Category: General

  • Border Crossing From Argentina into Bolivia & The Wild West of Tupiza: Everything you Need to Know!

    Border Crossing From Argentina into Bolivia & The Wild West of Tupiza: Everything you Need to Know!

    From Humahuaca, we caught the night bus to La Quiaca, which is the border town in Argentina to Bolivia. The night bus arrived at about 7am in La Quiaca, which is when the border opens. We walked around 15 minutes through La Quiaca to the border, as there were two of us and it didn’t feel particularly unsafe (contrary to many things that we’d read online). What happened next… was the quickest border crossing we’ve ever done. There was nobody else approaching the border from the Argentinian side, so we were stamped into no-mans-land within a minute. Then we crossed the bridge toward the Bolivian side only to see a line of people waiting outside – as Bolivia is an hour behind Argentina, the office wasn’t open yet! But when we asked one of the security guards what to do, he encouraged us to just pop our heads in – when we did, a bored-looking officer took our passports and disappeared for another minute, came back with our Bolivian immigration slip (DO NOT LOSE) and waved us on our way to Villazon. The line waiting outside the Bolivian immigration office was to exit Bolivia.

    Click here to take yourself to short and sweet where we summarize this blog post.

    Tell Me Everything:

    Overall the border crossing genuinely took about five minutes – and we ‘gained’ an hour of time, just crossing the border. We also found that the exchange houses at the border actually offered a reasonable rate – or, perhaps that with the Blue Dollar rate the difference was not going to bother us. However, we did get played for buying the first SIM card we found – 50 bolivianos for the SIM itself! When we bought a second in Tupiza, it was only 20BOB. But with our access to the internet restored, we walked to the bus terminal – again, the town felt safe and we were comfortable to walk rather than take a taxi, and it took about 30 minutes.

    From the Villazon you have a few options for a direct bus, depending on what you want to do. 

    • Tupiza, 4 hours: we took the bus directly here, to settle into Bolivian travel and then start our tour of the Salt Flats. However, by heading immediately west, we missed out on…
    • Tarija, 8 hours: we learned afterwards about this stunning town at moderate altitude in Bolivia. Tarija has plenty of swimming spots and beautiful architecture to occupy you inside and around the town. Besides, it is part of Bolivia’s wine region – a drawcard for many! This is a location of the beaten track but still with plenty to do. If you have the time to explore, we’d suggest this as a stop in your route. 
    • Uyuni, 8? Hours: Salt Flats tours are a day shorter from Uyuni, and with many more operators driving competition, your overall spend can drop decently. However, unless you’re really short on time we’d definitely recommend visiting one of the above options and potentially taking a tour from there!
    • There are other options further afield – Potosí, or Sucre, though it’s most efficient to tour the Salt Flats before exploring the rest of Bolivia – unless you’re trying to wait for the mirror effects of the wet season (Jan – Mar).

    Tupiza:

    We didn’t really have many conversations in Villazon, so it wasn’t until we arrived in Tupiza that we began to get a feel for Bolivia. I’ve read quite a few blogs which comment on the reserved nature of Bolivianos – especially compared to the hospitality found across the rest of South America. We found that this was so far from the truth. 

    Fewer tourists in Tupiza mean that the locals are much more interested in your story – I had a lovely conversation with a couple of ladies selling tamales, who were confused (yet excited) as to what I was doing in their little town. 

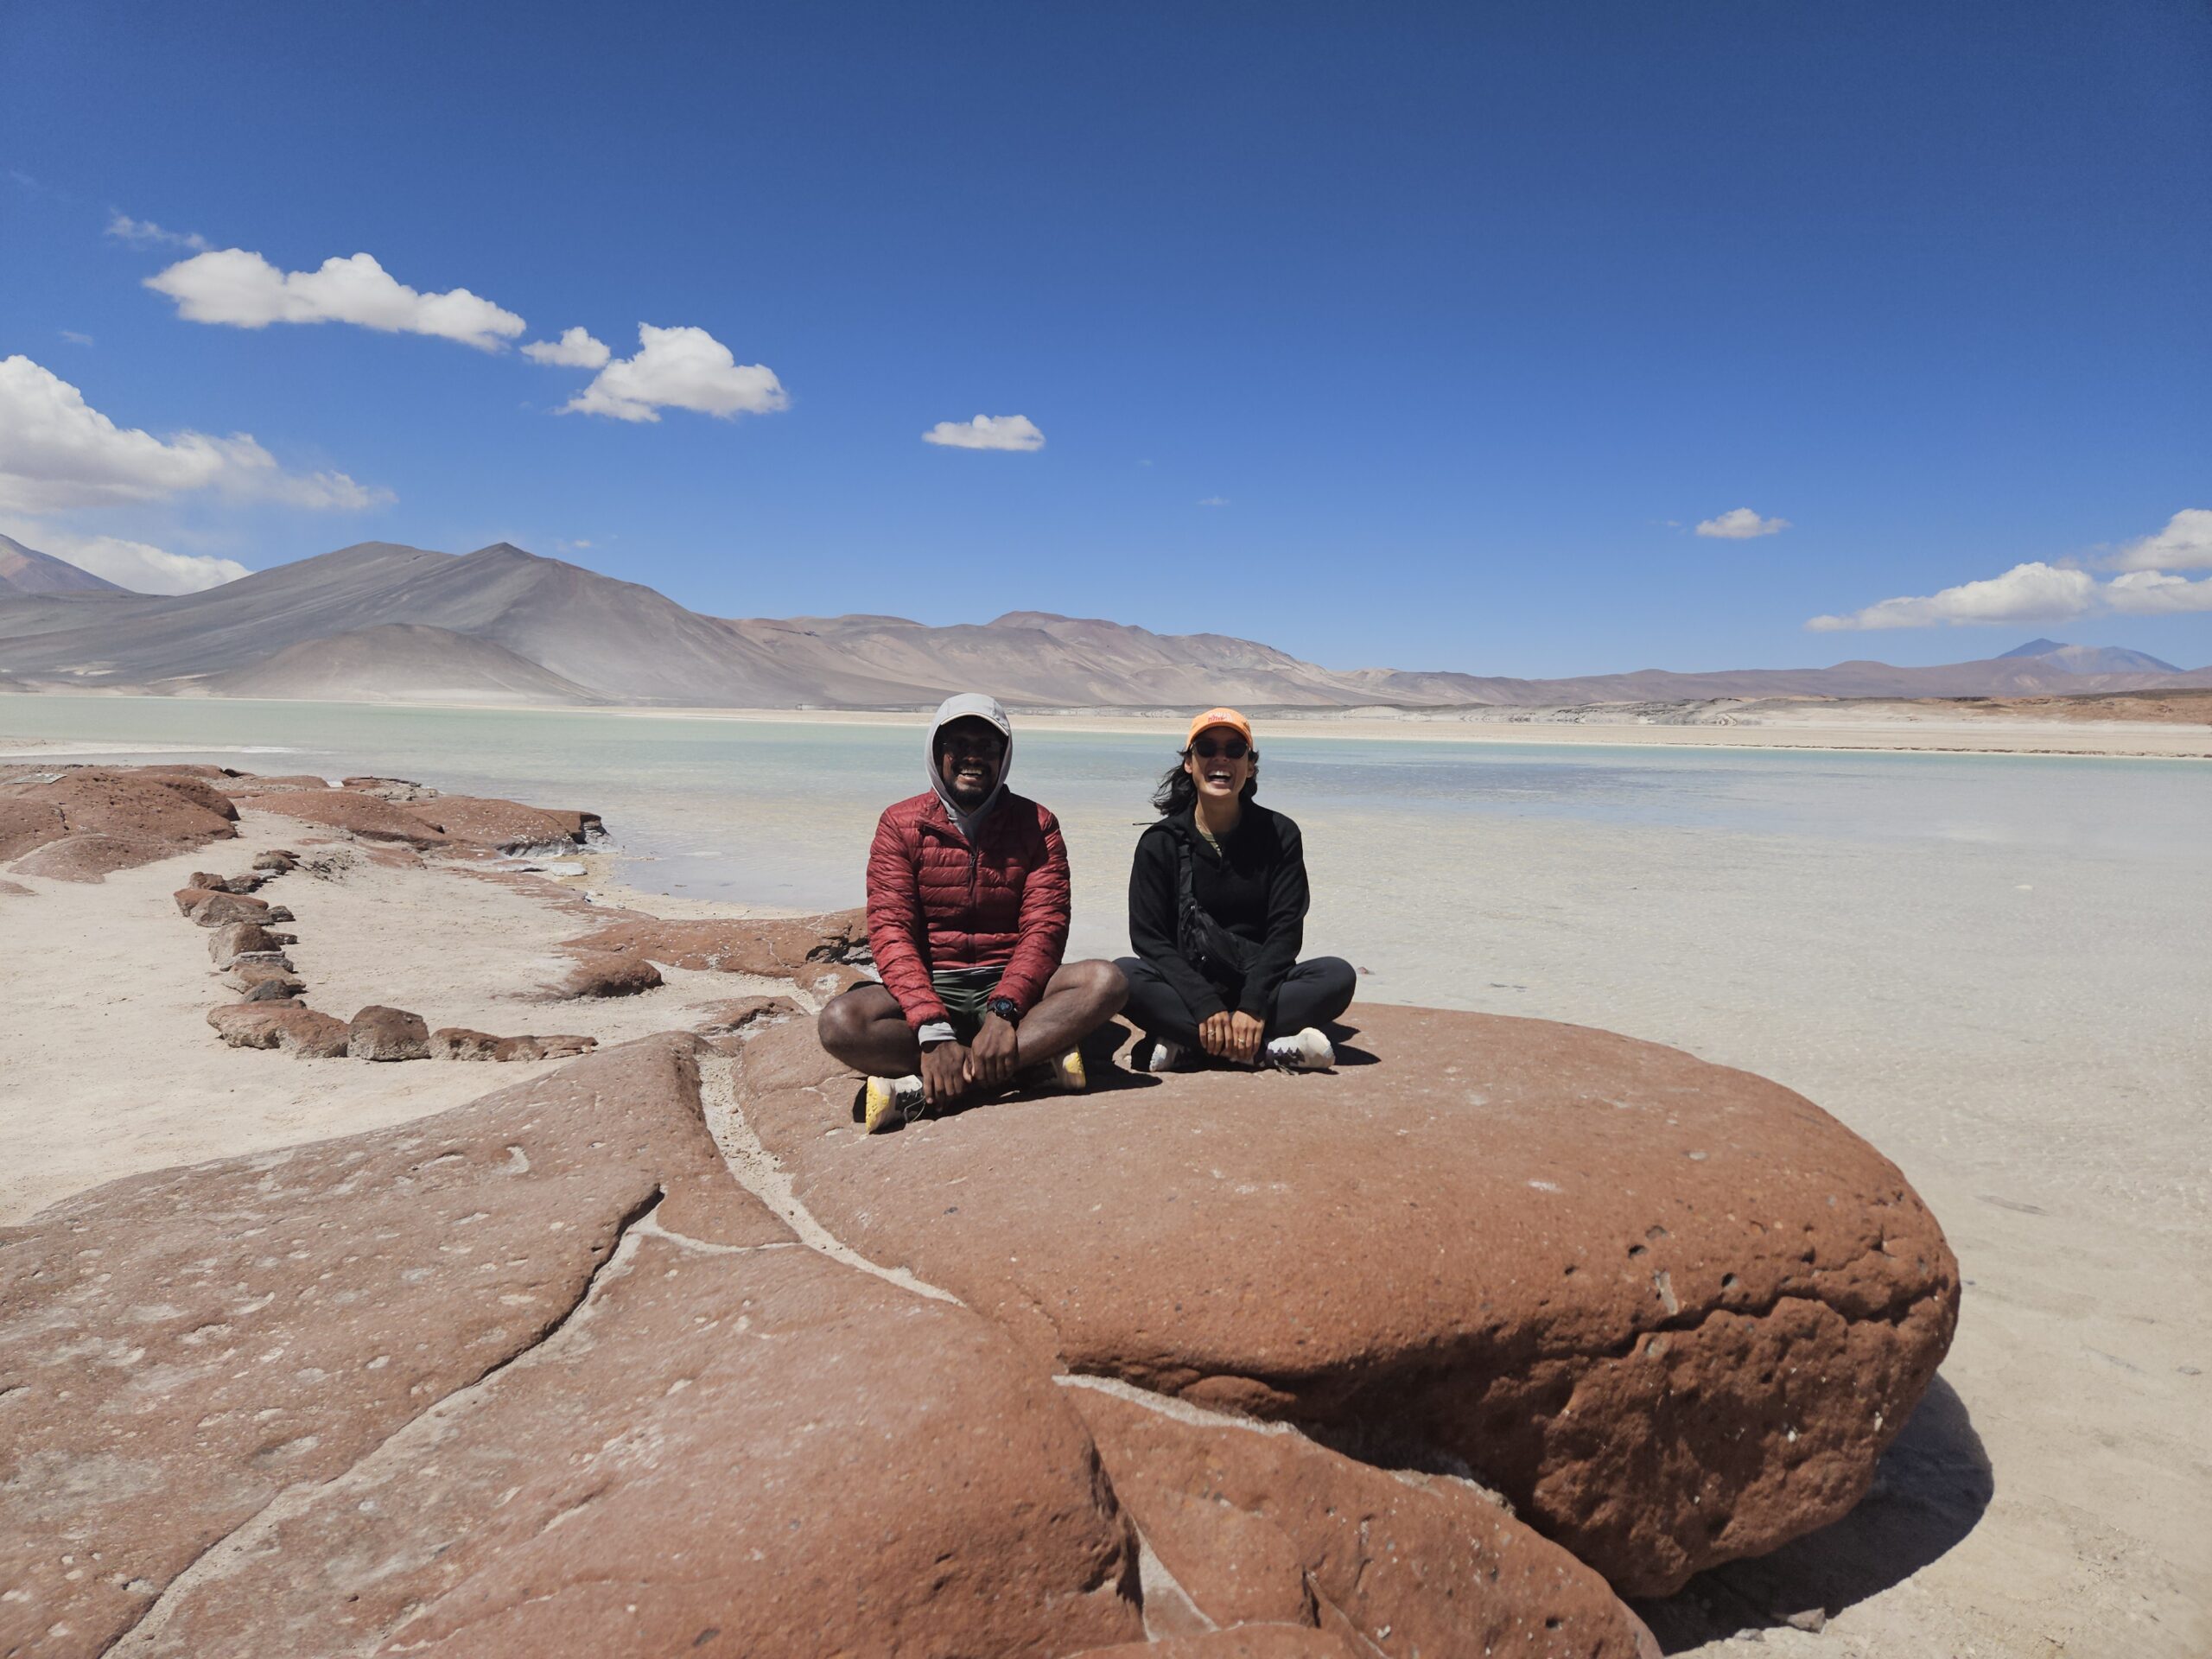
    So what were we doing in Tupiza? Primarily, using it as the third (least popular) location to start a tour of the Uyuni Salt Flats & surrounds. The tours from Tupiza are a day longer than those starting in San Pedro (Chile) or Uyuni, so they’re a little pricier. However, we liked the extra day, although there is a lot of driving, it’s a nice way to meet people and it was fairly quiet, especially compared to the 3rd and 4th days where we were really in the same crowds as the normal tours. There is a lot of sitting and driving and chatting/listening to music/napping, so this lazier way of travelling may not be for you.  We had a really fun group (luck of the draw) and the last day you take the salt flats tour, which is the really awesome part. We went with tupiza tours – who were fine, but we wouldn’t recommend them. Our guide was awesome and the food was tasty, but there wasn’t enough for any of the meals – your own snacks are absolutely required. We met others that were on other tours and they had no complaints about the amount of food served. So do some research before you book!

    However, Tupiza absolutely has its own charm that is worth exploring. There’s a small mercado central to pick up produce, and the streets around it will be filled with vendors too, or head to the Mercado Campesino for more variety. 

    The surroundings of Tupiza are also worth your while. The town is famous for its similarity to the Hollywood depictions of the Wild West – think cactus filled desert, craggy rocks, reddened soils. Seriously! It’s some insane landscape. It’s lower altitude that a number of other spots in Bolivia, but still somewhat arid, so it’s stinking hot in the middle of the day with strong sun and lost of dust, but we still had some mozzies in our room at night. 

    To enjoy the desert landscapes, you can explore on foot – a real all-day excursion. GPS, water and sunblock are all essentials! Be aware of trail dogs, some of whom can be aggressive. Keep some rocks on hand to scare them off. Walking from town is viable, but you can also take a tuk-tuk to reduce the distance.

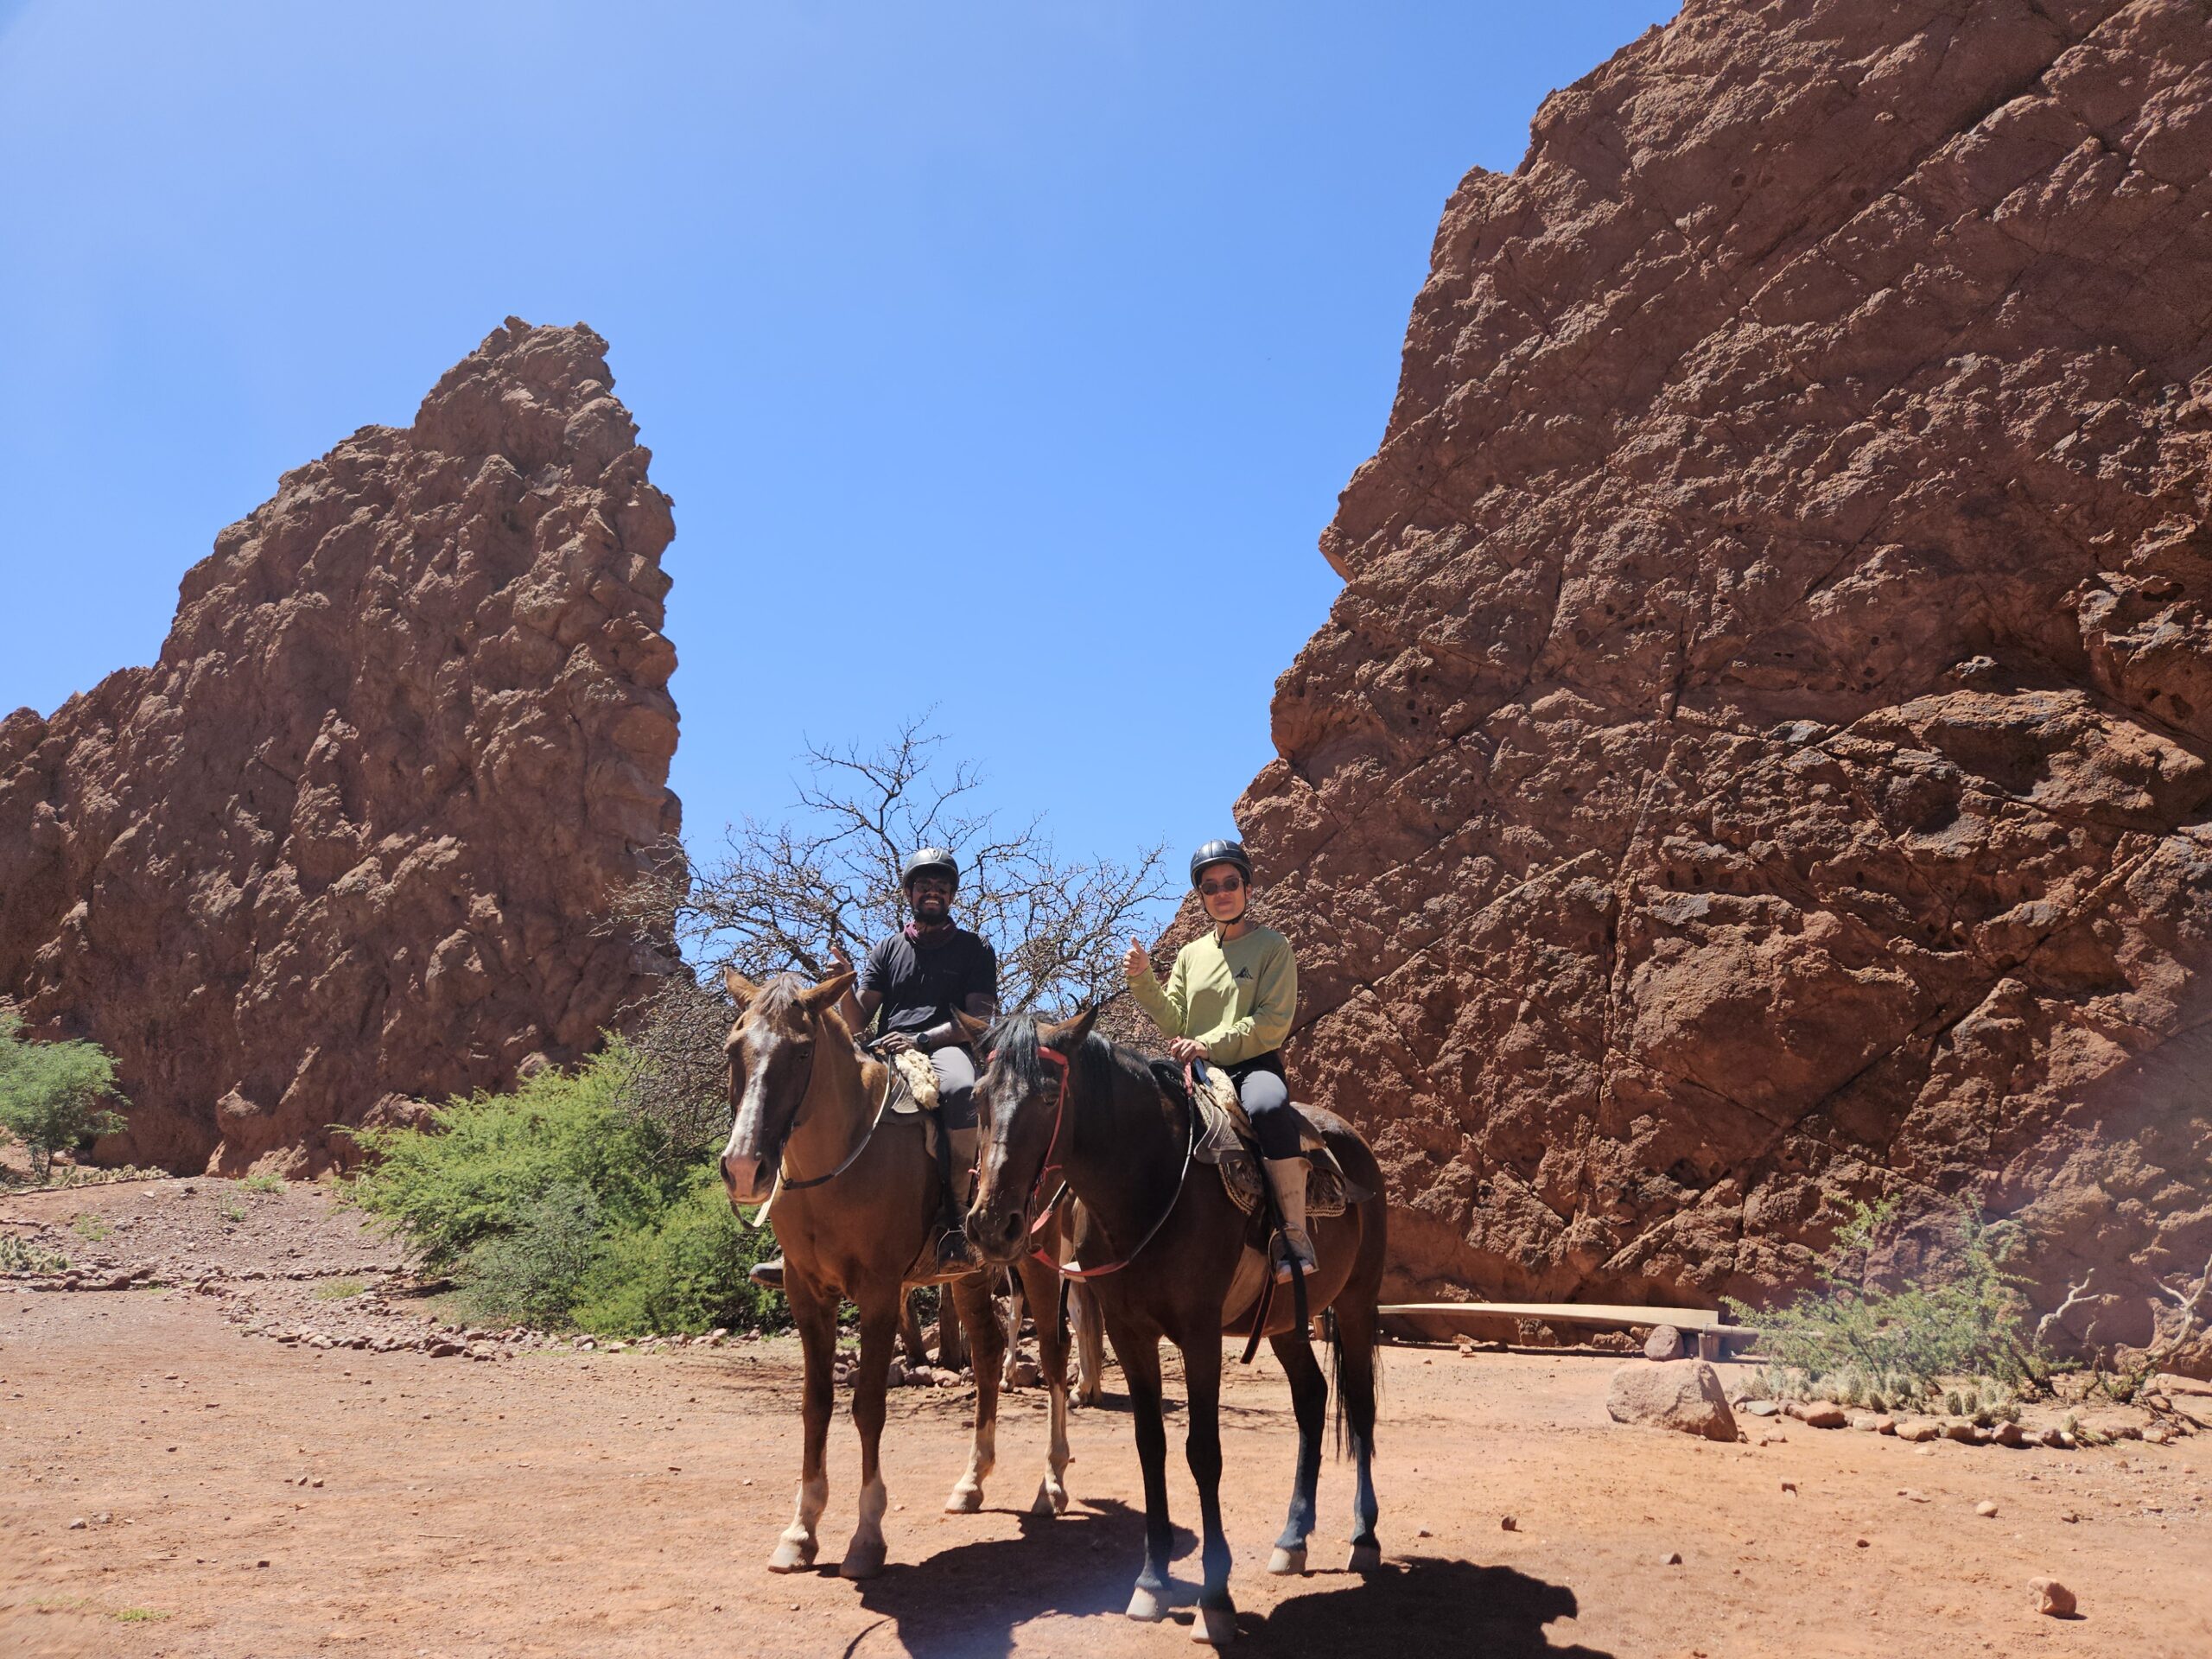
    We chose to explore Tupiza in the most fitting way possible – on horseback! There were options for 3, 5 and 7 hour tours, depending on what features you wanted to visit – we went with 5, and could hardly walk the next day… but it was so worth it! Although we both have next to no experience on horseback, we felt super comfortable with our guide, the horses looked happy, and the whole stable group were so friendly. And we kind of felt like cowboys – we even got to ride the horses at a trot, which is HILARIOUS for uncoordinated first timers. We went with Club Ecuestre Amazonas – highly recommended.  Get in touch with them on whatsapp to make a booking.

    The main features to visit in the desert are:

    • Canon del Duende – a narrow pass which opens up into a canyon with some spectacular rock formations. Best done on horseback as it is further away from town.
    • Puerta del Diablo & Canon del Inca – easily combined on a walk. The first is a cool looking piece of rock, and you’ll have to pass it to visit the canyon. The canyon goes on quite a way, although it starts off with a small ‘climb’ up a little rock face – and it was our last visit on our horse tour and we were feeling a little heat-strokey, so we didn’t continue on.

    This is a good thing to note though – we weren’t walking or exerting ourselves much on horseback, but by the end of the 5 hours and in the midday heat we were both feeling a little poorly – bring plenty, plenty plenty of water if you decide to go out into the desert!

    We stayed in Hostal Butch Cassidy – there are not that many hostels in Tupiza, so we mention this one because the rooms were comfortable, the breakfast was good, and it had a tidy little kitchen. We spent two nights in Tupiza, which was perfect for us. After horse riding in the morning of our full day, we lunched and rested before checking out the sunset from the Mirador Corazón de Jesus. It was an early night and an early start for the Salt Flats tour the next day!

    Keep it Short & Sweet:

    • Crossing the border from Argentina (La Quiaca) into Bolivia (Villazon) is best done early in the morning, but can be so quick and easy – depending on your passport and the requirements for a visa.
    • From Villazon, we’d suggest catching a direct bus to Tarija to explore Bolivia’s wine region and some beautiful-seeming swimming holes.
    • We caught a direct bus to Tupiza – a great place for seeing some Bolivian life off the beaten track, wild-west horse riding and launching a tour of the Salar de Uyuni.
    • Alternatively, there are direct buses to Uyuni, if you’re in a rush or aren’t interested (but we’d definitely recommend being interested!

  • Exploring Northern Argentina: Salta and Jujuy Provinces

    Exploring Northern Argentina: Salta and Jujuy Provinces

    It’s difficult to change the way one travels, as much as one may want to – old habits die hard, and our are formed from a deep-rooted need for organization and order, along with a strong sense of competition (it’s us vs. the daily budget). We are self-aware enough to realise that while on some days we can embrace ‘just going with it’, most of the time we do not. But as we reflect on our time and travels in Northern Argentina, we realise what really helped was keeping an open mind – to be more comfortable connecting through a stuttered conversation in Spanish, and a moment to take it all in.

    Tell me everything:

    As noted – the main attraction of the Salta and Jujuy provinces was the allure of revisiting Argentina at a more economical price, as our previous visits were in southern Argentina- much more on the $$$ side. We arrived in Salta on a Friday night from San Pedro de Atacama via a long bus ride through beautiful and winding mountains. In Salta, we were greeted by a lively, cheerful atmosphere. We walked from the bus terminal, down a main road into the centro historico, which also met alongside an evening craft market and a huge number of food stalls selling giant hot dogs, burgers and milanesas at thrifty wee prices. Families were out, friends were out – having been the first ‘city’ we’d visited in months (bar Santiago, which we literally breezed through), we were ready to enjoy some local comforts!

    Salta is nicknamed ‘La Linda’, the beautiful – the centro historico is well preserved, with white facades and lovely architecture perfect for photography. There are also plenty of churches to marvel at (we didn’t take a walking tour, so we don’t know why so many), so there’s a great calling for just wandering around, looking at knick knacks and shops during the day. We also love a good market – both for a good deal and to look at all the quality produce (even if we’re just going to cook a plain pasta dish – again). The mercado municipal in Salta is a great place to pick up anything you need – one thing I love about the South American markets is picking up dried herbs and spices, because you can just buy a massive bag all at once instead of the silly, tiny plastic bags they sell at the supermarkets. So much more efficient!

    Salta was also a major change in climate for us – we’d been from the wind and cold of Patagonia (even in the summer!) to having our noses dry out in Atacama, to Salta – hot late-summer days, a humid, jungle like feel and – god forbid – mosquitos in the backyard! Despite the heat, our favourite thing in the city was a sweaty hike up Cerro San Bernado. A well worn staircase will bring you from some fancy suburbs up to the summit with magnificent views across the city. You can take a cable car up to the summit if you aren’t able to walk it, and from the summit you can also catch a gondola to a neighboring peak – for even more views! Bring plenty of water in the summer – it’s a hot one.

    Now for something we haven’t covered in a while – food! After many moons of cooking and eating dinner in our hostel, we were able to get something more than just a coffee. In Salta, we had the best lunch of empanadas we’d ever thought we could find. There are lots of little spots selling empanadas, and lots of Google Maps reviews stating ‘they’re the best we had in Argentina!’. Certainly, the quality across the board is higher, but our favourite spot was called La Ollita. It’s not in the centro historico but so absolutely worth it. Not only were the empanadas fabulous value for money – so kind was the lady who took our order – patient with our poor Spanish, full of recommendations, big on smiles. We bought a dozen empanadas to share – 6 chicken, in the oven, 6 cheese, fried – all of them, to die for! We ate them in a nearby park, freshly cooked, and burnt our mouths enjoying them so much.

    Another key element in the food scene of Salta, and north Argentina in general, is the Pena. Penas are an experience, not just a restaurant, made so by the musicians who occupy the rooms every night. A talented group will be employed or contracted by the restaurant to play traditional folklore music late into the evening. Classically Argentina, penas only open late, and run late into the night. We must have left around 11 and there were still people just arriving for dinner – on a Sunday, too! We visited ‘La Casona del Molino’ for our experience – it seems to be a bit of an institution, for tourists and locals alike. We booked in advance via Whatsapp, because while you can turn up at any time, there was a line waiting for the doors to open. Once we were in, we were guided through a series of rooms to sit out the back – my impression was that you could sit anywhere, or at least that moving around was acceptable, as each of the different areas had different performers – pick your style of music, pick your seating, and have the perfect night! The food was plentiful, and good quality, and the two fullahs who performed in our section had the most stunning voices – many of the locals were singing and clapping along, but there were a few other clueless gringoes peppered about too. We ordered the parrilla for two (great value!) plus tried the Locro, a (delicious) regional stew. If you can’t make it to La Casona, or don’t want to head so far out of town (it’s very safe to walk around at night in Salta, so if you need to walk off a big meal, it’s doable!), you can try Balcarce Street for alternative penas.

    Feed at the Pena

    One night, we cooked at home, but felt like a little something extra… wandering down Avenue San Martin towards the bus terminal from the centre will offer plenty of street fast food – think fries, sandwiches, burgers, and hot dogs – in a super cheerful setting. We grabbed a (very salty) milanesa to eat for second dinner, and enjoyed watching the people go by. Just a note for where the cheap little snacks are!

    Now, getting out of Salta and around the province is a very popular trip; plenty of agencies offer day excursions, to the North, West and South. If you want to explore more of this area of Argentina, renting your own car is the best way to do it – however, we were sold on the prospect of travelling north towards Bolivia. It seemed to be a fairly blanket cost of 35000ARS pp for a full day tour – not including lunch, but including quite a lot of driving, in some cases! 

    In Salta Province, many of the pueblitos (small towns) are so popular because they are so cute – think colourful buildings, or well maintained colonial architecture, handicraft markets and real local vibes. A lovely combination of good photography ops and a real snapshot into Argentinian life. We didn’t visit any specifically, but we got some details from a local tour agency and did a little research to figure out what we thought was worth it. We think overall, a road trip through the following would serve you better – more time to pick some day hikes, and more freedom to skip the spots you find boresome! 

    To the south, the key stop is Cafayate, a wine-making town set amongst red rocks. Tours definitely include a stop at the Quebrada de Las Conchas, the Shell Canyon, to check out some fossils and rocks, but I think the itinerary has a few other spots en route – this area has a number of vistas.

    Immediately to the west of Salta is the town of Cachi – although it’s not so straightforward to get to, as there is a mountain range in between! However, day trips do still go here to see this picturesque little town and we did some reading that there is also some hiking to be found in the mountains of this area.

    Heading to the North West will take you past the Salinas Grandes – Argentina’s own salt flats. We didn’t need to take this tour, as our bus from San Pedro took us along highway 52 and straight through the middle of them! While we didn’t stop, it was a stunning sight out the window, so we think worth a visit. 

    Usually tours will loop back through the town of Purmamarca, a town known for its ‘Mountain of Seven Colours’. The valley that it’s set in is certainly beautiful (again, our bus passed through on the way to Salta), but we didn’t see it in the flesh.

    Now – we can give a little bit of personal advice on heading to the north! By this time in mid-March, we’d had nearly three weeks since our last multi-day hike – and we were itching for another way to explore the countryside. Using Wikiloc, we found a few random multiday trails, but nothing seemed particularly popular in this area – moreso because summer is the rainy season in the jungle areas. We decided to try out a trek from Tilcara, which had a handful of good reviews – a homestay-to-homestay hike, from the alpine pampas to the humid jungle. We’ll do another post on the details but – this was definitely one to remember! We had some incredible uplifting interactions with people, and a real taste of Argentinian hospitality and kindness that you may hear so much about.

    Other than a multi-day, Tilcara is popular for a short day-hike to the Gargantua del Diablo (if you read the last post, you’ll find this is a recurring theme – though this one refers to a waterfall rather than a narrow gorge!), which is a nice way to spend a morning. The entrance was 3000ARS pp. The market in Tilcara is tidy, and a great place to pick up fresh produce and see what’s up. We also found a really lovely cafe that served the most insane cakes – La Casa de Champa. We both got a full portion slice, which it turned out to be a mental amount of sugary deliciousness – we had to take the leftovers away. Their outdoor area was lovely to sit in, and we spent some time journaling here. Otherwise, Tilcara has quite a few international restaurants for such a wee town. If you’re looking for a cheap meal, Killa O Wasi serves a decent menu del dia for dinner, with basic but yummy kai. There’s a couple of other spots to check out if you want to spend more than a day here, a historical site and a cactus filled botanical garden, but we didn’t go for them.

    Tea and coffee at La Casa De Champa

    Our next stop on the trail up to Bolivia was Humahuaca, which bests Purmamarca with its Mountain of 14 Colours! We took a ‘tour’ for 15000ARS each, though the tour guide didn’t have much to say (and all of it was in Spanish – and ours was still not very good at this point!), we met our Brazilian friend Guillerme and a wonderful Argentinian couple by taking a shared van up to the site. We saw a few Vicunas on the way up (how are their eyes so large?), and the mountain itself is gorgeous and lovely to just gaze upon. It does run up to quite a high altitude, so if you decide to take the short walk to the lower viewpoint, be prepared to puff on the way up! And in another unexpected moment of kindness, on the drive back down Florian & Esteban helped us indulge in our first mate experience – kindly, not judging when we didn’t know to slurp on the straw as we finished. And while we have no frame of reference, their organic yerba was incredible and delicious and we are so grateful that on our last day in Argentina, we were able to experience such a key part of this culture!

    Photo with Florian, Esteben and Guillerme after our first mate experience

    Other than this tour, there’s not a lot to do in Humahuaca – but there’s some good cheap street food near the river, and we tried Llama Cazuela in one of the restaurants here – a traditional plate of the area. One thing that we might’ve tried if we had a little more time (or the freedom of our own car) is a tour to Inca Cueva, which is a historical site to the north of Humahuaca that involves a small amount of hiking.

    And thus ended our excursions in Argentina’s north – a part of our trip that surprised us, surprised us, and surprised us again. Everything in travel is great for different reasons, and while ‘no expectations!’ can give you a good experience, it’s the unexpected human interactions and snapshots of a whole different culture that leads to satisfaction.

    Keep it Short & Sweet:

    • Salta: Not the home of the Saltena, but certainly an excellent place to pick up a delicious Empanada, or experience local food and traditional music at a Pena. 
    • Spend a morning walking up Cerro San Bernado for some sweet views. 
    • Wander through the old town for shopping, chaos and churches galore! 
    • Pick up cheap street food along Av. San Martin. 
    • And it’s a great place to start a road trip, or take some full day tours: explore South for canyons, wine tastings and gentle hikes, West for the Salinas Grandes, or North for charming towns tucked in alongside dramatic Andean valleys. In March 2025, all of the day tours were about 35000 pp.
    • Explore the north: 
    • Tilcara offers a sweet day hike to the Gargantua del Diablo (if you read the last post, you’ll find this is a recurring theme – though this one refers to a waterfall rather than a narrow gorge!), or an extraordinary hike across the mountains, from the pampas through to the selva. Check out our next blog post for more details.
    • At Humahuaca you can jump in a 4×4 to explore Serrania de Hornocal, the mountain of 14 colours, or if you feel like a dash of history, a day tour to Inca Cueva, an old Incan site.

  • Exploring Northern Chile: San Pedro de Atacama

    Exploring Northern Chile: San Pedro de Atacama

    San Pedro de Atacama is one of those places on the Gringo trail – and while I think it’s deserving of the popularity, don’t forget that it is a highly popular, heavily touristic little town. The town sits around an oasis in the high-altitude Atacama desert, and its popularity stems from its proximity to many different natural vistas – colourful high alpine lakes and birds, Mars-like rock formations, geysers, star-gazing, salt-rich lagunas, canyons and pre-Colombian ruins. Many of these activities are day-long activities, either requiring a tour or a rental car – it’s a hive for excursions, and you could spend days making your way in and out of town.

    But a concentration of tourists and activities makes one thing certain – nothing is free! Every new area that you enter, lagoon that you set eyes on, path to cycle down has a little price tag set against it – and while the communities need to (and should) make their margins off us Gringos that come through, it can be tough on budget travellers who might like to hike on their ‘saving-days’, but even that is costly.

    Excuse the whining – read it instead as fair warning – because San Pedro does pack a punch in “things to do”. Although, our other observation is that many of them will require several hours driving and not a lot of walking – and our personal vibe is that there are only so many times you can pull over to take photos before it gets a bit hoha (tiresome), but many other reviews seem to have the opposite opinion.

    Click here to take yourself to the short and sweet section for the main informative points from this post.

    Tell me everything:

    Car Hire

    We found the most efficient manner to explore San Pedro de Atacama was with our own rental car. Note: we did this with only two of us, and it was still substantially cheaper! The tour companies are sneaky and don’t include park entry in their ticket prices, so check on that. The crux of the matter lies in hiring the cheapest car possible, and I can imagine the mathematics may not apply in the peak-peak times. We hired a sweet little Suzuki Swift, which sounded like it would be a right nightmare, but just take it slow to avoid the potholes and let everyone overtake you. You should be enjoying the views while driving anyway, so just chill! There are certain tracks you can only take with a 4×4, which will nearly double the cost for car hire, but read on for more details & make a decision based on your vibes.

    The descriptions below are itineraries we nicked from the tour agencies. Get them to give you a run down of the tour in person if anything is confusing below. I can’t comment properly, but because these are all sightseeing tours, we felt no need for a guide initially, nor did we feel as though we missed out on anything substantial without one.

    Note: always have at least a half tank of gas (in our experience) and offline maps downloaded. You’ll go into quite remote places. We used nearly a whole tank of gas over two days – which was pretty efficient. We paid 100000CLP for the Swift for two days’ hire, and 37000CLP for fuel. There is only one gas station in town that is notorious for scamming tourists so please make sure you check your receipts and you bank app that the amount charged is correct!

    Road Trip 1: Piedras Rojas (South) + Lagunas Piedra y Cejar + Ojos y Salar

    This one is a long day of driving! Leave early towards the town of Socaire, where you can grab a feed if needed and you’ll have to pay for your ‘park’ entry – 15k CLP pp. Continue on to where the views begin. We drove all the way out to Laguna Tayajto before stopping for our first photo ops, then turned around to come back, but really you could go all the way to the Argentinian border if you love to drive.

    Most of the viewpoints on the way back are clear & on the main road, and all involve a small amount of walking only. Don’t miss the turn off to Lagunas Miscanti and Miñiques – up a sandy road, a lil’ suss in the Swift but doable. There was heaps of birdlife at Miñiques, and we saw our first Flamingo!! So cool.

    If you haven’t mucked around too much on the way out and want to squeeze everything in, turn off to Lagunas Piedras and Cedar on the way back (swimming), and the Salar & Ojos del Salar (photography). I do think you’d be pushed for time to get all of this in, so it’s probably easier to do another, shorter road trip to these spots – we missed them because of time, and because all three had additional charges that we didn’t want to budget in.

    All in all, this road trip was cool, but driving to see sights is not something we rate highly. In saying this, the sights were worth the drive so we would recommend it.

    Road Trip 2: Highest Geysers in the World (North East)

    Another long day, but not as long. The best time to arrive at the geysers is while it’s still dark – which means a really early wakeup, and driving down a road full of potholes in the pitch black – not ideal. Nevertheless, it makes for an adventure, and one that is pretty sweet.

    The coldness of the predawn makes the geysers the most impressive, both because they blow higher and because of the amount of steam they then generate. Let’s be real – you won’t be seeing 10m blasts – the average height is something like 133cm. While there are a range of different type of geysers to admire, check with the person who takes your ticket where the most active geysers are (they were the furthest ones when we were there) and listen into the tour groups to figure out which ones are likely to be popping off soon – we caught some cool movement luckily by doing so! It’s bloody freezing as you’re up nearly at 5000m, so definitely don’t forget to layer up. Your ticket (15k CLP pp) has no end time, so enjoy the different Geysers until the sun rises and you can warm up. 

    We had our breakfast (brought our camping stove for hot coffee, honestly amazing) on the small hill just outside the park – most of the tour groups eat there too, so going a bit later also assures some peace. One of the tour groups were finishing up their breakfast and offered us their fresh fruits and biscuits, which we kindly accepted!

    Afterward, start back towards San Pedro with a few wonderful stops. This road is stunning, and you won’t have seen it yet! Appreciate the mountain views and straight roads. Spot Vicunas and Alpacas and birdlife (MORE FLAMINGOS) in the wetlands as you descend – there are a few miradores & clear places to stop. You can pause at Puri Libre (or Termas de Puritama & pay) for a thermal bath. If you feel like walking, take a wander through the Cañon de Guatin to spy some cool cactus.

    This was definitely my preferred trip – the views were more impressive and the geysers were really interesting. We saw far more wildlife, though that’s mostly luck! It’s also less driving (or maybe we just started much earlier?), so we were back in town late afternoon as opposed to night time.

    Road Trip 3: 4×4 Cerro Toco (East)

    This one got away from us, as the tours were even pricier and the 4×4 hire was out of budget. The trailhead for this 5604m peak is only accessible on a rough road that a poor wee Swift can’t handle. Although it’s high-altitude, the climb is supposedly non-technical and easy to do without a guide – though double check this with a local before you set out as things are always changing, and triple check that you’re acclimatised, as this hike hits some real heights! We also don’t believe there is an entrance fee for this hike.

    Night Road Trip: Stargazing

    If you’ve got a car hired and you’re a star lover, why not find a spot out of town and away from street lights to enjoy the clarity of looking at the night sky in a high altitude desert. In winter, there is less rain and cloud, so the likelihood of getting a truly clear night is much higher. The higher altitudes generally have clearer skies and less pollution than at sea level, so you should be able to enjoy some sweet views! Of course, you can also take a tour if you’re so inclined, there are plenty of offers within town. There is a huge observatory close to San Pedro de Atacama – we were hyped to do a tour, learning about the kind of astronomy that they perform (and to look through some huge telescopes!). Unfortunately, most of the time the observatory doesn’t actually run tours, but also do an extra check.

    Bicycle Hire

    Another great way to explore San Pedro de Atacama is on two wheels. There are plenty of options for bike hire around the town, for either half or full day. You could probably do the two valleys below in a single day, though you’d be hooning around for a long while and the sun does get blistering in the middle of the day – so take plenty of water. We paid 7000CLP each for a half day of bike hire – a full day was 16000CLP.

    Valley de La Luna 

    We hired bikes for half a day and cycled this route – you can easily get to the ticket office from the town, and while you have to cycle for a small while on the main highway, there are big shoulders that mean you will feel pretty safe even with the cars zooming past. At the ticket office they give you a map with all the different points of interest, which are all on an out-and-back road that runs into the desert. The suggested activities totals up to 2-3 of walking plus a couple of hours of cycling. Each of the stops is pretty cool, and it’s nice to switch between taking the landscape in on a bike and more slowly by foot. Entrance was 10800CLP.

    The entrance ticket also includes a viewpoint on the top of the hill, which is a great spot to watch the sunset – however, it’s not very accessible by foot, as it’s quite far from the town. If you want to enjoy the evening sun from this spot, make sure you hire the bikes for the whole day, or have a car to travel there in the evening. You can also just purchase a ticket for the sunset view, if you want to return, though we’ve advised an alternative (free) sunset location below.

    We both had incredibly sore butts by the end of the day, as the road is fairly bumpy! Fair warning if you’re not used to biking (like us) and plan to do more hours on the road.

    Gargantua del Diablo 

    As we only hired bikes for half a day, we didn’t get to this location. There is also an entrance fee here, paid at the entrance to Valle de Catarpe (currently it appears to be 5000CLP pp). It’s supposedly a great ride with a completely different type of scenery to Valle de la Luna, and a little mirador at the end that you must walk to. It may also be comparatively quiet to other locations you visit in San Pedro, as it’s further down the main tour list at agencies.

    Pukará de Quitor

    If you’re feeling like delving into a little bit of history, visit Pukara de Quitor, a remnant of the indigenous Atacama people. You can arrive at this site by bike, as it’s close enough to the town, but you’ll need to explore the grounds on foot. There is an entrance fee, and we can’t comment on the worthiness of the site itself, as we didn’t visit.

    Free Sunset spot at San Pedro De Atacama:

    Watch the sunset at Mirador Likan-Antay

    Keep it Short and Sweet

    There is so much to do in San Pedro de Atacama, but all of it will be dry, hot, high-altitude (make sure you take time to acclimatize) and cost you a buck or ten.

    Travel by: Hire car (instead of taking the same as a tour) and rental bike. We recommend hiring the car through West Rent a Car

    Road Trips: Piedras Rojas (15000CLP pp), Geysers (15000CLP pp), Lagunas Piedra y Cejar + Ojos y Salar (unsure on cost)

    Hiking Road Trip: Cerro Toco

    Bike tours: Valle de la Luna, Gargantua del Diablo, Pukara de Quitor.

    Tip: This list is not all inclusive! Check at the local tour agencies for all the activities that are available in San Pedro de Atacama, and don’t be afraid to use their itineraries as inspiration for your own self-guided journey. 

  • Exploring Bariloche: The four Refugio Hike and More!

    Exploring Bariloche: The four Refugio Hike and More!

    There’s no rest for those who love to hike – we had one night in a hostel in El Calafate before jumping on a plane to our final Patagonian destination: Bariloche, where warmer weather finally awaited us. In fairness, the weather was too warm – a series of wildfires had started a few hundred kilometers south of Bariloche, and for the previous few weeks the wind blowing from the south had been bringing ash and smoke into the skies. We got super lucky, and arrived as the prevailing wind turned. We had wonderful weather without a trace of the disasters further south. 

    Bariloche was the first reasonably sized town we’d been to since we left Puerto Montt. It was a bit of a shock to see so many bustling people, both locals and tourists, but overall the vibe was pretty cool – fancy chocolate shops line the main street, with stores full of Argentinian knick-knacks and anime filling the gaps. A small plaza overlooks the lake, and we arrived on a Sunday so there were plenty of locals out enjoying the sunshine, purchasing snacks and generally contributing to a sweet summer vibe.

    Bariloche was to be our last stop in Patagonia before we took a break from hiking and began to travel north towards Bolivia. We had eight days to explore the surrounding parks –  but after already spending 10 nights in the tent, we were keen to combine the hiking with some R&R. Thankfully, we spied a little B&B for a reasonable price, so the b

    Tell me everything:

    The Four Refugios Hike (well, two)

    Two days in Bariloche and we were off again, onto the popular Four Refugios hike. Of course, we weren’t staying in the refugios ($$) , but our tent (-$), although some of the refugios do have a large enough common area to accommodate campers – at least until dinner is served.

    This one didn’t go quite the way we had planned – it wasn’t just that the budget allowed us to spend less time in our tent, but that the rain forced us to cut this hike short. We spent two nights at Refugio Frey, taking a day in the sun to relax a bit, followed by one night at Refugio Jakob before the rain packed it in. The staff at Refugio Jakob strongly discouraged us from taking the route the next day to Refugio Negra (which also happened to be the most difficult section), and told us the National Park had actually closed the track for the weekend, the weather was forecast to be so bad. One of the staff described an ‘alternative’ route – that was, hiking down to the road, along it for 5km, and then back up the track to the next Refugio – totalling about 30km in the rain, with about 1000m of elevation in both directions. Once we got to the road, wet and cold, we decided it was a no-go plan. We ended up booking a last minute AirBnB within an hour’s walk of the trailhead, in the small village of Villa Nahuel Malal. Call us softies, but it ended up being the perfect little cottage – with a wee kitchen and a comfortable outdoor area – it made us feel as though we were still in the outdoors, but with the creature comforts a roof and hot water bring. Awal’s knees had started to play up with the elevation changes, so the extra days of recovery were well worth it. It does turn out that some of that ended up being beach time, because the forecasted ‘weekend storms’ never arrived! We had days of blue skies by the lake.

    The standard Four Refugios loop takes only four days. The order is Frey JakobNegraLopez. You can book at the huts online, either camping or in the refugio itself. They all have a limited number of booking slots (which is why we stayed at Frey two nights), although in the end as far as we could tell, they aren’t too worried on the number of campers who actually turn up. Please note that it snows during winter here so sometimes it is not possible to access certain huts and they are closed. Each respective website will be the best place to find the most recent information. Each refugio has a different amount you’re meant to pay to camp, though Frey was free when we were there. There are flushing toilets at all the refugios too – fancy! The refugios provide dinner & breakfast (for extra $$$), and you can buy lunch, so if you’re not inclined to bring food up the hills, you can purchase meals (and extra snacks) as needed.

    Each refugio is accessible from the road, but the track goes over mountain passes to join up to each of them. This does mean that on weekends & in general throughout the summer, they fill up, as locals can do overnighters easily. Frey is also a popular spot for climbers – which makes it extra busy!

    Getting There:

    There’s a public bus that leaves every hour from Bariloche, #55, that you can catch to “Cathedral” (ski area), which drops you at the trailhead. A Sube card is necessary, but you only need one for a group. The fee is relatively higher than others (we recall 5k ARS each), as it’s about an hour on the bus and it’s a popular tourist route both in summer and winter.

    Day 1 (~4 hours)

    Once at Cathedral, you’ll be dropped at a big parking lot. Check your GPS for the track start (or follow the line of people). It is well marked, once you find it. The track climbs steadily for about 30 minutes until you reach a highpoint over Lago Gutierrez. The track is exposed and provides gorgeous views as you walk alongside the lake. Eventually, you reach a pass, where you will turn northeast and begin to ascend again through forest – we spotted a woodpecker in this section, so keep an eye out for birdlife! Eventually, the forest clears and it becomes rocky scree and low bush again, and there’s a final ascent to Refugio Frey, which sits next to another Laguna for picturesque views.

    Note: Some people do this as a day hike, or you could do it as an overnighter loop, looping this section in with the start of day 2. The circuit goes up the first pass, and then back down to the west around Cerro Cathedral. We didn’t check out the route, but we read a few other blogs that said this path can be pretty steep and sketchy in sections – so have some good boots to keep you steady.

    Day 2: (~5 hours)

    As above, the track continues on around the laguna and up the first pass. The first uphill section is just a tough slog upward, and you eventually will arrive at a second, smaller laguna. The next section is a bit more challenging and fun – there’s a bit of boulder scrambling to get up, using your hands and a little rock climbing. Once through the pass, there are some gorgeous views of the surroundings, so take it in for a moment before beginning your descent! The descent is pretty steep, with some sections of thick scree (fun) and some of light scree (slippery as hell). You’ll descend into the forest and skirt the edge of the valley, walking east. There’s a campground marked on the map here, if you’d prefer to wild camp off the tops, and it seemed like a really nice spot. Continue on from there to eventually start rising again – one more pass! This climb is much less technical and a lot gentler, although the descent on the otherside is again, rough, the shots of the refugio nestled in against another the laguna are very very cool.

    Day 3: (supposedly, 10 hours)

    From here on, we have no personal experience. This section of the track is supposed to be the most difficult and the most poorly marked. As noted, it does seem like the National Park is a bit overkill on what is difficult and what is probably totally doable, but it is still above the bushline so always take care with the weather and ask if there is snow or ice on the trek. We do have some friends who couldn’t attempt this trek because all the passes we snowed out!

    Day 4: Trek to Refugio Lopez

    This day takes you over another pass to Refugio Lopez, but it’s meant to be quite a short day. Enjoy a long rest at the refugio!

    Day 5: Trek out of National Park

    You have a couple of options for this day – the short option, straight down the hill to the road for a couple of hours, or take the scenic route around to the lakefront and end in Bahia Lopez.

    Once you’ve finished your hike, you can take the bus from along RP77 (so if you take the short route, youll need to walk along the road a bit) back into Bariloche, but we’d recommend finding some accomodation along the waterfront and out of Bariloche so you can enjoy some of the day hikes at the end of the peninsula!

    Cerro Llao Llao

    This regional park is the main section of daywalking. There are several tracks that sort of join up, which offer hiking in between some huge & gorgeous pine trees, plus beach access. Visiting Mirador Llao Llao is a must, as the views to the lake are stunning. If you stay back in town, or somewhere along the coast, buses go from Bariloche, along the coastline to near the trailheads. The stops are by a handful of fancy restaurants and hotels, if that’s your post-hike vibe ($$$$).

    Biking Circuito Chico

    An alternative way to reach Cerro Llao Llao, and explore a bit more of this area, is to explore by bike – known at Circuit Chico. This (quite) hilly circuit should take at least a whole day, as it’s not just the riding that you’ll want to do but also the day walks around Cerro Llao Llao and stops to some of the pueblitos on the route, such as the quaint Colonia Suiza. We didn’t end up completing this circuit – although we wanted to – as the bike hire was actually quite expensive, and Awal’s knees were still on the ginger side!

    Nahuel Huapi National Park

    We’ve described one hike in Nahuel Huapi, but this national park encompasses more than just the four refugios trek. Check on the National Park website for all of the refugios, campsites and tracks that you can link up. You could spend days in the park, drifting between refugios and enjoying the outdoors, but as mentioned before, check on conditions in the mountains before you head out, as some of the passes can get gnarly. 

    Check out the official website for a list of hikes, both multi-day and single-day. Note that the park has an entrance fee, though the only place this seems to apply is in the Cerro Tronador area (which does look like a wonderful overnighter!). https://nahuelhuapi.gov.ar/

    Seven Lagunas

    If you’ve got time and, more importantly, a hired car on your hands, there’s more to do around the Argentinian lakes district. We had neither, but we would love to return one day to complete the seven lakes road trip. This driving route runs from Villa La Angostura to San Martin de Los Andes. You can stay in gorgeous little Argentinian villages and drive through spectacular scenery of glossy lakes and mountain peaks. A quick look can be taken in one day, or you could spend a few checking out the route and exploring the little towns and some small hikes.

    Hiking to the South

    With a car, you can also turn to the south of Bariloche – and to more national parks. Alerces is another very Popular park with plenty of hiking options, although with the lack of accessibility it should take you away from the crowds somewhat. Alternatively, you can visit Lago Puelo NP, which is closer.

    Overall, Bariloche itself offers plenty of cool things to do, gorgeous scenery, and yummy snacks (we went to this chocolate shop (https://maps.app.goo.gl/X211zoyUukaqMeLL8), which was a lot cheaper than the ones on the main strip, but the chef was genuine and enthusiastic and the choccy was delicious!!), we would love to return one day and continue exploring the area.

    Keep it Short and Sweet

    • We only did 2 days of this hike as the park closed due to bad weather
    • the bad weather never arrived!!!
    • You need to book spots at the refugios and campsites
    • You can purchase breakfast, lunch and dinner at the refugios
    • Catch bus #55 from Bariloche to the “Cathedral” (ski area) for the start of the hike
    • You will need a Sube card to catch the bus. You only need one per group. You can buy them from a kiosko but get one early as they seemed to be nearly all sold out when we were there!
    • Day 1 and 2 were moderate in difficulty. Day 2 specifically has alot of desending so take care of your knees!
    • Cerro Llao Llao is a beautiful regional park for day hikes
    • You can also do a bike ride along Circuito Chico. We found bike hire to be 35000ARS
    • You can do the seven lagunas- if you have hired a car we strongly recommend this!
    • Delicious chocolate at a reasonable price: https://maps.app.goo.gl/X211zoyUukaqMeLL8
  • Exploring The End of the World: Puerto Williams & Ushuaia

    Exploring The End of the World: Puerto Williams & Ushuaia

    Keep it Short and Sweet

    Puerto Williams:

    • Awesome 5 day trek- De Dientes De Navarino; to be some of the most southern people in the world
    • Chill and relax, very cosy and comfortable vibe

    Ushuaia:

    • The boat fromj Puerto Williams to Ushuaia costs $160USD per person. Pay at the only tour agency in Puerto Williams (Turismo Shila) in Chilean Pesos so you aren’t disadvangted by the Argentinean Peso exchange rate!
    • Day hike to Laguna Esmeralda and if your up for it, continuing further to Glacier Albino del Ojos
    • If you got the $$$ bills, take a tour to Antartica. If the tour leaves tomorrow, make sure you bargain because you can get a massive discount (We heard from other travelers who were offered $5000USD compared to the usual $10,000 USD)
    • Take a boat tour to see penguins.
    • High end cafes and shopping
    • Pretty expensive overall

    Tell me Everything

    Puerto Williams

    Reaching the end of the world – except Antarctica – is a pretty exciting feeling. We flew from Punta Natales to Puerto Williams, officially the southernmost city in the world. Hilarious fact: this is a reasonably new title, as Chile only recently changed their municipal definitions to include the tiny population of 2000 to be defined as a city. Puerto Williams pushes boundaries in that sense and no other. It is a quiet, sleepy coastal town, boasting a single tourism agency. It’s vibe is “end of the world”, but in the sense that it’s the end and nobody goes there. It is honestly,  completely lovely. Not that there is anything to do; our opinion is probably skewed by our choice of accomodation – a cottage that we found on Airbnb, tucked into the forest, away from the township with chooks, a garden and a wood-burning stove. We picked it because it was only 5 minutes away from the the start of the Dientes de Navarino, the southernmost hike in the world & the reason we visited Puerto Williams. However, it turned out to be the best choice, and the peaceful setting gave us the utmost sensation of being at the end of the world.

    This is our recommendation for Puerto Williams, if you aren’t (or can’t be arsed) hiking. Enjoy the peace. Unless you’re made of money and can head to Antarctica, this is the time to appreciate the fact that you’re one of the southernmost people in the world!

    Ushuaia

    Now, while Puerto Williams gives you the sensations of isolation and tranquility at the end of the world, you will find neither at the original Fin Del Mundo. Ushuaia feels like a city, and has the price tag to match. Picture this: two silly kiwis enter Argentina at its most isolated town, at the country’s most expensive point in history. That makes two hungry, hungry kiwis. To be fair, the “ferry” crossing from Chile to Argentina costing 160USD ea should have given it away. “Ferry” = 60 mins of driving along the coast of the Chilean side to reach the narrowest point of the Beagle Channel, then 30 mins on a speedboat to reach Argentina. 

    There are many more activities in Ushuaia, but all of them have a hefty price tag. 

    Channel cruises to see seals, penguins, and a few random attractions (lighthouse, anyone?) can be taken on big catamarans, or you can take a smaller boat for a higher price. We opted for the latter, and got to see some penguins up pretty close, but we would say it wasn’t worth it for the cost. There are better, cheaper places to see penguins, and the breeds aren’t endemic to the Beagle Channel. The channel itself has some interesting history – we enjoyed some explanations of the local indigenous population and

    As with all the national parks in Argentina, Tierra Del Fuego is now a pay-to-enter model. There’s a single shuttle group which has a monopoly of price, so you’ll be paying around 50k ARS to enter the park. There are options for camping, with a multi day circuit available. For reference – kiwis should be thinking “west coast”, aussies should be thinking “tassie”. It rains a lot in this region, so be prepared for some very boggy group and knee high mud patches. With a big price tag and tough conditions, we avoided!

    There are a few other day hiking options around Ushuaia which are not national parks. Absolutely our favourite was Laguna Esmeralda and Glaciar Albino del Ojos. This was also a shuttle ride away, so they took a fair bit of money off us for a very short ride – but we spent the whole day out, enjoying the track. This is an out and back – Laguna Esmeralda is an easy walk, well graded and well marked. It’s worth it and gorgeous. However, if you’ve got a good pair of boots and are feeling strong and fresh, we highly recommend continuing onto the glacier. The track is not well graded, it’s big rocks and some scree, which eventually turns into some rock climbing. It’s technically a little challenging and so – to us – super fun! As long as you have good weather, good boots and experience using them, there is no need for a guide. The glacier at the top has receded a fair bit but is still very cool to look at, and a great reward. We saw some people hanging our right under its shadow (but always take care doing this – glaciers can calve at any time!). We spent so long enjoying the views and chatting that we had to run back to our shuttle – worth it, though. 

    Glacier Albino del Ojos

    There are also some options for short hikes closer to Ushuaia. We climbed around the old ski lift, which is near the entrance to the Martial Glaciar track, for some great views and generally nice walking. We think we read you can get to the Martial Glacier yourself, although there are lots of (expensive) tours if you want to do it guided. Wandering around the wetlands and along the promenade is also pleasant, although the wind can really chill you, and watch out for the seagulls! They’re super aggressive. 

    Other than that – being a city, Ushuaia has plenty of cafes, restaurants and cute nooks that you can sit and have a bevvy and a treat. It’s also got at least three supermarkets (Emma’s dream), which gives you plenty of options to cook at home if you’re on a budget like us. It’s definitely a different “end of the world” vibe – think ‘Fin del Mundo’ plastered on shopfronts, the world’s southernmost mall, European and American outdoor brands in stores, flash coffee places. It’s a place made for money, especially with the Argentinian currency as it is, but there is still a place for a backpacker if you’re willing to skimp a little!

  • Exploring Puerto Natales and Punta Arenas: A Patagonian Guide

    Keep it Short and Sweet:

    There isn’t much to do, would recommend spending minimal time in these spots based on your interests.

    Tell me Everything:

    Torres del Paine is the biggest attraction in Southern Chilean Patagonia, but surely there are other things to do, right? To be frank, not really. We like a low-stress timeline where we can make it work, especially in a windy location like Patagonia where flights are so often delayed or cancelled. We booked to fly into Puerto Natales two days before we started the O-Circuit, and to fly out of Punta Arenas three days after we finished. That gave us plenty of time to “explore” both towns. Did we do any exploring? Shit no. 

    Not only is there very little to do, but we were somewhat preoccupied. Pre-trek we spent exploring the supermarkets for the best hiking food locations (a favourite activity), and post-trek we spent eating and recovering – mentally, physically, and from illness, as we both caught a cold on the trek. So we don’t have much personal advice for the area!

    Puerto Natales is cool for the landscapes, and for the sensation of how far you are – from everything. If you fly in, like we did, this will be your first stop for the famous Patagonian winds – a breeze sometimes, a gale others, but always there to keep you company. We were also lucky enough to have awesome views of the Torres & Patagonia in general as we flew over. It was actually a hilarious experience, with everyone in the right row getting out of their seats and leaving over the left row to get the view, too. So make sure you reserve a seat on the LHS of the plane!

    Otherwise, Puerto Natales supposedly has some good bars and restaurants (all beyond our price range), and a few random things to do. The walk along the waterfront is quite nice – again, for getting a sense of Patagonia and the wildness of this place. There are a few statues to take photos with if that’s your thing. If you’re so inclined, you can hire a bike and visit a cavern which holds the remains of some dinosaurs – this did actually sound quite cool, but we only heard about it from some friend on the O-trek. We would advise doing this activity before you do any hiking – we were much too tired afterwards to even think about attempting it!

    Punta Arenas is bigger and a bit dirtier – it’s got a proper port, so it’s more like a real town. This does mean there are a few more options to pick up hiking essentials, and many more options for where to stay. However, it’s still mostly just a landing port for tourists, and there is apparently not heaps to do. There are a couple of national parks nearby, though again – if you’ve just spend 8 days in TDP, you might be a little over that. 

    As we were recovering from the O Trek and knew we’d start the Dientes in a matter of days, so we weren’t very activity heavy in this town. 

    There are several museums if that’s your fancy – though they’re all a little pricey, so we can’t recommend any. 

    We heard from a friend that the penguin tours here are awesome – we took one in ushuaia and it was probably 50% more expensive, for the same breeds – so if you’re keen to see some birdies and have the time here, we’d recommend it! 

    Punta Arenas has a few microbreweries to visit, if you’re a beer lover and you want a relaxing activity.

    Otherwise, we read that Pali Aike national park and the lighthouse, Faro San Isidro were both good places to visit for some walking. 

    In general – we’re glad that we had the days to chill out in our Airbnb and recover, but we wouldn’t really recommend spending more days than you need in either Punta Arenas or Puerto Natales. Stay in the bush – it’s where life is best, anyway! 

  • Patagonia Travel Costs and Itinerary: What You Need to Know

    Patagonia Travel Costs and Itinerary: What You Need to Know

    Logistically, this part of our journey was not well planned. As Worldwide Walkies, you can guess why we were in Chile in the first place – for Patagonia, and its wealth of trekking destinations. We wanted to do the whole honky – south as south goes, the big treks with big names, and anything we could fit in between. We knew it would be expensive – but just how expensive? We didn’t get to that level of detail, and we ended up with a number of shocks to our system (and the budget spreadsheet)!

    You can definitely complete Patagonia on the cheap, don’t get us wrong. There are always options to cook in your hostel, to avoid the expensive tours, or to walk everywhere you conceivably can. However, there are three things which really contribute to a full ‘Patagonia Tour’ being very expensive, despite being in countries which are traditionally considered cheap.

    Distances, Weather and Isolation

    The Patagonia region is nearly 2 million km^2 of the world’s southernmost countries. Most of the places that offer the best hiking (and therefore receive all the tourism) are along the spine of the Andes, which are a substantial roadblock in any easy travel. The western side is peppered with fjords and mountains that are beautiful but basically uninhabitable. Most of the civilisation on the Chilean side lies along a single, dead-end road which traverses 1240km of Chilean Patagonia from Puerto Montt to Villa O’Higgins. This is the Carretera Austral. There are a few crossover points from the Carretera Austral into Argentina, but it is an extremely isolated route – and half of it isn’t even paved!

    The eastern side of the Andes slowly flattens out into an arid plain that alpine grass and nothing else grows on. Roads (and ferries) do connect the southernmost point of Argentinian Patagonia to the northernmost, but the next consideration is the weather. Ruta 40 runs adjacent to the Andes and connects up the popular tourist towns of El Calafate and Bariloche, but the road is not passable in the winter, and can be questionable in the shoulder seasons. For the perspective of our kiwi readers: Stewart Island ends at about halfway down the Carretera Austral, and it’s another 900km South to Puerto Williams. That’s pretty far south.

    So we have – towns that are connected by one road; roads that close in the wintertime; sub-Antarctic weather patterns all year around – which all in all, smells like true isolation. That’s part of the beauty of Patagonia – a real sense of being far, far away from anything else. Sure, there is still normal infrastructure in the towns, but just out of them, you can get a sense for how wild the countryside really is. That beauty just comes at a cost – and the costs are your groceries, which can be up to double the price that you’ll find in the northern regions of both Chile & Argentina.

    National Park and Camping Fees

    In Aotearoa, you pay for huts and the occasional campsite – and nothing else. Paying to enter a national park is a concept that was entirely foreign to us, although we have since heard it is common in many parts of the world. It seems like every National Park across Chile & Argentina have fees to enter, ranging from 10USD to 50USD – and it varies to pay by entry, and to pay by day. What really caught us out is that the fees in Argentina were introduced at the start of the 2024-2025 summer season and without warning – so just before we started travelling, but well after we’d done all of our research. For this very reason, we did not visit Tierra del Fuego National Park in Ushuaia.

    Camping in Patagonia is also not always cheap. We paid, at maximum, 40USD per night per person in the O-Circuit in Chile – sure, this was in a campground with running water and hot showers, which was a pleasant surprise, but still a hell of a price to sleep in your own tent! In Los Glaciares in Argentina, campgrounds wanted to charge 15USD per night plus $45USD per day to enter, with the absolute bare minimum of facilities (long drop & no campers shelter). It seems crazy to us that we could be so self-sufficient and still be charged so much money!

    The Cheap Countries are No Longer Cheap

    Chile’s economy has been stable and strong for some time, so prices steadily increase over time as tourism and infrastructure develop. To be honest, the work of CONAF in a place like Torres del Paine felt genuine and really positive; despite the heinous amounts of tourists, we thought that the rangers were honest hard-workers who care about the diversity and conservation efforts in the park.

    The major spanner in the works is Argentina. In 2022, people were travelling to Argentina and living like Kings and Queens. Argentina was renowned for its “Blue Dollar Rate” – an unofficial exchange rate (although, sanctioned by Western Union) of USD into ARG which could (at one point) double your pretty money. In 2024, inflation was 200% – the stability of the dollar compared to the chaos of the peso drove the blue dollar rate. However, the more recent political party has stabilised the inflating economy, which has resulted in the Blue Dollar Rate closing into the official rate – using Western Union still gives a better rate than the official, but only by about 10%. It also means that the cost of goods has increased dramatically, all over Argentina but felt even more strongly in Patagonia, where as above, distance and isolation further drives up the costs of goods. Talking to Argentinians living in Patagonia was rough – the wages of the local people haven’t increased with the record inflation, so the cost of living for the locals is sky-high.

    Tell me everything:

    What we did:

    As per our previous blog posts, before descending into Patagonia we thought we would take a break and enjoy the north of Chile. This meant we’d been through Santiago de Chile, Pucon, Valdivia, visited Chiloe before flying out of Puerto Montt. If we hadn’t had the O-Circuit booked in our third week of travel, or maybe if we’d just thought a little harder, we would’ve decided to do a more efficient South > North route (or vice versa). 

    Our route, briefly, was as so – including the key trekking points:

    Puerto Montt > Puerto Natales (plane) – Torres del Paine NP & the O-Circuit

    Puerto Natales > Punta Arenas (bus)

    Punta Arenas > Puerto Williams (plane) – the Dientes de Navarino

    Puerto Williams > Ushuaia (ferry) – Tierra del Fuego NP & other hiking in the surrounds

    Ushuaia > El Calafate (plane) – Perito Moreno Glacier in theory, but it was too expensive for us

    El Calafate > El Chalten (bus, return) – Los Glaciares NP

    El Chalten > Bariloche (plane) – Nahuel Huapei NP & other hiking in surrounds

    Bariloche > Puerto Varas (bus) – to collect our gear!

    That’s four flights, and a whole lot of doubling back and forth on ourselves. Looking at how to travel through Patagonia is confusing – there are buses, but some aren’t direct, or your sequence of stops is important to ensure you can bus from place to place. To top that off, some of the buses (looking @ El Calafate > Bariloche) can be far more expensive than flying – we booked our plane ticket 4 weeks in advance and saved around 100USD (with checked baggage!).

    One thing that we do regret is flying from Punta Arenas to Puerto Williams. Apparently, the ferry is beautiful – 30 hours on a boat, but you’ll sail through the fjords of Patagonia, seeing wildlife and glaciers for the whole time. Apparently it is also very common to get all the seasons in one day 🙂 So if you’re travelling and you’ve got the time, we would definitely advise the ferry over the plane. For us, the decision was made because flight was slightly cheaper, but we definitely think that the ferry sounded worth it.

    In hindsight, we have two routes we’d advise depending on whether you start in Argentina or Chile, minimising your time on the bus or the need to catch so many flights!

    From Argentina:

    Buenos Aires > Ushuaia (plane)

    Ushuaia > Puerto Williams (ferry)

    Puerto Williams > Punta Arenas (ferry)

    Punta Arenas > Puerto Natales (bus) 

    Puerto Natales > El Calafate (bus)

    El Calafate > El Chalten (bus, return)

    El Calafate > Bariloche (bus)

    From Chile:

    Santiago > Punta Arenas (plane)

    Punta Arenas > Puerto Williams (ferry)

    Puerto Williams > Ushuaia (ferry)

    Ushuaia > Punta Arenas (bus, which will get on a ferry!)

    Punta Arenas > Puerto Natales (bus) 

    Puerto Natales > El Calafate (bus)

    El Calafate > El Chalten (bus, return)

    El Calafate > Bariloche (bus)

    ArgentinaChile
    Buenos Aires > Ushuaia (plane)Santiago > Punta Arenas (plane)
    Ushuaia > Puerto Williams (ferry)Punta Arenas > Puerto Williams (ferry)
    Puerto Williams > Punta Arenas (ferry)Puerto Williams > Ushuaia (ferry)
    Punta Arenas > Puerto Natales (bus)Ushuaia > Punta Arenas (bus, which will get on a ferry!)
    Puerto Natales > El Calafate (bus)Punta Arenas > Puerto Natales (bus)
    El Calafate > El Chalten (bus, return)Puerto Natales > El Calafate (bus)
    El Calafate > Bariloche (bus)El Calafate > El Chalten (bus, return)
    El Calafate > Bariloche (bus)

    And if you want to do everything at once – instead of returning to El Calafate and continuing onto Bariloche, you can cross back into Chile from El Calafate and hitch-hike or bus up the Carretera Austral! Buses are available in some sections, but we’ve heard that in particular the southern section is very quiet, so you’ll need to be happy to chill out and spend some time waiting for a mate:

    El Chalten > Villa O’Higgins (bus, ferry, hike/bike – this crossing sounds awesome, albeit a little complex. There are pletny of blogs out there with detailed descriptions, and we met lots of people who did it, it sounds amazing!)

    Villa O’Higgins > Puerto Montt (hitch, bus)

    Puerto Montt > Puerto Varas (bus)

    We believe that both Puerto Varas and Bariloche are worthwhile destinations, of the lake districts of Chile and Argentina. There’s a lot to do in the Lakes Districts of both countries – we’ll cover the details (and the details of each of the different locations) in different posts!

    Also just a random aside – the Andes are renowned for being high altitude – the highest capital, the highest lake, etc. However, the Andes in Patagonia are not high altitude. The maximum point above sea level would only be around 2000m. That doesn’t mean you don’t do lots of elevation when you’re hiking – just that your starting elevation won’t be adding in an extra factor of difficulty!

  • Exploring Southern Chile: Highlights from Valdivia to Chiloé

    Exploring Southern Chile: Highlights from Valdivia to Chiloé

    Post hitchhike and 5 day trek on the Villarica Traverse, we had no set plans and were a little frazzled. What do we do? Where do we go? How do we get there? What are we doing here, anyway…? That was a wee learning for us – after a big hike, don’t try to make too many decisions, or rush out to the next stop (especially if it’s your first hike in 9 months!). The difficulty was doubled as we arrived back in Pucon the day before the Pucon 70.3 Ironman began (“the most scenic Ironman in the world”), so the town was extra full.

    We had a list of “this sounds mean” for the next stop. Budi Lago and its surrounds to get an insight into Mapuche culture in modern times. Valdivia for a riverside breeze, fish markets and German influence. Castro for stilt houses, great seafood and local mythology. Puerto Varas for more beautiful lakesides, cute cafes and fabulous kuchen. Or maybe a little road trip through the top of the Carretera Austral, for our first Patagonian hiking experience. 

    Just look at that list! We had two weeks to travel, and over a month’s worth of things we wanted to do, several of which required hiring a car or some awkward bus heavy travel days.

    Click here to take yourself to ‘Keep it Short and Sweet’ at the bottom of this page which summarizes this blog post.

    Tell me everything:

    What we did:

    Valdivia

    Turns out that booking accommodation for your current evening, in peak holiday time, means that you can only find some very expensive options. This felt limiting, but meant that the decision was made for us. Valdivia was the only town that had an option for accommodation that was within our budget.

    Valdivia is charming. Its river is actually quite beautiful, not the stinking mess that you get in some towns. The riverside market has plenty of tasty treats and friendly sellers. There is a gathering of museums on the opposite riverbank, in heritage buildings, which are reasonably priced and have some interesting information on the history of the settler immigrant families in the area (although, unless your Spanish is fluent, make sure you’ve got photo-capable Google Translate at the ready, because the captions are not in English). “Daus Haus” is a German restaurant that does yummy Crudos and kuchen, which is such a fun contrast to the normal foods in a Chilean town – if you go, we definitely recommend popping in.

    Crudos and Kuchen

    However, we wouldn’t necessarily recommend going to Valdivia. We had lovely weather and enjoyed walking on the riverside, but couldn’t be bothered forking out the cash for a boat tour (prepare to be waved at and pursued by every vendor who sees you dawdling down the boulevard), though they did look relaxing. We wanted to learn more about the Mapuche people, but realistically Valdividia is too far away from the villages and doesn’t have major tour operators – it’s better to go to a place like Budi Lago on your own time, with a car, if you want to learn more about the indigenous cultures.

    So there it was – a couple of days recovering from our walk, and it was time to move on again.

    Castro

    The next few days were still to be dictated by our decrepit bodies. Despite the sun and relaxing in Valdivia, we weren’t really recovered. Awal’s boots really hadn’t been broken in, and he had blisters on both heels that hurt even to flex. Any more hiking was a no-no, with the O-Circuit just a week away.

    So we picked Castro, a location known for some good museums, fascinating architecture and excellent seafood. However, we were again bitten in the ass with the peak-season last-minute accommodation booking. We eventually decided on a homestay, which turned out to be so lovely, with many other friendly travelling locals and a very sweet family. The cooking facilities were a little lacking – not ideal for a couple of backpackers on a budget! Fortunately, one of Castro’s key attractions is the food, and we were ready to eat some sweet local food (cooked by someone else!).

    Chiloé is an island with a lot of culture that differs from mainland Chile, even in modern times; it’s a slower way of life, there’s specific dishes to the island, different architecture and even the climate is unique – with far more rain than the mainland. Chiloé refers to the main island, but it’s technically an archipelago with many, many smaller islands which share similar cultures, and can be visited by different ferries.

    Our first day – we went a little crazy. We spotted a cute little cafe with a proper coffee machine and a hipster-looking barista and decided – to hell with it! Let’s spend a little money. Note that at this point it’s been three weeks since either of us has had any caffeine (or alcohol), and we also skipped breakfast. We both ordered double shot espressos – the norm in Aotearoa. The coffee was delicious – would totally recommend the spot – but within 20 minutes we were both buzzing, borderline non-functioning. Emma’s blood pressure got so high her inner ear fluid got out of whack and she couldn’t hear. She spent the whole morning whispering. 

    Caffeine hit on board, we were ready to explore the town. There are some awesome museums in Castro, and very interesting churches. When the Spaniards arrived with their religion, they wanted to build churches – but the local population only built with wood. There were no building techniques that used stone. Hence, all of the churches on the island are made from wood, but in the style that was common in the 1600s – so all of the columns and reliefs are carved from wood! They are beautiful and strange, and it’s a bit of history that is so cool to see in person. However, you may be shocked (as we were) by the outward appearance of the central church in Castro, which is painted gaudy purple and yellow on the outside, and looks fairly lopsided.

    We then went to the Municipal Museum, which we would 100% recommend. It’s only small and all of the text is in Spanish, but again, pull out Google photo translate and you’ll be fine. The content is super informative, with details around the local traditions of wood carving and building, plus some of the traditional tales that are really niche to the population of the island of Chiloé.

    The Municipal Market is definitely worth a visit. There’s heaps of well priced goods – think spices and veges and fruits and cheeses! You can also get an awesome meal on the second floor, with fresh fish and local dishes being cooked up in little stalls. These are also pretty well priced. The feria on the waterfront and the restaurants there are easier to access & more touristy, so are more expensive for very similar quality. Do note that the Municipal Market is more of a lunch or very early dinner affair, so don’t go too late!

    Our favourite place to snack and get breakfast was a stall in the centre of town called Empanadas and Milcaos on Google Maps (https://maps.app.goo.gl/1dadiPCJWAQV9d4m6), where different vendors offer different types of empanadas and milcaos. Milcaos are like an empanadas, but mashed potato flour instead of pastry – so amazing. Super reasonable prices and they are huge! Emma’s biggest regret was not trying the pulpo empanada – octopus! They were always out 🙁

    Of course, walking around the town is lovely and there are a couple of great locations to snap pictures of the famous stilt houses, ‘Palafitos’, painted cheerful colours. Plazuela Martín was our favourite place to chill out and admire the structures. Many of the Palafitos have been made into tourist bars, so you can get a drink, but do note that it’s a tourist activity – and is priced likewise!

    Outside of Castro, there is also plenty to do. Dalcahue is the nearest town on the island, and is the best place to eat high quality, economically priced traditional food. The spot is called Cocineria Dalcahue, and is a collection of small kitchens, similar to the Municipal Market in Castro, but with fresher, even less pretentious vibes. This is where we tried Curanto, a famous (enormous!) dish filled with high quality seafood, potatoes, ham and chicken. The food was so good we actually visited Dalcahue twice, once as Van Guests to our mates Leo and Sam (it is so nice to meet friends travelling!), and a second time by ourselves via bus – which is very easy to do.

    Emma got the Curanto. Delicious!

    There’s also great hiking to be found on Chiloé. From Castro, it’s easiest to get to the southern section of Parque Nacional Chiloé, by Cucao on the west coast. This really reminded us of home again, with quite a similar climate to the west coast of Aotearoa! We only did a brief day walk that took a few hours (blisters said NO) but there is at least one overnight hike in this section!

    Now, some logistics: It’s easy to get there by bus. Most buses will pass through Puerto Montt, and your bus will spend about 40 minutes on a ferry – which is a pretty nice way to stretch your legs!

    Castro is the biggest town on the island, and is the easiest base of operations. There are lots of minibuses within Chiloé which are cheap and run often, which makes it easy to visit the national parks and other towns. Your hostel will be able to help you with timetables and suggestions!

    You might want to stay in Ancud instead if you’re particularly interested in seeing penguins. Tours run from here. Dalcahue is a good place to stay if you want to explore further – there’s a ferry to the neighboring island of Quinchao.

    The First of the Puertos

    After Chiloé, it was the end of our relaxing time in Central Chile. We had booked a couple of nights in Puerto Montt before we flew south, to Puerto Natales and Torres Del Paine for the O-Circuit. Puerto Montt is definitely not a place we would recommend. It’s got a big mall, we picked up some extra essentials from Decathlon, but in reality it’s a big, dirty port town. In our spare day, we actually boosted it over to Puerto Varas – a 30 minute bus ride away – which is a completely different affair. 

    Puerto Varas is gorgeous, with a wonderful view over the lake, lovely cafes, tasty Kuchen – overall a completely different vibe to Puerto Montt! The main purpose of our trip was luggage storage – while we were in Patagonia, we knew we were going to only be hiking, so we left about 10kg worth of our “city-only” items in Puerto Varas. We are still so grateful to Susy at Hostel Tusi Susy, this was such a life saver and when we came back to Puerto Varas we had a lovely, relaxing few days.

    After a day in the sun by the lake, it was back to Puerto Montt for a final pack before the big event of our first month! The O-Trek.

    What we didn’t do:

    Budi Lago

    Lago Budi is a big salt lake that is characterised by the concentration of Mapuche villages in the surrounding area. The region is open to tourism which enables travellers to learn more about the native people and their history and traditions. It’s a great place to reconnect with the land and understand more about the indigenous peoples of the area. 

    This is always something that we want to do – but unfortunately, with our short timeline we couldn’t make it work. We couldn’t find a lot of information online as to how to get there or exactly where to go. Buses don’t really run through this region, as it is off the normal tourist route. It sounds like a journey more suited to someone with their own car. If anyone can leave a comment on their experiences in the area, we would absolutely love to hear it!

    Cochamo and Vista Hermosa

    We didn’t actually hear about this area until we returned to Puerto Varas in February, but at the very bottom of the lakes district is a town called Cochamó. From here are hikes all up the Cochamó valley which we were told are incredible! It’s a pretty untouched area with some more difficult hiking and climbing, with several campsites and refugios to stay at. We were recommended “Vista Hermosa”, which sounds so peaceful!

    Note that this area is very wet and the trails sound fairly hit and miss, so make sure you have good gear and a functioning GPS. Check other places online for up to date information on the available refugios and who to contact to book a campsite.

    Carretera Austral

    The big one we missed. The Carretera Austral is *the* place for a roadtrip, a dead-end highway that traverses as much of Chilean Patagonia as possible. It ends at Villa O’Higgins, but it’s very possible to hire a car and just do a bit of the northern section for a few days. On the flip side, you could easily spend months driving (or even longer, hitch hiking) the Carretera Austral, as there are so many national parks with gorgeous hiking and camping, all along its length. Apparently, the road is paved up until Coyhaique, so if you’re only planning to do half, a normal hire car is fine – but any further and you’ll need a 4×4. We will be back to do it all, one day, and then it will definitely get its own blog post!

    Keep it Short and Sweet

    • Southern Chile has plenty for you to do!
    • Valdivia: Not our favourite spot, but certainly relaxing and interesting in its own way. 
    • Chiloé: Amazing culture and vibes, interesting history, accessible gentle hikes, great seafood.
    • Puerto Montt: Great to pick up any hiking essentials, but not anything attractive here.
    • Puerto Varas: Gorgeous town, great cakes, fancy restaurants, and a nice place to run on the waterfront! Lots of days trips to mountains and lakes are doable from here.
    • Budi Lago: A great way to connect with and understand the indigenous history and culture in Southern Chile.
    • Cochamó: Plenty of backcountry hiking options in this area.
    • Carretera Austral: Anywhere from a few days to months of content – hire a car or give yourself plenty of time to hitch-hike – absolutely do it if you can! 
  • Exploring Pucon: A Comprehensive Travel Guide

    Exploring Pucon: A Comprehensive Travel Guide

    So, our landing spot was Santiago de Chile, where the summer heat was high and the vibes were off. We itched to get out, so off we were onto an overnight bus within a couple of days. After eight hours (and a sweet-as bus sleep, to be fair), we were waking up in the Chilean Lakes District, in the beautiful town of Pucon. We welcomed the chilly mornings and sweltered in the hot, sunny afternoons. We were enraptured by the beautiful lake and the plentiful hiking. In fact, it reminded us a little of Taupō back home, with a kindly, small-town, local tourist feel. Pucon was the perfect place to have a holiday before we began our travels in earnest. 

    At this point, not having any luggage (and having heaps of anxiety about when it would arrive), limited our activity options, so we spent plenty of time enjoying the town itself. We snacked, we swam, we explored the touristy shops, appreciated the wooden buildings, experienced our first Chilean supermercado (so good!!!). This town vibe was awesome – full of relaxed local and foreign tourists soaking up the summer sun. Once we got our gear (four stressful days, let us tell you), we even managed to squeeze in a 5 day trek, the Villarrica Traverse – we’ll put more details of that in another post.

    Sometimes our journey won’t be packed full of to-dos. Sometimes when travelling, all you can manage is a walk around town and a sit down at a cafe – either because the budget demands it, or travel fatigue does. We arrived in Pucon barely a week after Christmas – a week after emotional family goodbyes, last minute stress packing, and a hefty amount of over-eating. What we felt was more like life-fatigue – and we wanted a wee holiday from thinking about anything even remotely futuristic.

    Click here to take yourself to ‘Keep it Short and Sweet’ at the bottom of this page which summarizes this blog post.

    Tell me everything:

    What we did:

    Eat, wander, swim, sleep.

    The town of Pucon is cute and small but still has three whole supermarkets to explore, which is one of the greatest things about being in a new country – new peanut butter, new hot chocolate, new bread, new vegetables – so much to try! The architecture is mostly wooden and cool to look at, and the tourists were mostly local and super friendly, which made it feel full but not full of gringos. You really only need one good day to explore the town – there isn’t much to it – but there’s a fair bit to do in the area. Chile was a little expensive for us, so we predominantly ate in our hostel. However, we did pick up a few tasty empanadas (around 3000CLP for a big one), and a small amount of ceviche from a few ladies on the road. It looks as though there is a good spread of cuisines, but mostly aimed at a bougier tourist budget – so a bit more than we were willing to pay for a proper meal out.

    We stayed at Gecko Hostel, which had a lovely outdoor area and a reasonably sized kitchen. Our room had a private bathroom and a comfy bed, but it was on the upper floor so it got hellishly hot during the day. Thankfully, we had a fan! The owner was lovely and allowed us to leave a decent amount of gear at the hostel while we hiked. There was also a very sweet dog – Midnight – who loved a big cuddle..

    The lake is a lovely temperature, but the beach is made up of tiny little black stones, rather than sand, so it’s a motherf***er to walk on, both due to the slipperiness and the heat. There are heaps of water activities right on the beach – kayaking, paddle boarding, and some inflatable playgrounds, too. There’s not really anywhere to paddle to, so we settled for sunbathing and swimming only. If you get peckish, there’s no need to hustle back into town – someone will eventually wander past you peddling some tasty treats, from popcorn to empanadas. However, fair warning in this region: horse flies. We had to scarper – twice! – from our relaxing morning on the beach due to a very persistent insect. Horse flies are not a thing in Aotearoa, so in our first interaction we both had a bit of a panic at the biggest ‘wasp’ we’d ever seen. To be honest, I don’t know which is worse…

    Santuario El Cañi

    Our single day excursion was to Cañi, a privately owned piece of land to the North East of Pucon. The Sanctuary is special because it holds some of the oldest Araucanía trees in the area, and their presence is culturally significant for the indigenous First Peoples of the area. Not to mention, they are spectacular trees and have some curious biological developments! Upon arrival, they give you a map of the trail which has some really nice descriptions at points of interest, with historical and cultural tidbits. The track is mostly uphill (like, very uphill), and at the summit you get a stunning view of the surrounding parks – totally worth it, and an awesome spot for lunch.

    The entry cost was 5000CLP each, and the return bus was 3000CLP each.

    It’s easy to get there by bus, we caught the first one at 8:30am from the Pullman Bus terminal. Double check the return times before you descend – we missed one by about 10 minutes (after running/skidding down half the hill) and then had to wait two hours. It was a little rough. However, it is pretty easy to hitchhike on this road in summer – another couple gave up on the bus and picked up a hitch within 20 minutes or so. Your hostel should be able to give you information on the bus times, and at the terminal there are updated times (which you should definitely take a photo of, and triple check which column is going and which is returning! Our #1 mistake…).

    As we said, the walk itself is properly steep – the track is in excellent condition, and well signposted, but it’s pretty much all uphill. We’d recommend poles if you’ve got knee issues (or even if you don’t!). We got some hellish blisters, and our poor toes were not pleased when we started the Villarrica Traverse the next day.

    Parque Nacional Villarrica

    Villarica Traverse- hiking through snowy mountains
    Day 3, Villarrica Traverse

    We completed the Villarrica traverse, a 5 day hike from the Villarrica ski lodge towards the border with Argentina, walking in between three volcanoes. We had spectacular weather the whole time, and all the camping spots were stunning. It was, however, our first hike in 7 months, so it was an absolute slog. If you don’t have five days but want to get a taster, our favourite campground was Laguna Azul, which it seems like you can access from the road end. The laguna is stunning, and when you wake up with energy in the morning you can hoon it up the hill to the highest point on the traverse for more great views and some fresh snow melt (but beware of the horse flies!). It’s also possible to complete the Traverse in 3 days, by starting at a different location and shortening the route (or, you could just be a distance-junkie and complete the 71km in 3 days)- we met an ultralight couple that did this.

    Entrance to the park was 10800CLP each – this was a blanket fee for our entrance (it didn’t matter how many days we were there), and there was no camping fee.

    What we didn’t:

    There’s lots of other classic Pucon activities out there, but we didn’t attempt anything more than walks and relaxing.

    Adrenaline Junkie Heaven

    You name it, Pucon has it. White water rafting, hydrospeed (white water rafting, but just with a board & flippers), skydiving, there are plenty of tour agencies who will help you fill your adrenaline rush, if you so desire. Not a very budget friendly option, though! And while we hiked around it, there’s also several tours which offer expeditions up to the summit of Villarrica volcano, which sits at 2,860m. Climbing an active volcano does seem like a pretty cool (and unique) experience.

    Thermal Baths

    Due to the activity of Volcano Villarrica, it only makes sense that there are thermal pools nearby. There are three different lots of pools, of varying fanciness. There were plenty of tours going out this way, but unfortunately no easy bus to give us more freedom (and less cost!). Despite that, we definitely gave this a long think – it would’ve been lovely to relax in a proper spa – but in the middle of the day in January, jumping into a hot pool sounds a lot less appetising, strangely enough. Each of the thermal baths seem to have a different entrance fee which probably related to the fancieness at each bath.

    Caburgua & Parque Nacional Huerquehue

    These are two additional options we found for hiking and lakes, again accessible by bus. The Huerquehue National Park bus only runs one in and out per day, so we picked Cañi for the flexibility. As always, it’s important to check at your hostel AND again at the bus station what the schedule looks like, as they often change. Huerquehue has more options for hiking with three different trails which are easily accessible. There are also places to camp if you’re keen to do an overnighter. The park entrance is 10400CLP at writing for internationals. It looks like there’s also updated information for buses from Pucon on this website, so check back if you’re heading there! https://parquenacionalhuerquehue.cl/acceso-boletos-entradas/

    Carburgua offers some lovely looking beaches, rather than hiking. We were a bit beached out by Pucon itself, so felt no need to get on a bus to another swimming destination. The photos do look spectacular though, with the combination of sand and green surroundings. 

    En route to both destinations are some more natural lakes called “Ojos del Caburgua”, the eyes of Caburgua. As you can imagine, this looks like another great photography spot. The infrequency of the bus means a stop here might leave you waiting over an hour, unless you can pick up a hitchhike (again, likely to be easy in the busier summer months).

    What we wish:

    The rest of the lakes district boasts plenty of stunning national parks and hikes that you can link together. You could easily spend a whole summer hiking through this area, between mountains and lakes, along the spine of the Andes. It’s a matter of picking your battles! A lot of the hiking information is also a little more difficult to find – when we emailed CONAF about the state of the Villarrica Traverse, they didn’t reply for 4 days (we were halfway through the hike!) and they sent us a link to a non-official description of the track, on WikiExplore. Thankfully, there was a kind local tour guide who answered a number of our questions on Whatsapp.

    Keep it Short and Sweet

    • Pucon is very popular in summer – but good popular, with good vibes 
    • For Pucon itself – you only need a day or two, depending on your shopping and beaching desires.
    • For Pucon’s surroundings – there are easily enough activities for 3 whole days. 
    • Local hikes are easily accessible by bus (but double check the timetable).
    • Our two top single-day activities, for a budget and for the height of summer:
      • Sanctuario el Cani (3000CLP return bus, 5000CLP entrance)
      • Parque National Huerquehue – we didn’t do it, but would have if we had our gear earlier (3000CLP return bus, 10400CLP entrance)
    • Our activity wishlist, if we had a bigger budget:
      • Thermal baths 
      • Summiting Volcano Villarrica (~100USD for a day-long tour)
    • We can recommend Gecko Hostel, where we stayed.
    • We can’t recommend any restaurants, and while we got some good empanadas from “Panadería Marsil”, the server was cranky on the last day and didn’t heat them up 🙁 so make sure you’re specific!

    If you found this post helpful and have any questions about Pucon or any of our other blog posts, then feel free to contact us!

  • A New Start in 2025! Planning for a Year of Travel

    A New Start in 2025! Planning for a Year of Travel

    Hola hola! Blog post number 1!

    This is Worldwide Walkies, the travel & trekking blog for Awal and Emma’s big 2025 adventure. Since the 1st Jan 2025, we’ve been in South America, walking and eating, learning and exploring, and generally trying out a life that’s a bit different for us. This is our little corner of the internet where we’ll be keeping a diary of our journey – sharing the experiences of the sunny days, but also the ones that are full of mud, rain and gale force winds. We’ll describe towns that capture our hearts and the ones that we couldn’t wait to get out of. We’ll note down our favourite itineraries, and the ones that, simply put, went to shit!

    Maybe you’re here because you’re our mums (hi ma <3), but maybe you’re here because you’re keen to explore some of what South America has to offer – maybe you’re here because you also love to walk internationally and think we could offer a bit of guidance – or maybe you’re here to live vicariously (this was us! years in the making!). Whatever the case – thanks for stopping by. So let’s set the scene…

    Click here to take yourself to ‘Short and Sweet’ at the end of the page that summarizes this blog post.

    Tell me everything:

    Why (and why not) South America?

    We were inspired to return to this massive continent after a mini-adventure in 2022, where we spent 5 weeks tripping through Ecuador and Peru (and a tiny bit of Chile). As it turns out, five weeks was only enough for a taster of South America. We fell hard for the landscapes, the food (read: potatoes and corn), and the breadth of culture. We knew we’d be back, with a few key things to either hit or revisit.

    The key attraction should be pretty clear: walkies, walkies, walkies. The Andes provide the ultimate stomping ground for trekking, through mountains and valleys, alpine forest and desert, through snow into blistering sun. From the southernmost tip of the continent up through to the transition into Central America, the Andes create a dramatic landscape that has plenty to offer those who love to walk. Patagonia is the obvious example of South American hiking, but mountain range carries stunning opportunities right through to the north of Argentina, and across Bolivia, Peru, Ecuador and Colombia.

    The alternative landscape is the jungle – although, the hot, humid landscape doesn’t sound quite as appealling for multiday treks, the Amazon offers opportunities to experience nature in unique and exciting ways through tours and – the biodiversity is a huge draw card for the region, and the natural experience is a stark contrast to the high altitudes of the Andes. The most popular places for tours are Brazil and Peru, but we’ve researched some opportunities across Bolivia, Ecuador and Colombia.

    Backpacking for a year requires a certain price band – either taken from your belly & activity count, or taken from the currency of the countries you pick. South America can be a reasonably cheap place to travel, specifically through the northern countries. Brazil, Bolivia, Peru, Colombia, Ecuador and Venezuela offer awesome bang for your buck, although the latter two tend to have issues with safety, and it’s important to remember than any place super touristic will change the money you spend. Chile, Uruguay, Paraguay and Argentina have more productive economies which have led to higher prices (to us, comparable to Aotearoa in many ways). They are especially high in the far reaches of Patagonia – so it’s important to keep the variation in mind when budgeting.

    We’ve felt that South American cultures are truly genuine and unique, and in some cases untouched. From pre-Incan through to post-colonial South America, the history is fascinating and inspiring, horrible and bloody, and in some places, still strongly represented. The indigenous people of South America retain a strong presence in many countries, through villages, markets and traditional dress. There are opportunities to discover these cultures for yourself by taking a responsible tour, or simply being present in the moment and willing to have a new conversation. Every country has a different story to be heard, a dance to be learned, or a belief system to understand.

    Part of that culture is, as always, food. We love to eat, and we’ll always find something that inspires us – but we know that South America is probably not the place for every foodie. With the exception of Lima in Peru taking on a more international influence, the traditional foods are rooted in their many types of potatoes and corn, with fewer fresh vegetables and deeper flavours. Homely meals are the core of South American cuisine, and they don’t have the breadth that you may find elsewhere.

    How does a year of travel begin?

    It took a hot minute to get our things in order but eventually – savings, friends, family, frisbee (totally Emma’s fault) – all aligned and gave us the opportunity to quit our jobs and exchange a cosy Aotearea life for something a bit more unknown.

    The experience that we gained on our first trip to South America made the decision easier. We had a reasonable estimate on budget (three months in, and it’s going about as well as planned!), we’d already done a fair bit of research (a massive and overwhelming task for the size of the continent), and we were already confident that we would absolutely love the cultures and experiences. 

    As mentioned – South American countries have a wide range of budget types. For example, a ‘shoestring budget’ – the cheapest hostels, home-cooked meals, free activities, limited tours – will look very different when you cross from Chile into Bolivia. For example, we hardly ate out in Chile (less than 10 meals over nearly 7 weeks), but in Bolivia it is almost cheaper to eat out. This does mean that South America has something to offer every budget type, and every length of trip. Besides home cooking, we think there are two key factors to travelling cheaply – travel slowly and hike a lot. Travelling slowly almost always ends up being more economical – less time paying for transport, more time to spread activities over multiple days, more chances to visit a region in its off-season. Hiking is truly a great shoestring budget activity – if you’ve invested in your own gear, you’ll only be paying for transport (or just hitch!) park entry, and possibly campsites. 

    We budgeted a year of travel based on our monthly spend in NZ, with a cross-check from the spend of our last trip, which ends up being about 1000NZD a week (500NZD each), which at the time of budgeting was about 600USD (300USD each). Now it’s more like 550USD, but that’s an economics gripe for Awal to tell another time! We then budgeted a bit extra – if you know you’ll be going to places like Patagonia, the Amazon and the Galapagos, you know those will be bigger chunks out of the budget. We’ll post more details on cost breakdown per country as we go along.

    Planning for a year is a weird sensation. We are both very structured people, so we knew we should take this year-long opportunity to be more open-ended. However, the purely care-free, ‘let the adventure find you’ outlook generally leads to a massive problem – spending a disproportionate amount of time stuck in your hostel room, rushing to complete that research on your phone! There’s a balance to be struck to provide freedom and flexibility. For us, that meant a key question – “what matters most?” – well, clearly it’s Walkies. That gave us a framework – knowing that there are certain multiday hikes that we want to hit provides us the countries we wanted to visit. Having a general idea of what your key spots are helps that structure. Maybe it’s the most beautiful locations for photos; are you a birder or after a particular animal sighting – are there certain dishes you’d love to eat – maybe you want to learn the choice slang from every dialect of Spanish across South America – do you want to explore the best nightlife? Any of these could give you a starting point to plan your trip; maybe you aren’t sure, but picking one to begin can really help focus your planning!

    While planning out a whole year is weird, packing for a whole year is even stranger. This is something that we do not have nailed down!! Packing up your whole life into a bag each is hard, but what’s harder is carrying the weight of something you don’t use often enough. Time on the trail will tell you what’s essential and what’s not – our best advice for now is that you will overpack. As our priority was hiking, we have big packs full of all of our own gear – tent, sleeping mat, bags, liners, and a full set of hiking clothes. To be fair, everything else is excess – but it’s nice to look cute in a city, and it’s hard to start a blog without a laptop! We’ll make another post one day (if we ever figure out a system that actually works…)

    Where do you start?

    From New Zealand, “where do I start” has an easy answer – the only place you can fly direct is Santiago de Chile (although – we flew via Melbourne as it was somehow considerably cheaper). So at 8am on the 1st January 2025, we left NZ and at 11am we arrived in Santiago! 

    Now Santiago… honestly – not the greatest place to start a journey. Since our visit in 2022, Santiago has seen some tough times, with regular protests and changes to population demographics, many neighborhoods have become quite dangerous, even in the day, and there’s a definite uncomfortable feeling in 2025 that we didn’t sense in 2022. It’s a shame, because we knew it as a cool city – with museums and cheap food, tidy cafes and funky suburbs, cool traditional mercados and a metro to boot! Not to mention the walkies – at the foot of the Andes, it’s got some awesome treks nearby. It was almost a culture shock to return and find it in its current state.

    Thankfully, we didn’t have much time planned in Santiago – just enough to ride the teleférico and purchase some new clothes (not something we love doing, but LATAM lost our bags for 4 days…). Unfortunately even getting out of Santiago was a dodgy affair – the Bus Terminal for southern buses (Terminal Sur) is in a renowned bad neighborhood, with poor security around the terminal. Get out of your taxi and get in the terminal ASAP was the advice we read, and it worked out fine. It is not advised to walk to this terminal, especially in the evening!

    Where next: From Santiago down into Patagonia, we would advise two main routes: you can either go down through Chile and back up through Argentina, or travel right to the bottom and make your way back up, crossing the borders as you need (or vice versa). We’ll put a bit more detail in another post, but either is manageable and gives you opportunities to get plenty of walking in! From Patagonia – just don’t forget that it is a huge continent. Fitting everything in is a tough ask. Chile is long, Argentina is long and wide – so hitting the key spots in both would take a long time, on a lot of buses. We nearly spent three months just across the two countries, and didn’t see any of central Argentina.

    From either Argentina or Chile, you can cross over into Bolivia, then through to Peru then Ecuador and Colombia pretty smoothly. This route works both ways – starting in Colombia and working your way down, although in that case you’re working from cheapest to most expensive countries – so keep that in mind on your budgeting!

    The elephant in the room: we’ve missed a big contender. We are not travelling through Paraguay, Uruguay, Venezuela or Brazil. The former two are cited to be quite similar to Argentina, in culture and price. Venezuela is not a very safe place to travel, so it’s off the list! As for Brazil – we would love to, but it is just so massive. We’ve heard it is a cheap place to travel, but is intimidating in its enormity (and neither of us speak a word of Portuguese!). We decided to not bite off more than we could chew – and one Brazilian chap that we met confirmed our suspicions by saying we’d need at least two months in Brazil. However, we did do some research: all the potential routes mentioned above are in the maps below.

    Peep where we took this screenshot. See the two starting locations for Patagonia ($$$$), vs. starting in Colombia ($). The following maps are annotated by starting in BA or Santiago, but run in a single direction, so starting in Colombia & going in reverse works too!
    Starting with Patagonia, then moving up through either northern Argentina or Chile to move into Bolivia. This misses east Argentina, and all of Brazil (Portuguese is scary!)
    Starting with Patagonia, then moving up through Argentina into Brazil. Hitting the top of Chile and Argentina becomes a bit tough.
    A Few Extra Thoughts and Considerations

    Even though Santiago didn’t work out the way we hoped, there were a few things that didn’t surprise us (thanks to a combination of previous experiences and research) that are pretty key elements of travelling to South America. Some of the points below might give you an insight into some of our decision making as our trip goes on.

    • Travel time – the continent is huge, the Andes are hard to cross (if you’re going over the mountains, your bus will not be on time!).
    • Spanish – there is very little English spoken, even in some touristic areas! Get practicing early, talk to yourself if you don’t have a buddy, and consume lots of audio content for listening practice!
    • Spanish – the Chilean accent and vocabulary are crazy, so if you start there prepare to say ¿que? a lot. The variations in accent across countries can also throw you – the Argentinian ‘sh’ noise for a normal ‘j’ or ‘y’ was confusing as hell for us.
    • Brazil – it is enormous, and they speak Portuguese, not Spanish! We think we’ll return one day, but for now it was too complicated to include – so don’t expect any Brazil advice, sorry (for now)!
    • Danger – safety is not assured anywhere in the world, but we’ve always felt pretty safe in places in our travels. However South American countries tend to see more unrest than, for example, South East Asia. Be sensible, read reviews and message your accommodation in new towns, and always trust your gut. If it doesn’t feel safe to you, it’s probably not!
    • Age group – we’re in our late 20s, and so are most of the people that we meet. The higher price and higher danger probably contribute to this, but it is not the same very youthful age group as South East Asia.
    • Seasons – Chile and Argentina are sub tropical and so align with Southern Hemisphere seasons – Dec – Mar Summer, Jun – Aug winter. This is super important to consider if you want to visit regions of Patagonia, because it is very far south – even if you’re there in summer, you can get snow, and the shoulder seasons can be rough. The dry regions of Central South America follow the wet-dry seasons (and it’s always hot and humid in the Amazon!).
      • Bolivia & Peru dry season: April – October
      • Ecuador dry season: June – September
      • Colombia dry season: December – March, July – August

    So… is it living up to expectations?

    Yes yes, and yes again. Not every day is amazing, or goes the way we plan, but we’re making sure to soak up every moment. It’s taken us nearly three months to get around to working on this blog, but that just means that every post is a chance to reflect and do a little more processing, to take a moment to go ‘oh wow, that really happened’. We hope you’ll enjoying these ‘ah-ha’ moments with us. Catch you on the next one!

    Keep it Short & Sweet:

    Why (or why not) South America?

    • The Andes – walkies, walkies walkies.
    • The Amazon – jungle walkies & biodiversity
    • The Prices – cheap-ish, but caters for many budget types.
    • The Culture – a hospitable melting pot of Pre-Incan to post-colonial mindsets.
    • The Food – gems to be found, but few and far between..

    What does a year of travel look like?

    • Budgeting – it doesn’t have to be expensive, but it doesn’t have to be cheap. Think locations, seasons, activities.
    • Planning – can you pick a focus to help guide your travels?
    • Packing – you will overdo it! Part of the process is detaching (so maybe don’t bring your favourite handmade sweater).

    Where do you begin?

    • Santiago de Chile – but get out of there, fast!
    • For Patagonia – border hopping or down through Chile, up through Argentina.
    • For the continent – Patagonia first, Colombia last (cheap to expensive); or vice versa if you can plan that well!

    Extra Considerations:

    • Time – the continent is huge, the Andes are hard to cross.
    • Learn some Spanish – very little English is spoken!
    • Danger – it’s not unsafe, but it’s not the most stable place in the world.
    • Age group – more late 20s, rather than early.
    • Seasons vary across every country.

    If you found this post helpful and have any questions about this or any of our other blog posts, then feel free to contact us!