Tag: Argentina

  • An Essential Guide To Hiking in Northern Argetina: Tilcara-Calilegua Traverse (4 days)

    An Essential Guide To Hiking in Northern Argetina: Tilcara-Calilegua Traverse (4 days)

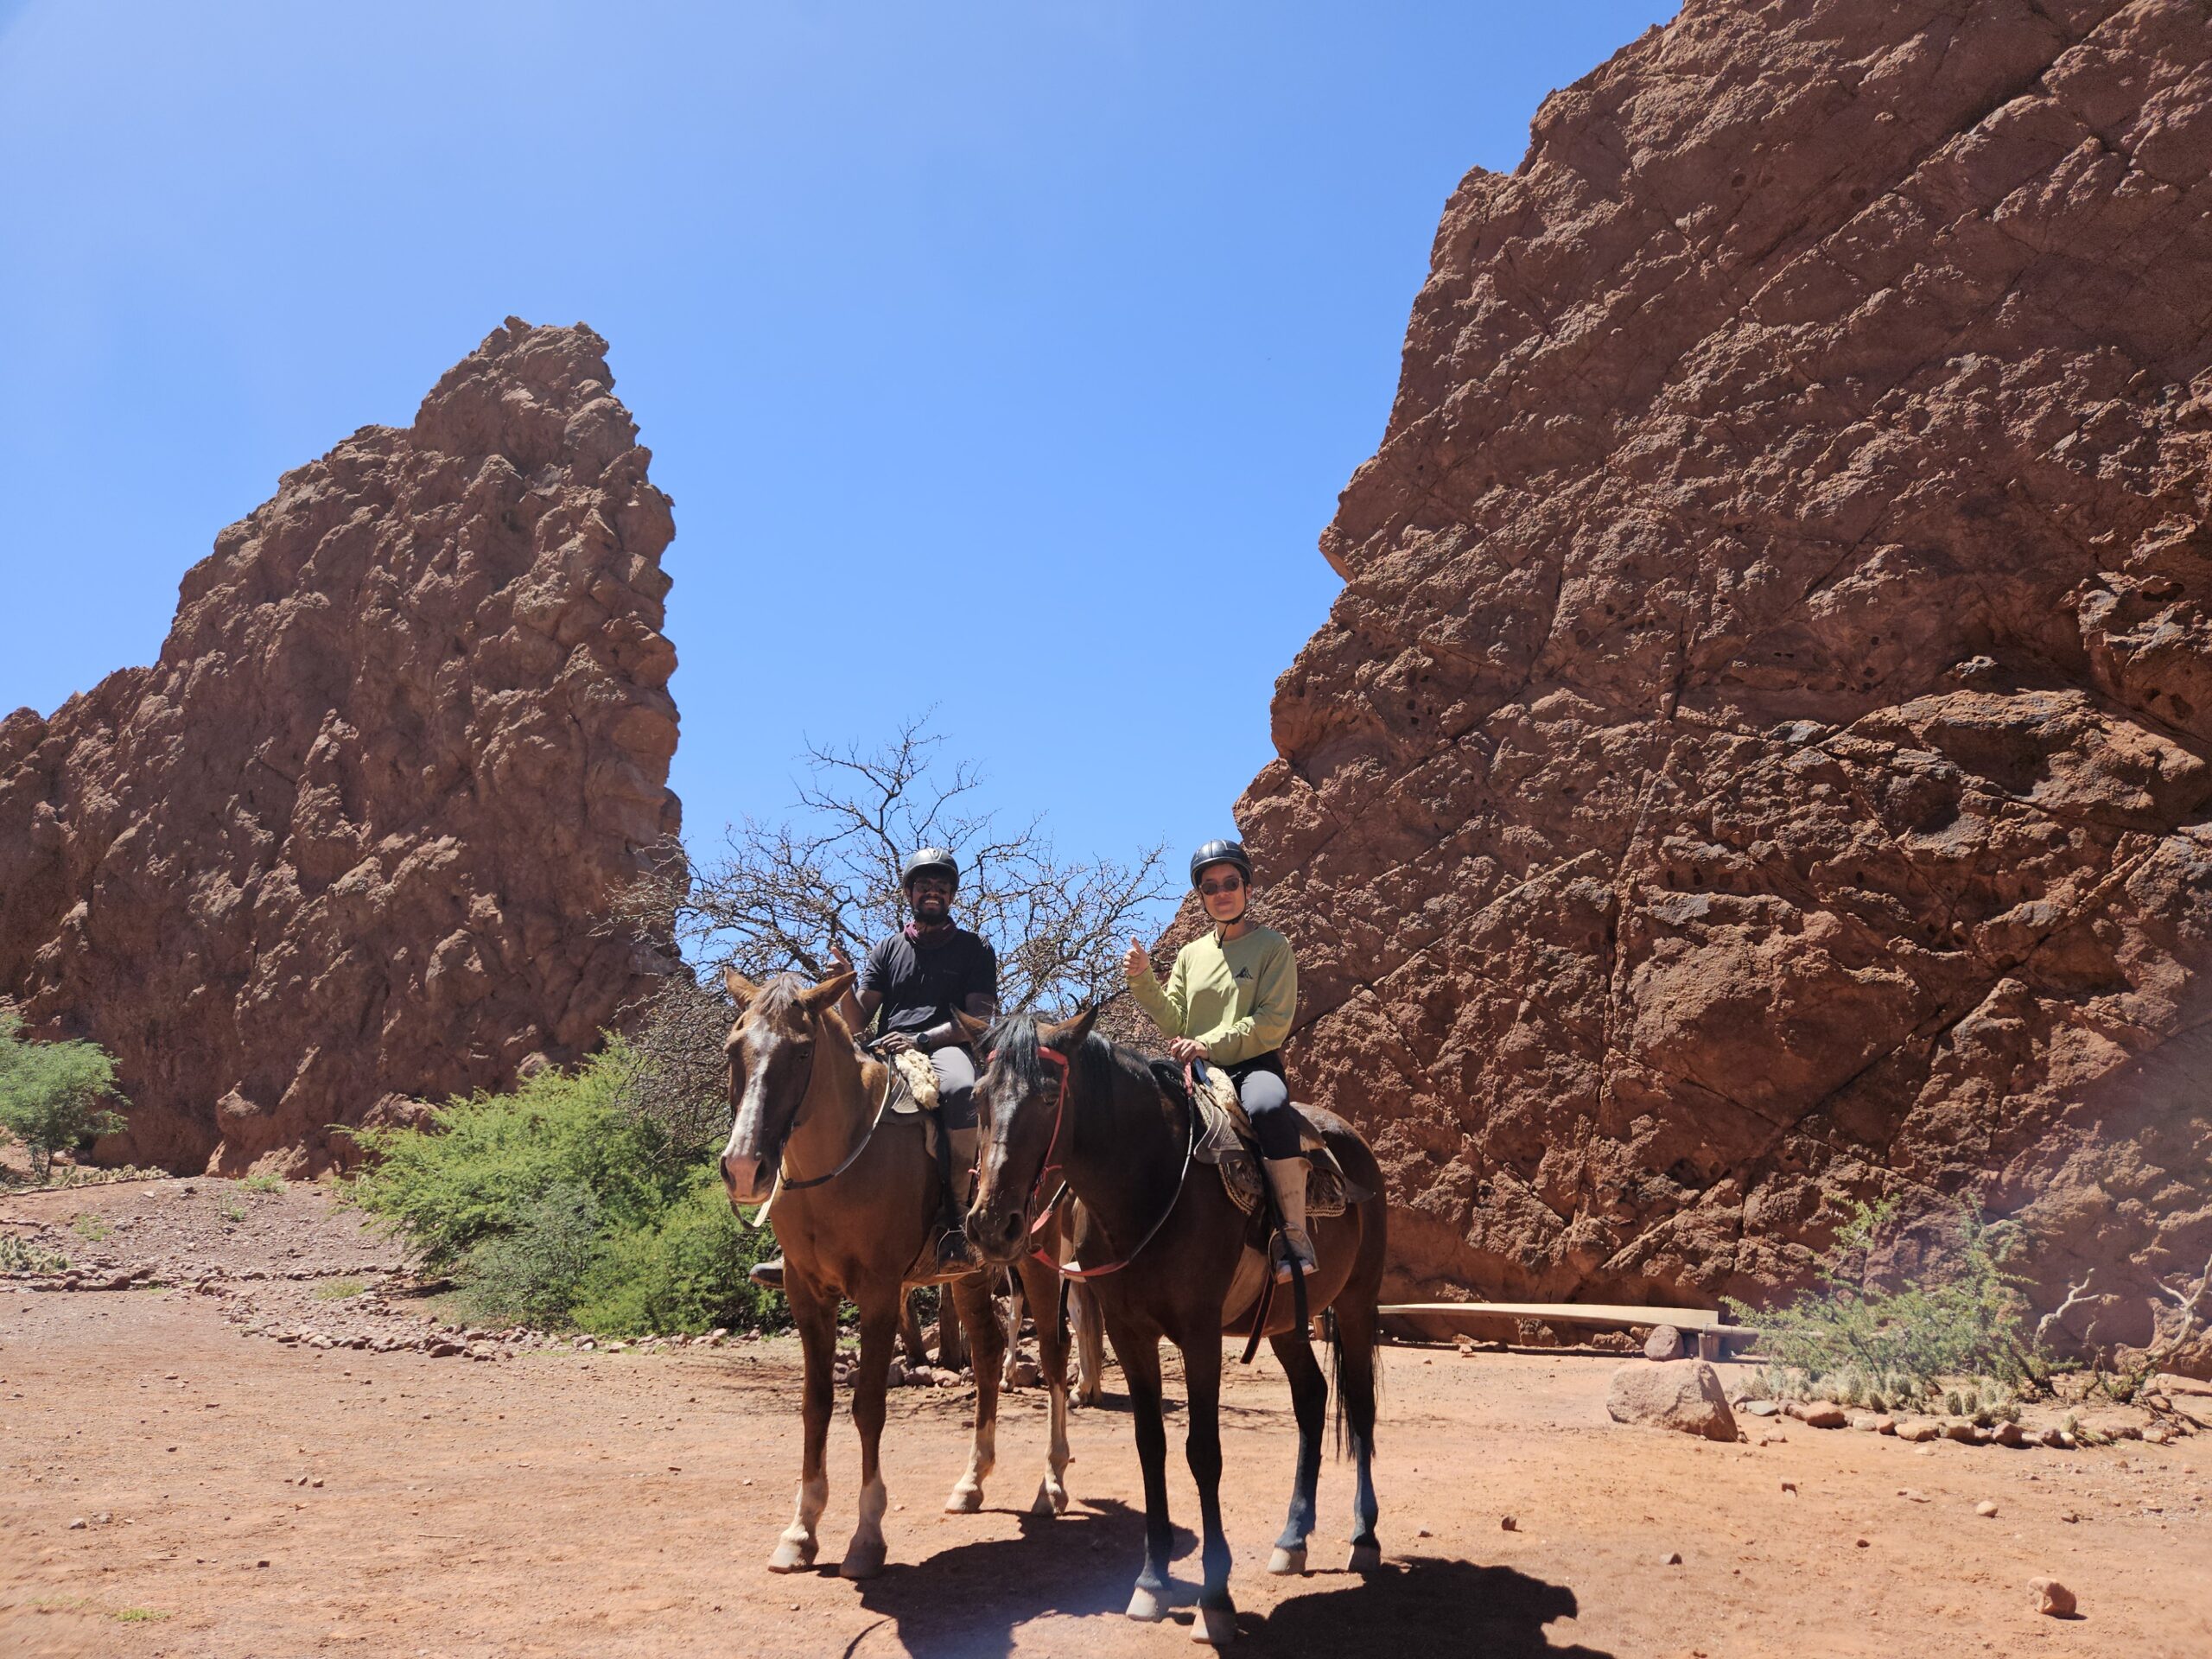
    This walk was a lesson in “if you’re willing to wing it a bit, it may just surprise you”. The Tilcara Traverse was a trail we picked based on a hasty search of Wikiloc, after a hot minute of deprivation from trekking (okay it was maybe three weeks… but it felt like months since Patagonia!). We weren’t certain what the hiking would look like in Bolivia, so we were willing to try something out before crossing the border. 

    We knew that we were going to be walking on paths less trodden by tourists, as all of the recommendations were by locals with local guides (and there were no blog posts at all!), but the kind contributors to Wikiloc had left great detail. The paths would still be well trodden, as the route we were going to take is one used by the people who live in the mountains – the range is dotted with pueblitos, so they need ways to connect to their neighbours, and to the roads for supplies. While the crossing from Tilcara to Calilegua is one of the most direct ways across the range, there are plenty of small trails that veer off to other villages and individual homes along the way. It’s an insight into a totally unique way of life in a really special part of the world; being able to see it first hand is a true privilege.

    It was also technically the ‘low’ season for this part of Argentina – being so far north, the summer/winter seasons are more like wet/dry, and of course hiking in the wet season is never ideal! 

    Click here to take yourself to short and sweet where we summarize this blog post.

    Tell me Everything

    Because the trail runs between villages, and actually amongst a lot of private land, the trek is a homestay to homestay number. We camped nights 1 & 3, and stayed in beds on night 2 (the weather was rubbish and the price was great… who were we to say no?), but even on the nights we camped, we were on someone’s property and were able to use a flushing (!) toilet and a makeshift shower. The relevant people can be contacted on WhatsApp before; this is most important for night one as the Yuto Pampa is not a village, but is a loose collection of houses – other homestays may be in the area but it’s not clear.

    Our original plan was to hike from Tilcara to Molulo, then return by the same route to Tilcara – because the trip back to Tilcara via road is so convoluted, and there are so many buses to catch, we were a little hesitant to waste a day or two travelling back around when we wanted to get to Bolivia (read: had meant to be in Bolivia two weeks prior…). However, the first two days were so spectacular (and we had descended SO much), that we decided to continue in the spirit of ‘just wing it’, and figure out the buses as we went along. And well… read on to see how that went!

    Day 1: Tilcara to Yuto Pampa (7-9hrs)

    It was not a good start. Our hostel host had organised a taxi pickup at 8am to the trailhead, which is at Casa Colorada, with an agreed price of 35000ARS – which was on the limit of what we were willing to pay for a 50 minute taxi. Halfway through breakfast our host burst in to inform us that the taxi was actually only going to take us to La Garganta del Diablo for 35K (a 30 minute drive, but the day before we’d walked it in one hour!) – and if we wanted to go to Casa Colorada, it was dependent on the ‘condition of the road’ (the weather had been perfect) and was going to cost us 50K! Clocking out at nearly 75NZD just to start our hike was an absolute no-go for us, and we were pretty upset as we felt like our host had been untruthful and it was feeling really, really scammy. We told him we couldn’t catch a taxi for that much and he got pretty mad – in Spanish, so unintelligible to us – and pretty much stormed out of the dining area while saying we had to follow up our end and take the taxi regardless of the cost.

    That was a pretty bad vibe – we had been planning to leave our spare kit at the hostel, but we really couldn’t afford to take this taxi, and we didn’t want to leave our stuff in the lap of someone who was potentially going to be looking for revenge. When the taxi arrived, we had a conversation about the mishap – the driver was very amicable, and relaxed about letting the job go. Nevertheless, with a few angry WhatsApp messages waiting on the phone, we shot out the door with all our things and spent the next 30 minutes finding a new hostel to book a room post-hike to secure our bag storage.

    In hindsight – we do think it was a genuine mistake by the host, and not that he was in kahoots with the taxi driver – partially because we walked past the taxi stand on the way out and checked their (always inflated) prices. The language barrier is always tough with this kind of thing. We spent the rest of the day to-ing and fro-ing – we were in the right, we were in the wrong. But at the end of the day it was done, and we had an extra 600m elevation and 6.5km to tackle!

    From Tilcara village, follow the track to La Garganta del Diablo. Without packs, this takes an hour – with packs and a burning sense of injustice, it also takes an hour! Continue along the road for another hour, climbing steadily, until you reach Casa Colorada. When we passed by, it seemed deserted; we had contacted them on WhatsApp for room prices out of curiosity, but there was no response at all, so we aren’t sure what the deal is there. Either way, it’s the last place you’ll find real shade the rest of the climb – so take a break!

    The road then continues on vaguely, but eventually peters out and becomes a normal track. The trail really just is switchbacks, cactus, and views over the valley until you hit the saddle. We were incredibly lucky with a cloudless stunner of a day but with a decent breeze, so we never got too hot. At beginning of the saddle, there’s a small river crossing via rock bridge, and then you enter a flatter valley filled with flowers and lush grass that rises to the maximum point of the hike, before descending somewhat to Yuko Pampa and El Cokena Refugio for the night.

    We would love to tell you that the views are gorgeous, that the descent into the pampa is magnificent – and while we’re sure it is, we have no clue personally, as the weather completely clouded over for us before we even reached the high point! We reached the refugio damp from cloud, rushing from impending rain, and feeling a little off from the altitude. It’s an important point to consider – even if you start from Casa Colorada, it’s a massive gain, and you’ll be sleeping quite high. We’d messaged El Cokena’s owner in advance, so they knew that we had our own gear – we guess that was why there was nobody there to greet us, and why the dorm rooms were firmly closed & locked. They don’t seem to live in or near the refugio (again, visibility was terrible, so we could have missed something), but there was a flushing toilet (that is, a toilet designed to flush, with big buckets of water to flush it yourself! No plumbing needed) and shower under a concrete shelter which were open to use. We had a bathroom, running water, and a flat space to pitch up – what else could you want!

    With the altitude playing tricks on our appetite, it was cookies with nutella and peanut butter for dinner, and an early night.

    Day 2: Yuto Pampa to Molulo (5-7 hrs)

    Day 2 also started a little miserable – the cloud hadn’t cleared, so we woke up fairly damp and still without a view. The altitude sickness was still playing on us, and who wants to cook breakfast in misty rain, so it was a quick pack down and off we went. The track continues to descend into a valley – and with this descent, we finally got some clearing clouds and some very cool sights of red clay against green hills, with horses and cattle peppering the hills. Down it goes (and down slips the hiker!) until the river that carves out the valley, and then it’s back up the other side. The track is not entirely clear in this section due to the livestock, so check your GPS regularly. The trail then winds around the tops of this part of the range for some time, which we think would give incredible views on a clear day – maybe even all the way to the yungas forest from certain points. We were lucky enough to see sporadic vistas of our close surroundings – little hamlets would appear randomly at the base of the ridge we were walking; peaks would suddenly loom out from across the valley; sunlight would peek through to warm and dry us off for a few minutes. Not quite knowing what we were walking through really added a layer of mystery to the journey. 

    Yea, couldn’t see nothing!!!!!

    The track eventually leads you into the village of Molulo. Here, there is a school and a little hospital, and a collection of houses and two or three homestays to pick from. The popular refugio in the pueblo is Refugio Lo de Lili (according to Wikiloc), but we found an alternative called ‘Mi Esperanza’ – and we couldn’t have been happier with our choice! The area is generally quite muddy, there’s not a lot of grass, plus we’d been walking in rain all day, so we elected to splurge for the night on a dorm bed each – 15K ARS each, about 21NZD. The family we stayed with were so kind and welcoming – plenty of chooks, a couple of friendly dogs and a tiny wee puppy wandered the yard, and along with Soledad, our host, there were four relatives of varying ages. They were all a little shy (except for the youngest – she was so curious, of course!), but we felt very welcome. The accommodation was basic, a mixture of traditional adobe and concrete, but so comfortable. Another ‘flushing’ toilet, too! They gave us some space once we were settled in by heading out (to a market, or a friend’s place – we weren’t sure), so we cleaned up and relaxed in the common area, had a hot drink and finally got set on cooking a hot meal!

    By the time our host Sole and her family returned, we were feeling pretty chuffed with our decisions and comfortable and warm inside. We knew a good night’s rest was just around the corner. We also knew that if we followed our original plan of an out-and-back, we were going to spend tomorrow hiking up all the downhill we’d just trekked down… so we decided to continue down the trail to Calilegua. We toyed with the idea of walking all the way out the next day – but Sole laughed at the idea, telling us that while she could walk all the way out in one day if she needed to, there was no way that us gringos would match her mountain pace! Our plan the next day would be to head to the next pueblo of San Lucas, and stay the night at Sole’s recommendation of Refugio Montana Ramona. 

    Day 3 :Mololu to San Lucas (6-8 hrs)

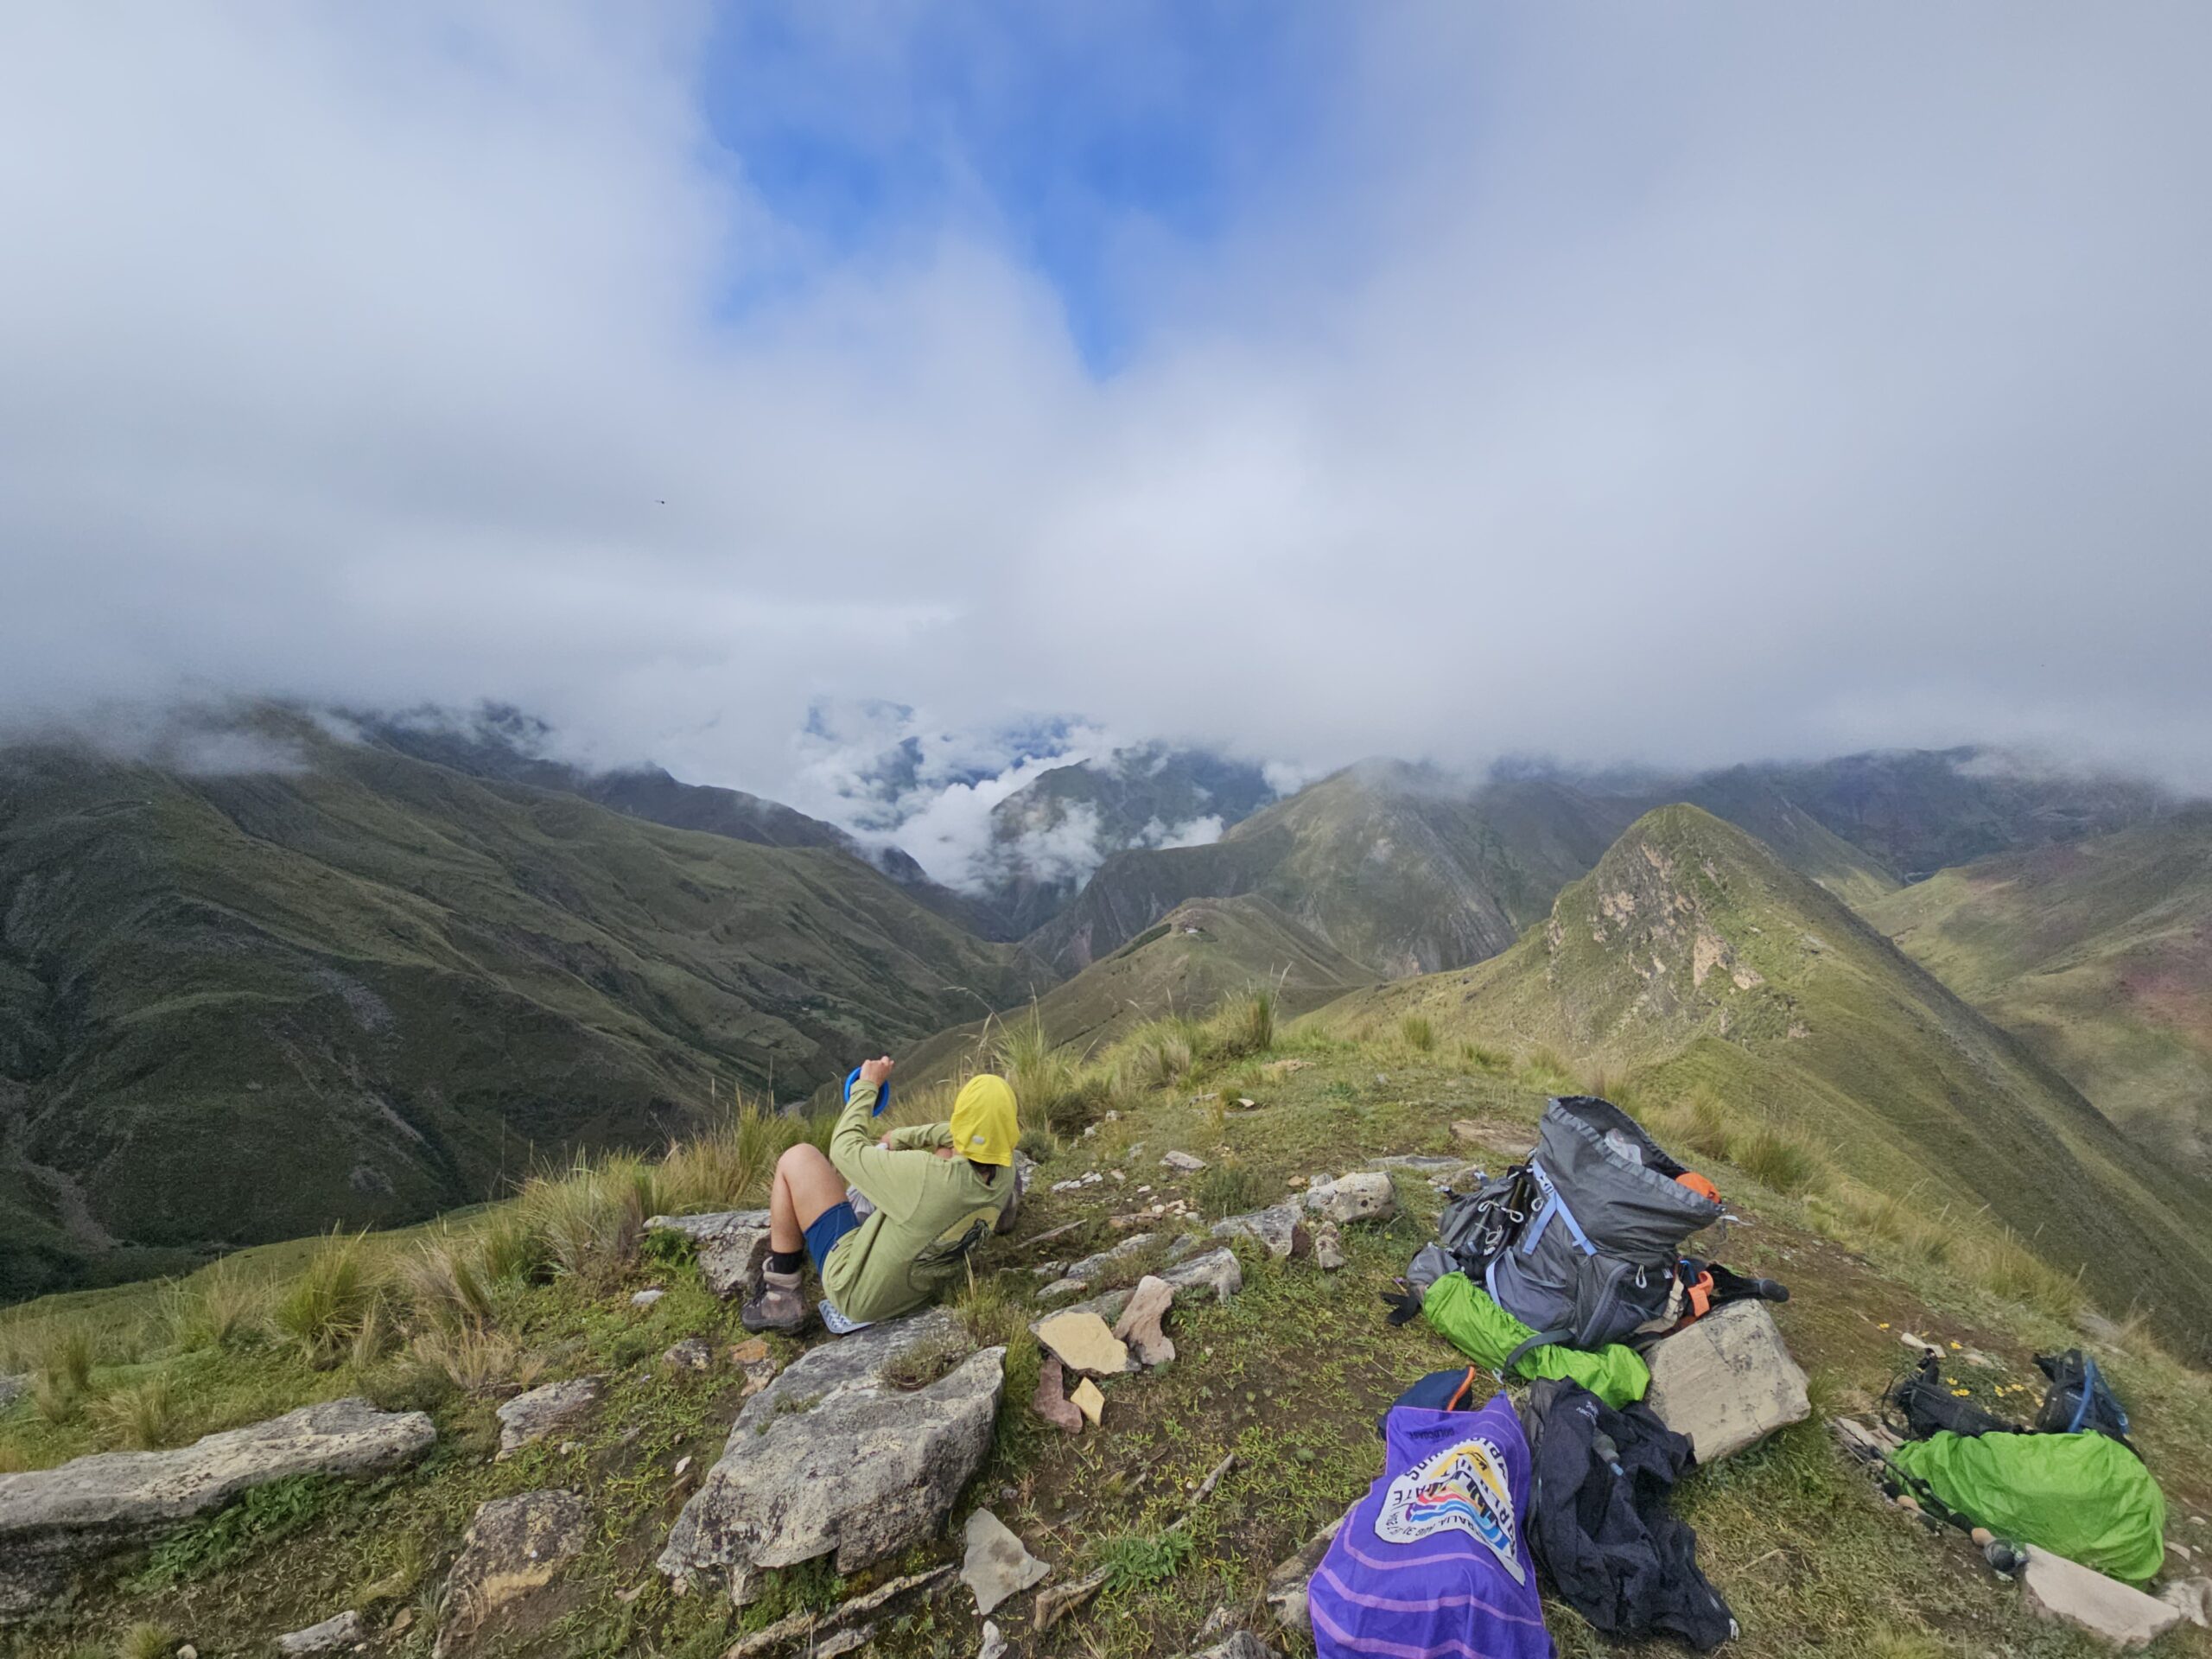
    We woke up early, (just in case we made good time and could make it all the way to the road) to clear skies on day 3. With a quick breakfast we began the trek down to San Lucas. The first part of the day was unbelievable – Molulo sits tight up against the hills facing east, but the refugio itself was tucked in behind some trees, so we couldn’t see the sun rising. However, once we were out of the village and onto the trail – the vistas were insane. We finally got the full picture of where we were walking. The track is reasonably flat to begin with, cut into the side of a hill. An alternative track runs along the ridgeline above you, if you want to start the day with an ascent to see a different view, but there are plenty coming. Our initial views were just across hills of alpine grass, but as we continued we got an idea of where we’d come from – even higher hills – and where we were going. The yungas were covered in cloud, as rainforest is so commonly, but the sights of the yellow-green of the pampas graduating into verdant forest, which quickly disappears into a blanket of cloud as far as the eye can see – well, it’s a pretty humbling perspective. 

    The track follows the sights – the rough alpine plants were replaced by bushes, then eventually trees began to surround us, and suddenly we were back amongst humid clouds. The altitude is still reasonable at this point, so it’s not hot – yet. The trail is pretty well worn and clear for this section, and the whole section is mostly downhill – but it still requires concentration, as it can get very, very slippery, especially on sections where the red clay is the prominent. There are a few small uphill sections, and throughout the trail enjoy the variety and beauty of the jungle growths.

    Walking into Refugio Montana Ramona

    Coming into San Lucas, the track widened out into a grassy area, with horses popping in and out of the bushes. Refugio Montana Ramona is well signposted and is the first dwelling in the village proper. The Refugio is run by two kindly old sisters; we arrived as they were doing some building work in one of their rooms – the language barrier meant we didn’t quite know what, or why, but we were eventually able to communicate that we just wanted a spot to pitch our tent, and we didn’t need food – it seemed like they weren’t keen to take dorm visitors and didn’t have the time to ‘host’ properly. Once they realised we weren’t going to be a hassle, they were happy for us to hang out. This refugio was so lovely. As it’s the first property in the village, it sits at the top of the hill with a great view of the valley. There’s an outdoor undercover space to hang out in, with a big table to sit and cook and eat. There’s only enough lawn to pitch one or two tents, but as we were the only ones there, it wasn’t a problem. And there was a proper flushing toilet, and a hot shower if you were feeling fancy! There are lots of other homestays in San Lucas, as it’s a reasonably big mountain village, but if you can get a spot at Ramona we would highly recommend it. 

    We had arrived quite early, so we spent most of the afternoon lounging, drying off our gear, playing with the kittens and the dog (or watching them get uncomfortably close to our tent), and generally enjoying life. Eventually the views turned to rain for the evening, so we were very happy with some shelter from the rain.

    Day 4: San Lucas to Pena Alta (2.5-4hrs)

    We woke up before sunrise to get on our way. We’d done some research before we left (and hence decided to only go halfway-and-back…), and our hosts confirmed that there was only one bus from the trailhead to Libertador General San Martin, and it came at 4pm. From Libertador General San Martin, we’d have to catch another bus to San Pedro de Jujuy. Then another to San Salvador de Jujuy. Then another to Tilcara. A logistical nightmare! But we were filled with hope – for hitchhiking is common enough in Argentina; all we needed was someone to be driving along the road.

    So we were off early, slipping and sliding through the clay tracks of San Lucas, in the morning mist. The track is a little convoluted through the town as there are lots of houses and connecting trails, but once you’re out it’s very straightforward to the road. The track descends quite a lot to start, down into a ravine. The track then follows the wall of the ravine, which is pretty spectacular, occasionally passing over or through connecting waterfalls. The descent is slow along the ravine, until it’s not! But this is the final section – a drop down to the water, across a bridge, and then back up 100m or so until the trailhead. By this time you will be sweaty – the altitude isn’t enough to stop the heat and humidity, and it’s really mosquito central. Have your bug spray ready if you want to stop. 

    We really hustled through this section, and took a short break at the road before beginning to walk towards San Francisco – the closest town about 7km away – as we thought that getting a hitch might be a bit more likely from there. Luckily, we weren’t walking for 20 minutes before a ute stopped for us – a friendly young Argentinian guy who was happy to take us to San Francisco, although his plan was to head to Termas del Rio Jordan, a famous thermal spot on the river, to pick up his friends who were kayaking down towards there. We thought that sounded ideal – a touristic area was way more likely to have people coming and going, and our chances of snagging a ride would be way better. Our new friend was munching on coca the whole way, and was happy to practice his English with us, so we had a good yarn before he dropped us off at Cañon de los Loros – a little further than he’d meant to go, as he needed to find a local guide to take him down to the termas. There were plenty of people at the Canyon, so we were hopeful, but all of them were tour groups who were just starting their canyoning tours, and then continuing onto San Francisco – so, the wrong way! 

    We hung around for 20 minutes or so, before Awal suggested continuing walking away from the groups of people. We looked a little out of place, there was a bit of traffic around, and there was a little bit of a mind game behind it, too. Do you think you’re more likely to give someone a hitch if you see them struggling? Looking miserable? Or just hanging out at a touristy area, looking hopeful and bright… Awal thinks the former is a better play, so we got our packs on and started walking (again) along the road. Now, it was really just luck, not strategy, because the first car drove past us while we were walking without a second glance, but the next car – well, it was our saviour! We were picked up by a super kind Argentinian couple from BA, who were on a birthday holiday in the north. We spent the whole drive out of Calilegua yarning – in broken Spanish, with a bit of Google Translate thrown in, but they were so interested, kind, and welcoming to their country. AND in a stroke of complete luck, they were staying in San Salvador – so they offered to drive us all the way there, directly to the bus station. We were totally overwhelmed with kindness – and the pure luck of being able to get back to Tilcara in a single day. 

    Lovely Argentinean couple that gave us a 4hr hitch

    This was one of those hikes that totally, unexpectedly worked in our favour. The views were sporadic but it meant they were so much more memorable. The locals were kind, helpful and welcoming – not just our hosts, but the people that we met on the trails who were going about their day to day. And of course, without the kindness of friends who offered us a ride all the way to San Salvador (4 hour drive), our experience would have been completely different. We finished up in Tilcara with warm hearts and full of gratitude.

    Keep it Short and Sweet:

    Climate: Wet in summer – December to March ; dry in winter – June to August

    Total Distance: 65km

    Elevation: 4500m up and 5780m down

    Description: A one way; homestay-to-homestay (book in advance via WhatsApp) track that traverses a mountain range. Walk between small mountain villages in alpine grasses into a humid jungle. If it’s not overcast, there should be fantastic views from the alpine hills across the jungle plains.

    Track: Non-technical, mostly well trodden, not always well marked.

    Facilities: Homestays with dorms or a space to camp; flushing toilets; makeshift shower; running water (filter needed); food available if you book in advance

    Getting there: The track can start from the town of Tilcara. The ‘road’ ends at Casa Colorada, so it’s possible to take a taxi if the conditions are good enough (50000ARS) or walk there from the town (extra 2-3 hours). 

    Day 1: Tilcara -> Yuto Pampa. Steep uphill most of the way, with views of Tilcara and the surroundings in the valley. At the ridge, take in the views then continue to descend into the pampas. The homestay we contacted didn’t have the bunkroom open, I believe because we had our own tent. The toilet and a makeshift shower were accessible. You will have passed through some substantial altitude, so increase your water intake and be sure to eat well. Homestay: El Cokena – Marcela (+54 9 388 477 9368)

    Day 2: Yuto Pampa – Molulo. Descend into the valley, cross the river, then ascend the other side. The track can get a little unclear in patches after this, so check your GPS to eventually descend into… and stay at the home of Sole Martines (+54 9 388 462 4023), Refugio Mi Esperanza

    Day 3: Molulo -> San Lucas. Continue around the alpine ridges for a few hours before descending into the jungle. It should still be cool enough that there aren’t any mosquitos. Stay at one of the homestays in San Lucas – we camped at Refugio MontaNa Ramona, which is the first refugio in the village, without a booking. 

    Day 4: San Lucas -> PeNa Alta (trailhead). Descend for about 4 hours, mostly alongside the river, in a ravine, until reaching the road at a point called PeNa Alta. You’ll be watching out for mosquitos by the end of this track – keep your repellent handy.

    Getting out: Is complicated! The range you’ve just walked over is not passable, so you have to drive all the way back round (or double your distance – hardcore). The bus only runs once a day from the trailhead to Libertador General San Martin at 4pm – 5pm. From there, take separate buses to San Pedro de Jujuy, onwards to San Salvador de Jujuy, then finally to Tilcara. Factor in an extra night to travel back. Agencies may offer private transport if you’re willing to pay. We were able to get a hitch hike straight back to San Salvador – which was incredibly lucky, as we only had to catch one bus.

  • Border Crossing From Argentina into Bolivia & The Wild West of Tupiza: Everything you Need to Know!

    Border Crossing From Argentina into Bolivia & The Wild West of Tupiza: Everything you Need to Know!

    From Humahuaca, we caught the night bus to La Quiaca, which is the border town in Argentina to Bolivia. The night bus arrived at about 7am in La Quiaca, which is when the border opens. We walked around 15 minutes through La Quiaca to the border, as there were two of us and it didn’t feel particularly unsafe (contrary to many things that we’d read online). What happened next… was the quickest border crossing we’ve ever done. There was nobody else approaching the border from the Argentinian side, so we were stamped into no-mans-land within a minute. Then we crossed the bridge toward the Bolivian side only to see a line of people waiting outside – as Bolivia is an hour behind Argentina, the office wasn’t open yet! But when we asked one of the security guards what to do, he encouraged us to just pop our heads in – when we did, a bored-looking officer took our passports and disappeared for another minute, came back with our Bolivian immigration slip (DO NOT LOSE) and waved us on our way to Villazon. The line waiting outside the Bolivian immigration office was to exit Bolivia.

    Click here to take yourself to short and sweet where we summarize this blog post.

    Tell Me Everything:

    Overall the border crossing genuinely took about five minutes – and we ‘gained’ an hour of time, just crossing the border. We also found that the exchange houses at the border actually offered a reasonable rate – or, perhaps that with the Blue Dollar rate the difference was not going to bother us. However, we did get played for buying the first SIM card we found – 50 bolivianos for the SIM itself! When we bought a second in Tupiza, it was only 20BOB. But with our access to the internet restored, we walked to the bus terminal – again, the town felt safe and we were comfortable to walk rather than take a taxi, and it took about 30 minutes.

    From the Villazon you have a few options for a direct bus, depending on what you want to do. 

    • Tupiza, 4 hours: we took the bus directly here, to settle into Bolivian travel and then start our tour of the Salt Flats. However, by heading immediately west, we missed out on…
    • Tarija, 8 hours: we learned afterwards about this stunning town at moderate altitude in Bolivia. Tarija has plenty of swimming spots and beautiful architecture to occupy you inside and around the town. Besides, it is part of Bolivia’s wine region – a drawcard for many! This is a location of the beaten track but still with plenty to do. If you have the time to explore, we’d suggest this as a stop in your route. 
    • Uyuni, 8? Hours: Salt Flats tours are a day shorter from Uyuni, and with many more operators driving competition, your overall spend can drop decently. However, unless you’re really short on time we’d definitely recommend visiting one of the above options and potentially taking a tour from there!
    • There are other options further afield – Potosí, or Sucre, though it’s most efficient to tour the Salt Flats before exploring the rest of Bolivia – unless you’re trying to wait for the mirror effects of the wet season (Jan – Mar).

    Tupiza:

    We didn’t really have many conversations in Villazon, so it wasn’t until we arrived in Tupiza that we began to get a feel for Bolivia. I’ve read quite a few blogs which comment on the reserved nature of Bolivianos – especially compared to the hospitality found across the rest of South America. We found that this was so far from the truth. 

    Fewer tourists in Tupiza mean that the locals are much more interested in your story – I had a lovely conversation with a couple of ladies selling tamales, who were confused (yet excited) as to what I was doing in their little town. 

    So what were we doing in Tupiza? Primarily, using it as the third (least popular) location to start a tour of the Uyuni Salt Flats & surrounds. The tours from Tupiza are a day longer than those starting in San Pedro (Chile) or Uyuni, so they’re a little pricier. However, we liked the extra day, although there is a lot of driving, it’s a nice way to meet people and it was fairly quiet, especially compared to the 3rd and 4th days where we were really in the same crowds as the normal tours. There is a lot of sitting and driving and chatting/listening to music/napping, so this lazier way of travelling may not be for you.  We had a really fun group (luck of the draw) and the last day you take the salt flats tour, which is the really awesome part. We went with tupiza tours – who were fine, but we wouldn’t recommend them. Our guide was awesome and the food was tasty, but there wasn’t enough for any of the meals – your own snacks are absolutely required. We met others that were on other tours and they had no complaints about the amount of food served. So do some research before you book!

    However, Tupiza absolutely has its own charm that is worth exploring. There’s a small mercado central to pick up produce, and the streets around it will be filled with vendors too, or head to the Mercado Campesino for more variety. 

    The surroundings of Tupiza are also worth your while. The town is famous for its similarity to the Hollywood depictions of the Wild West – think cactus filled desert, craggy rocks, reddened soils. Seriously! It’s some insane landscape. It’s lower altitude that a number of other spots in Bolivia, but still somewhat arid, so it’s stinking hot in the middle of the day with strong sun and lost of dust, but we still had some mozzies in our room at night. 

    To enjoy the desert landscapes, you can explore on foot – a real all-day excursion. GPS, water and sunblock are all essentials! Be aware of trail dogs, some of whom can be aggressive. Keep some rocks on hand to scare them off. Walking from town is viable, but you can also take a tuk-tuk to reduce the distance.

    We chose to explore Tupiza in the most fitting way possible – on horseback! There were options for 3, 5 and 7 hour tours, depending on what features you wanted to visit – we went with 5, and could hardly walk the next day… but it was so worth it! Although we both have next to no experience on horseback, we felt super comfortable with our guide, the horses looked happy, and the whole stable group were so friendly. And we kind of felt like cowboys – we even got to ride the horses at a trot, which is HILARIOUS for uncoordinated first timers. We went with Club Ecuestre Amazonas – highly recommended.  Get in touch with them on whatsapp to make a booking.

    The main features to visit in the desert are:

    • Canon del Duende – a narrow pass which opens up into a canyon with some spectacular rock formations. Best done on horseback as it is further away from town.
    • Puerta del Diablo & Canon del Inca – easily combined on a walk. The first is a cool looking piece of rock, and you’ll have to pass it to visit the canyon. The canyon goes on quite a way, although it starts off with a small ‘climb’ up a little rock face – and it was our last visit on our horse tour and we were feeling a little heat-strokey, so we didn’t continue on.

    This is a good thing to note though – we weren’t walking or exerting ourselves much on horseback, but by the end of the 5 hours and in the midday heat we were both feeling a little poorly – bring plenty, plenty plenty of water if you decide to go out into the desert!

    We stayed in Hostal Butch Cassidy – there are not that many hostels in Tupiza, so we mention this one because the rooms were comfortable, the breakfast was good, and it had a tidy little kitchen. We spent two nights in Tupiza, which was perfect for us. After horse riding in the morning of our full day, we lunched and rested before checking out the sunset from the Mirador Corazón de Jesus. It was an early night and an early start for the Salt Flats tour the next day!

    Keep it Short & Sweet:

    • Crossing the border from Argentina (La Quiaca) into Bolivia (Villazon) is best done early in the morning, but can be so quick and easy – depending on your passport and the requirements for a visa.
    • From Villazon, we’d suggest catching a direct bus to Tarija to explore Bolivia’s wine region and some beautiful-seeming swimming holes.
    • We caught a direct bus to Tupiza – a great place for seeing some Bolivian life off the beaten track, wild-west horse riding and launching a tour of the Salar de Uyuni.
    • Alternatively, there are direct buses to Uyuni, if you’re in a rush or aren’t interested (but we’d definitely recommend being interested!

  • Exploring Northern Argentina: Salta and Jujuy Provinces

    Exploring Northern Argentina: Salta and Jujuy Provinces

    It’s difficult to change the way one travels, as much as one may want to – old habits die hard, and our are formed from a deep-rooted need for organization and order, along with a strong sense of competition (it’s us vs. the daily budget). We are self-aware enough to realise that while on some days we can embrace ‘just going with it’, most of the time we do not. But as we reflect on our time and travels in Northern Argentina, we realise what really helped was keeping an open mind – to be more comfortable connecting through a stuttered conversation in Spanish, and a moment to take it all in.

    Tell me everything:

    As noted – the main attraction of the Salta and Jujuy provinces was the allure of revisiting Argentina at a more economical price, as our previous visits were in southern Argentina- much more on the $$$ side. We arrived in Salta on a Friday night from San Pedro de Atacama via a long bus ride through beautiful and winding mountains. In Salta, we were greeted by a lively, cheerful atmosphere. We walked from the bus terminal, down a main road into the centro historico, which also met alongside an evening craft market and a huge number of food stalls selling giant hot dogs, burgers and milanesas at thrifty wee prices. Families were out, friends were out – having been the first ‘city’ we’d visited in months (bar Santiago, which we literally breezed through), we were ready to enjoy some local comforts!

    Salta is nicknamed ‘La Linda’, the beautiful – the centro historico is well preserved, with white facades and lovely architecture perfect for photography. There are also plenty of churches to marvel at (we didn’t take a walking tour, so we don’t know why so many), so there’s a great calling for just wandering around, looking at knick knacks and shops during the day. We also love a good market – both for a good deal and to look at all the quality produce (even if we’re just going to cook a plain pasta dish – again). The mercado municipal in Salta is a great place to pick up anything you need – one thing I love about the South American markets is picking up dried herbs and spices, because you can just buy a massive bag all at once instead of the silly, tiny plastic bags they sell at the supermarkets. So much more efficient!

    Salta was also a major change in climate for us – we’d been from the wind and cold of Patagonia (even in the summer!) to having our noses dry out in Atacama, to Salta – hot late-summer days, a humid, jungle like feel and – god forbid – mosquitos in the backyard! Despite the heat, our favourite thing in the city was a sweaty hike up Cerro San Bernado. A well worn staircase will bring you from some fancy suburbs up to the summit with magnificent views across the city. You can take a cable car up to the summit if you aren’t able to walk it, and from the summit you can also catch a gondola to a neighboring peak – for even more views! Bring plenty of water in the summer – it’s a hot one.

    Now for something we haven’t covered in a while – food! After many moons of cooking and eating dinner in our hostel, we were able to get something more than just a coffee. In Salta, we had the best lunch of empanadas we’d ever thought we could find. There are lots of little spots selling empanadas, and lots of Google Maps reviews stating ‘they’re the best we had in Argentina!’. Certainly, the quality across the board is higher, but our favourite spot was called La Ollita. It’s not in the centro historico but so absolutely worth it. Not only were the empanadas fabulous value for money – so kind was the lady who took our order – patient with our poor Spanish, full of recommendations, big on smiles. We bought a dozen empanadas to share – 6 chicken, in the oven, 6 cheese, fried – all of them, to die for! We ate them in a nearby park, freshly cooked, and burnt our mouths enjoying them so much.

    Another key element in the food scene of Salta, and north Argentina in general, is the Pena. Penas are an experience, not just a restaurant, made so by the musicians who occupy the rooms every night. A talented group will be employed or contracted by the restaurant to play traditional folklore music late into the evening. Classically Argentina, penas only open late, and run late into the night. We must have left around 11 and there were still people just arriving for dinner – on a Sunday, too! We visited ‘La Casona del Molino’ for our experience – it seems to be a bit of an institution, for tourists and locals alike. We booked in advance via Whatsapp, because while you can turn up at any time, there was a line waiting for the doors to open. Once we were in, we were guided through a series of rooms to sit out the back – my impression was that you could sit anywhere, or at least that moving around was acceptable, as each of the different areas had different performers – pick your style of music, pick your seating, and have the perfect night! The food was plentiful, and good quality, and the two fullahs who performed in our section had the most stunning voices – many of the locals were singing and clapping along, but there were a few other clueless gringoes peppered about too. We ordered the parrilla for two (great value!) plus tried the Locro, a (delicious) regional stew. If you can’t make it to La Casona, or don’t want to head so far out of town (it’s very safe to walk around at night in Salta, so if you need to walk off a big meal, it’s doable!), you can try Balcarce Street for alternative penas.

    Feed at the Pena

    One night, we cooked at home, but felt like a little something extra… wandering down Avenue San Martin towards the bus terminal from the centre will offer plenty of street fast food – think fries, sandwiches, burgers, and hot dogs – in a super cheerful setting. We grabbed a (very salty) milanesa to eat for second dinner, and enjoyed watching the people go by. Just a note for where the cheap little snacks are!

    Now, getting out of Salta and around the province is a very popular trip; plenty of agencies offer day excursions, to the North, West and South. If you want to explore more of this area of Argentina, renting your own car is the best way to do it – however, we were sold on the prospect of travelling north towards Bolivia. It seemed to be a fairly blanket cost of 35000ARS pp for a full day tour – not including lunch, but including quite a lot of driving, in some cases! 

    In Salta Province, many of the pueblitos (small towns) are so popular because they are so cute – think colourful buildings, or well maintained colonial architecture, handicraft markets and real local vibes. A lovely combination of good photography ops and a real snapshot into Argentinian life. We didn’t visit any specifically, but we got some details from a local tour agency and did a little research to figure out what we thought was worth it. We think overall, a road trip through the following would serve you better – more time to pick some day hikes, and more freedom to skip the spots you find boresome! 

    To the south, the key stop is Cafayate, a wine-making town set amongst red rocks. Tours definitely include a stop at the Quebrada de Las Conchas, the Shell Canyon, to check out some fossils and rocks, but I think the itinerary has a few other spots en route – this area has a number of vistas.

    Immediately to the west of Salta is the town of Cachi – although it’s not so straightforward to get to, as there is a mountain range in between! However, day trips do still go here to see this picturesque little town and we did some reading that there is also some hiking to be found in the mountains of this area.

    Heading to the North West will take you past the Salinas Grandes – Argentina’s own salt flats. We didn’t need to take this tour, as our bus from San Pedro took us along highway 52 and straight through the middle of them! While we didn’t stop, it was a stunning sight out the window, so we think worth a visit. 

    Usually tours will loop back through the town of Purmamarca, a town known for its ‘Mountain of Seven Colours’. The valley that it’s set in is certainly beautiful (again, our bus passed through on the way to Salta), but we didn’t see it in the flesh.

    Now – we can give a little bit of personal advice on heading to the north! By this time in mid-March, we’d had nearly three weeks since our last multi-day hike – and we were itching for another way to explore the countryside. Using Wikiloc, we found a few random multiday trails, but nothing seemed particularly popular in this area – moreso because summer is the rainy season in the jungle areas. We decided to try out a trek from Tilcara, which had a handful of good reviews – a homestay-to-homestay hike, from the alpine pampas to the humid jungle. We’ll do another post on the details but – this was definitely one to remember! We had some incredible uplifting interactions with people, and a real taste of Argentinian hospitality and kindness that you may hear so much about.

    Other than a multi-day, Tilcara is popular for a short day-hike to the Gargantua del Diablo (if you read the last post, you’ll find this is a recurring theme – though this one refers to a waterfall rather than a narrow gorge!), which is a nice way to spend a morning. The entrance was 3000ARS pp. The market in Tilcara is tidy, and a great place to pick up fresh produce and see what’s up. We also found a really lovely cafe that served the most insane cakes – La Casa de Champa. We both got a full portion slice, which it turned out to be a mental amount of sugary deliciousness – we had to take the leftovers away. Their outdoor area was lovely to sit in, and we spent some time journaling here. Otherwise, Tilcara has quite a few international restaurants for such a wee town. If you’re looking for a cheap meal, Killa O Wasi serves a decent menu del dia for dinner, with basic but yummy kai. There’s a couple of other spots to check out if you want to spend more than a day here, a historical site and a cactus filled botanical garden, but we didn’t go for them.

    Tea and coffee at La Casa De Champa

    Our next stop on the trail up to Bolivia was Humahuaca, which bests Purmamarca with its Mountain of 14 Colours! We took a ‘tour’ for 15000ARS each, though the tour guide didn’t have much to say (and all of it was in Spanish – and ours was still not very good at this point!), we met our Brazilian friend Guillerme and a wonderful Argentinian couple by taking a shared van up to the site. We saw a few Vicunas on the way up (how are their eyes so large?), and the mountain itself is gorgeous and lovely to just gaze upon. It does run up to quite a high altitude, so if you decide to take the short walk to the lower viewpoint, be prepared to puff on the way up! And in another unexpected moment of kindness, on the drive back down Florian & Esteban helped us indulge in our first mate experience – kindly, not judging when we didn’t know to slurp on the straw as we finished. And while we have no frame of reference, their organic yerba was incredible and delicious and we are so grateful that on our last day in Argentina, we were able to experience such a key part of this culture!

    Photo with Florian, Esteben and Guillerme after our first mate experience

    Other than this tour, there’s not a lot to do in Humahuaca – but there’s some good cheap street food near the river, and we tried Llama Cazuela in one of the restaurants here – a traditional plate of the area. One thing that we might’ve tried if we had a little more time (or the freedom of our own car) is a tour to Inca Cueva, which is a historical site to the north of Humahuaca that involves a small amount of hiking.

    And thus ended our excursions in Argentina’s north – a part of our trip that surprised us, surprised us, and surprised us again. Everything in travel is great for different reasons, and while ‘no expectations!’ can give you a good experience, it’s the unexpected human interactions and snapshots of a whole different culture that leads to satisfaction.

    Keep it Short & Sweet:

    • Salta: Not the home of the Saltena, but certainly an excellent place to pick up a delicious Empanada, or experience local food and traditional music at a Pena. 
    • Spend a morning walking up Cerro San Bernado for some sweet views. 
    • Wander through the old town for shopping, chaos and churches galore! 
    • Pick up cheap street food along Av. San Martin. 
    • And it’s a great place to start a road trip, or take some full day tours: explore South for canyons, wine tastings and gentle hikes, West for the Salinas Grandes, or North for charming towns tucked in alongside dramatic Andean valleys. In March 2025, all of the day tours were about 35000 pp.
    • Explore the north: 
    • Tilcara offers a sweet day hike to the Gargantua del Diablo (if you read the last post, you’ll find this is a recurring theme – though this one refers to a waterfall rather than a narrow gorge!), or an extraordinary hike across the mountains, from the pampas through to the selva. Check out our next blog post for more details.
    • At Humahuaca you can jump in a 4×4 to explore Serrania de Hornocal, the mountain of 14 colours, or if you feel like a dash of history, a day tour to Inca Cueva, an old Incan site.

  • Exploring Bariloche: The four Refugio Hike and More!

    Exploring Bariloche: The four Refugio Hike and More!

    There’s no rest for those who love to hike – we had one night in a hostel in El Calafate before jumping on a plane to our final Patagonian destination: Bariloche, where warmer weather finally awaited us. In fairness, the weather was too warm – a series of wildfires had started a few hundred kilometers south of Bariloche, and for the previous few weeks the wind blowing from the south had been bringing ash and smoke into the skies. We got super lucky, and arrived as the prevailing wind turned. We had wonderful weather without a trace of the disasters further south. 

    Bariloche was the first reasonably sized town we’d been to since we left Puerto Montt. It was a bit of a shock to see so many bustling people, both locals and tourists, but overall the vibe was pretty cool – fancy chocolate shops line the main street, with stores full of Argentinian knick-knacks and anime filling the gaps. A small plaza overlooks the lake, and we arrived on a Sunday so there were plenty of locals out enjoying the sunshine, purchasing snacks and generally contributing to a sweet summer vibe.

    Bariloche was to be our last stop in Patagonia before we took a break from hiking and began to travel north towards Bolivia. We had eight days to explore the surrounding parks –  but after already spending 10 nights in the tent, we were keen to combine the hiking with some R&R. Thankfully, we spied a little B&B for a reasonable price, so the b

    Tell me everything:

    The Four Refugios Hike (well, two)

    Two days in Bariloche and we were off again, onto the popular Four Refugios hike. Of course, we weren’t staying in the refugios ($$) , but our tent (-$), although some of the refugios do have a large enough common area to accommodate campers – at least until dinner is served.

    This one didn’t go quite the way we had planned – it wasn’t just that the budget allowed us to spend less time in our tent, but that the rain forced us to cut this hike short. We spent two nights at Refugio Frey, taking a day in the sun to relax a bit, followed by one night at Refugio Jakob before the rain packed it in. The staff at Refugio Jakob strongly discouraged us from taking the route the next day to Refugio Negra (which also happened to be the most difficult section), and told us the National Park had actually closed the track for the weekend, the weather was forecast to be so bad. One of the staff described an ‘alternative’ route – that was, hiking down to the road, along it for 5km, and then back up the track to the next Refugio – totalling about 30km in the rain, with about 1000m of elevation in both directions. Once we got to the road, wet and cold, we decided it was a no-go plan. We ended up booking a last minute AirBnB within an hour’s walk of the trailhead, in the small village of Villa Nahuel Malal. Call us softies, but it ended up being the perfect little cottage – with a wee kitchen and a comfortable outdoor area – it made us feel as though we were still in the outdoors, but with the creature comforts a roof and hot water bring. Awal’s knees had started to play up with the elevation changes, so the extra days of recovery were well worth it. It does turn out that some of that ended up being beach time, because the forecasted ‘weekend storms’ never arrived! We had days of blue skies by the lake.

    The standard Four Refugios loop takes only four days. The order is Frey JakobNegraLopez. You can book at the huts online, either camping or in the refugio itself. They all have a limited number of booking slots (which is why we stayed at Frey two nights), although in the end as far as we could tell, they aren’t too worried on the number of campers who actually turn up. Please note that it snows during winter here so sometimes it is not possible to access certain huts and they are closed. Each respective website will be the best place to find the most recent information. Each refugio has a different amount you’re meant to pay to camp, though Frey was free when we were there. There are flushing toilets at all the refugios too – fancy! The refugios provide dinner & breakfast (for extra $$$), and you can buy lunch, so if you’re not inclined to bring food up the hills, you can purchase meals (and extra snacks) as needed.

    Each refugio is accessible from the road, but the track goes over mountain passes to join up to each of them. This does mean that on weekends & in general throughout the summer, they fill up, as locals can do overnighters easily. Frey is also a popular spot for climbers – which makes it extra busy!

    Getting There:

    There’s a public bus that leaves every hour from Bariloche, #55, that you can catch to “Cathedral” (ski area), which drops you at the trailhead. A Sube card is necessary, but you only need one for a group. The fee is relatively higher than others (we recall 5k ARS each), as it’s about an hour on the bus and it’s a popular tourist route both in summer and winter.

    Day 1 (~4 hours)

    Once at Cathedral, you’ll be dropped at a big parking lot. Check your GPS for the track start (or follow the line of people). It is well marked, once you find it. The track climbs steadily for about 30 minutes until you reach a highpoint over Lago Gutierrez. The track is exposed and provides gorgeous views as you walk alongside the lake. Eventually, you reach a pass, where you will turn northeast and begin to ascend again through forest – we spotted a woodpecker in this section, so keep an eye out for birdlife! Eventually, the forest clears and it becomes rocky scree and low bush again, and there’s a final ascent to Refugio Frey, which sits next to another Laguna for picturesque views.

    Note: Some people do this as a day hike, or you could do it as an overnighter loop, looping this section in with the start of day 2. The circuit goes up the first pass, and then back down to the west around Cerro Cathedral. We didn’t check out the route, but we read a few other blogs that said this path can be pretty steep and sketchy in sections – so have some good boots to keep you steady.

    Day 2: (~5 hours)

    As above, the track continues on around the laguna and up the first pass. The first uphill section is just a tough slog upward, and you eventually will arrive at a second, smaller laguna. The next section is a bit more challenging and fun – there’s a bit of boulder scrambling to get up, using your hands and a little rock climbing. Once through the pass, there are some gorgeous views of the surroundings, so take it in for a moment before beginning your descent! The descent is pretty steep, with some sections of thick scree (fun) and some of light scree (slippery as hell). You’ll descend into the forest and skirt the edge of the valley, walking east. There’s a campground marked on the map here, if you’d prefer to wild camp off the tops, and it seemed like a really nice spot. Continue on from there to eventually start rising again – one more pass! This climb is much less technical and a lot gentler, although the descent on the otherside is again, rough, the shots of the refugio nestled in against another the laguna are very very cool.

    Day 3: (supposedly, 10 hours)

    From here on, we have no personal experience. This section of the track is supposed to be the most difficult and the most poorly marked. As noted, it does seem like the National Park is a bit overkill on what is difficult and what is probably totally doable, but it is still above the bushline so always take care with the weather and ask if there is snow or ice on the trek. We do have some friends who couldn’t attempt this trek because all the passes we snowed out!

    Day 4: Trek to Refugio Lopez

    This day takes you over another pass to Refugio Lopez, but it’s meant to be quite a short day. Enjoy a long rest at the refugio!

    Day 5: Trek out of National Park

    You have a couple of options for this day – the short option, straight down the hill to the road for a couple of hours, or take the scenic route around to the lakefront and end in Bahia Lopez.

    Once you’ve finished your hike, you can take the bus from along RP77 (so if you take the short route, youll need to walk along the road a bit) back into Bariloche, but we’d recommend finding some accomodation along the waterfront and out of Bariloche so you can enjoy some of the day hikes at the end of the peninsula!

    Cerro Llao Llao

    This regional park is the main section of daywalking. There are several tracks that sort of join up, which offer hiking in between some huge & gorgeous pine trees, plus beach access. Visiting Mirador Llao Llao is a must, as the views to the lake are stunning. If you stay back in town, or somewhere along the coast, buses go from Bariloche, along the coastline to near the trailheads. The stops are by a handful of fancy restaurants and hotels, if that’s your post-hike vibe ($$$$).

    Biking Circuito Chico

    An alternative way to reach Cerro Llao Llao, and explore a bit more of this area, is to explore by bike – known at Circuit Chico. This (quite) hilly circuit should take at least a whole day, as it’s not just the riding that you’ll want to do but also the day walks around Cerro Llao Llao and stops to some of the pueblitos on the route, such as the quaint Colonia Suiza. We didn’t end up completing this circuit – although we wanted to – as the bike hire was actually quite expensive, and Awal’s knees were still on the ginger side!

    Nahuel Huapi National Park

    We’ve described one hike in Nahuel Huapi, but this national park encompasses more than just the four refugios trek. Check on the National Park website for all of the refugios, campsites and tracks that you can link up. You could spend days in the park, drifting between refugios and enjoying the outdoors, but as mentioned before, check on conditions in the mountains before you head out, as some of the passes can get gnarly. 

    Check out the official website for a list of hikes, both multi-day and single-day. Note that the park has an entrance fee, though the only place this seems to apply is in the Cerro Tronador area (which does look like a wonderful overnighter!). https://nahuelhuapi.gov.ar/

    Seven Lagunas

    If you’ve got time and, more importantly, a hired car on your hands, there’s more to do around the Argentinian lakes district. We had neither, but we would love to return one day to complete the seven lakes road trip. This driving route runs from Villa La Angostura to San Martin de Los Andes. You can stay in gorgeous little Argentinian villages and drive through spectacular scenery of glossy lakes and mountain peaks. A quick look can be taken in one day, or you could spend a few checking out the route and exploring the little towns and some small hikes.

    Hiking to the South

    With a car, you can also turn to the south of Bariloche – and to more national parks. Alerces is another very Popular park with plenty of hiking options, although with the lack of accessibility it should take you away from the crowds somewhat. Alternatively, you can visit Lago Puelo NP, which is closer.

    Overall, Bariloche itself offers plenty of cool things to do, gorgeous scenery, and yummy snacks (we went to this chocolate shop (https://maps.app.goo.gl/X211zoyUukaqMeLL8), which was a lot cheaper than the ones on the main strip, but the chef was genuine and enthusiastic and the choccy was delicious!!), we would love to return one day and continue exploring the area.

    Keep it Short and Sweet

    • We only did 2 days of this hike as the park closed due to bad weather
    • the bad weather never arrived!!!
    • You need to book spots at the refugios and campsites
    • You can purchase breakfast, lunch and dinner at the refugios
    • Catch bus #55 from Bariloche to the “Cathedral” (ski area) for the start of the hike
    • You will need a Sube card to catch the bus. You only need one per group. You can buy them from a kiosko but get one early as they seemed to be nearly all sold out when we were there!
    • Day 1 and 2 were moderate in difficulty. Day 2 specifically has alot of desending so take care of your knees!
    • Cerro Llao Llao is a beautiful regional park for day hikes
    • You can also do a bike ride along Circuito Chico. We found bike hire to be 35000ARS
    • You can do the seven lagunas- if you have hired a car we strongly recommend this!
    • Delicious chocolate at a reasonable price: https://maps.app.goo.gl/X211zoyUukaqMeLL8
  • Los Glaciares in El Chalten: Patagonia’s Most Famous Hikes & A Moral Conundrum 

    Los Glaciares in El Chalten: Patagonia’s Most Famous Hikes & A Moral Conundrum 

    It’s curious to consider how a region gets famous, and the fine difference between popular and overrated. Is it the difference between online-generated expectations and reality? Is it the crowds of people? Is it the burgeoning prices? Or some perfect, unfortunate combination of the above.

    Parque Nacional Los Glaciares is probably the most heavily visited area of Patagonia, iconic for Petito Moreno Glacier in the south, near El Calafate, and for the Cerro Fitz Roy mastiff in the north, by El Chalten. The accessibility of natural beauty from these two towns is a key reason for their popularity. Petito Moreno is an hour bus ride each way, but only a 30 minute walk to see an advancing glacier. And while trekking to Fitz Roy is a fairly long day (25km return), the trailhead is right in town. These two small Argentine towns have a mountain-village charm that – for us – was somewhat worn down by exorbitant prices. 

    Prior to summer 2024 – 2025, there were no fees to enter Los Glaciares. Prior to January 2025, there were no camping fees in the park, and wild camping was permitted – but all of this changed, quickly, without warning, and without the infrastructure to support the changes. 

    Entry to Los Glaciares now costs 45k ARS per day – although Guardparque Stations only exist on some trailheads, and the Guardparques are only serviced from 7am-5pm, so avoiding the fees is very much doable. A night’s stay at any of the campsites in the park costs 15K ARS per person – with long-drops available, but no campers’ shelter.

    As in our previous budget posts, the high cost of goods is some unlucky combination of Argentina’s changing economy and Patagonia’s isolation, but all prices are also driven by demand, of which there is plenty. Of course, we are complaining as reasonably well-off tourists – so if we found the prices in supermarkets rough, it only stands that the locals have it even harder.

    But while consuming food and booking accommodation supports the local community, it sounds like the changes to the park and park fees themselves are having little impact on the local people or the park maintenance itself. Although, whether that is the truth or a tale designed to make us all feel better, we have no proof.

    We’d say that in general, we’re pretty rules-driven people. We like lines. We think sign-in books are cool. We’re comfortable paying for an honesty campsite. And we both instantly feel guilty when we do something that we know isn’t right – so camping in Los Glaciares was a mixed bag for us. 

    We planned the trip to El Chalten based on information collected from the previous year – which turned out to be wildly wrong. It wasn’t until we had booked flights in and out that we checked again – on reddit – only to find out about all the changes to prices. We were already massively over-budget in Patagonia (a good start to a year travelling!), and couldn’t even remotely afford an extra 60USD each per day. Our only option was to hide out in the park, free camp in secluded places, and enjoy the solitude as much as possible.

    Tell me everything:

    Overall, we spent 11 days in Los Glaciares, with one restock. Five days were on the Huemul, which we’ve detailed in another post, then another 6 in the ‘main’ section of the park.

    Skipping Petito Moreno

    We flew from Ushuaia to El Calafate, as we’d already travelled through Punta Arenas and Puerto Natales, and didn’t need to return (and it ended up cheaper). We decided to only spend a single night in El Calafate, skipping a visit to the Petito Moreno Glacier. If you’ve the cash to burn – don’t do what we did! It does sound spectacular. The walkways are close to the glacier front, so you get stunning views all around. In the afternoon, it’s supposedly common to see the glacier calving, where it sheds chunks of ice. But it’s 45k ARS entry (as part of Los Glaciares), plus 50k ARS for the return bus. That’s about 100USD ea…

    Bus Prices: Calafate to Chalten

    Talking about extortionate – buses in Argentina are far more expensive than those in Chile. The three hour ride between the two mountain towns will set you back 38K ARS per person, each way. Apparently, there is one bus that’s cheaper, but we don’t think it runs often (or at all) anymore.

    Camping at Laguna Sucia

    After the Huemul Circuit, we restocked and reentered the park late, snagging an uninspired camping spot in some trees a couple of hours in. The next day, we continued on with the intention of enjoying Fitz Roy from the neighbouring Laguna Sucia, rather than the main track, and camping there the night – we’d read and heard that there were lots of good campsites on this track. As mentioned, we had snapped a picture of an old park map, which had multiple tracks that are no longer displayed or ‘recommended’. So when we went to turn off onto the Laguna Sucia track, there were a couple of signs telling us to turn back! We ploughed on, crossed the river and did some fun boulder hopping to get to the laguna – which is absolutely worth it. It was super quiet, and the weather was stunning – no wind, no clouds, and only one other person, who wasn’t camping there. We picked a spot with a big rocky barrier someone had kindly built, and settled in for a calm evening.

    Little did we know – although perhaps it should’ve been obvious by the absence of other campers at the laguna – a storm was coming over the mountain. And that’s the problem with camping near such dramatic peaks; the sudden changes they can cause. From 9pm, the wind and rain picked up more, and more, and more, until we were pulling on rainproofs, crawling out of our shaking tent, restaking pegs and tightening guys – and eventually, changing clothes completely, packing up everything non-sleep related, and considering packing down and leaving. But at 3am, the storm eased off a bit (to the point where we didn’t have to hold up the tent’s buckling pole system), and we slept uneasily until sunrise. We snapped a cute photo and enjoyed the morning light on the mountains, slept a few more hours, then made our way down the mountain and away from the horrors of the previous night.

    Camping by Lago Electrico

    We’d wanted to spend two nights at Laguna Sucia recovering from the Huemul, but there was no way we were taking another chance there. Our next goal was Lago Electrico – at the far end of the park, and far away from the big crowds. It also turns out, Lago Electrico is actually private land and isn’t technically part of the park. There’s a shitty little barbed wire fence that has been maneuvered to fit a hiker, but otherwise we were easily able to move between the two without any guard stations.

    From the base of the Fitz Roy trail, we traversed down the true left of the Río Blanco, which enables you to take a side trip to some cool views of Glaciar Piedras Blancas. There’s a bit of rock hopping around this section too, which is fun, but will slow you down a bit. With the pack weight and the tiredness, this actually ended up being a much longer day than we anticipated.

    Río Electrico and the valley run perpendicular to the Cerro Fitz Roy mastiff – that is, it runs in the direction that the storm came the night before. This didn’t become obvious until we exited the cover of the forest, right after the Piedra Del Fraile refugio. Camping at the refugio was available for 20k ARS a night, so we continued on to brave the winds…

    … which did not work out in our favour. It took over an hour to reach the shores of Lago Electrico, where again, we’d read there were good camping spots – all of which were super exposed! There were a few ‘sheltered’ areas amongst the rocks on the way, but the wind simply said no – it must’ve been gusting at well over 100kph, and always found a way to rush around or over the surrounding escarpment. As we retreated back from the beach, we tried to set up in three different spots, quite unsuccessfully, and eventually were forced to run back to the trees, racing a rain front and the dying sunlight, and setting up camp alongside the cliff-face ascending to Piedra Negra. It was cookies and nutella for dinner.

    We spent three nights in the same spot – the next day, the sun shone and the trees gave us shelter, so we spent the whole day lazing around, eating our spare food and enjoying the break. The following day, the rain packed it in again, so we had a slow morning before taking a day-walk back to the shores of Lago Electrico. Emma really wanted to see the marked ‘Playita’ campsite on the map, but the river was impossible to cross without getting boots wet – so in the spirit of taking it easy, we enjoyed the view of the back of Fitz Roy and headed back for an early night.

    Cerro Fitz Roy

    Day 10 in the park – a few hours walking took us from Lago Electrico and back to the big crowds, and it was time to join in – for the most famous peaks in Patagonia. Actually, only Emma ascended to admire Fitz Roy from the traditional spot, and Awal stayed with the packs (a kind gesture, but also driven by being a wee bit hoha). It was a gorgeous day; although the wind was howling the whole time, the clouds would part to expose the peaks. What I found most hilarious was the line of people waiting patiently to stand on ‘the’ rock in the laguna, which provides the best shot of you, the clear blue waters, and the dramatic peaks. Do take care heading up – there is a steady line of people in both directions, and some places are well worn and quite slippery. It’s great fun to race up and down (especially being pack-less after walking 10 days with a pack!), but watch out for the wind in the exposed sections, it will blow you over if you’re moving too fast…

    After snapping a few shitty (hilarious) selfies with ol’ Fitz, we carried on to find a new campsite, again running away from a rainfront, and trying to find a spot nice and close to a trailhead for an early morning exit. We eventually set up near Laguna Capri, and had an early night hiding from the rain.

    Over and Out

    We exited super early the next morning down the main Fitz Roy track, and en route were greeted by dozens and dozens of other early risers! So many people complete this trail, from keenos who want to see the sunrise to trail runners getting their ks up to the majority – who just want to get through before the guard gets onto their shift. Since we’d been off the main tracks in the popular hours, this final part of our hike was the real ‘holy shit’ moment of the density of people walking in Los Glaciares.

    And it was a good thing we left early – we rocked up to the bus stop to check our tickets at about 7:50am, and found out that our midday bus was cancelled and we could only get on the 8am bus! There was a rush to grab some snacks, and then it was a prompt return to El Calafate and the biggest pot of post-hike maccy cheese you’ve ever seen. Delicious!

    Keep it Short and Sweet

    Normal Routes

    So we did a few odd things, and spent a few extra days just chilling out, but in the end didn’t backtrack on ourselves that much. We’ve put a little annotated map below, with a similar circuit and some options for wild camping that we thought might be good. Aside from our recommendation, there are apparently two massive circuits that you can complete – one that links up the Huemul to the main attractions instead of re-entering in the town, although you’ll need to do an extra Tyrolean and hire the harness for your whole trip. There’s also a super hardcore route, which you should only do guided or with expertise, that takes you over the ice sheet itself from Lago Electrico down to midway on the Huemul – it sounds so amazing!

    Our route in Los Glaciares
    Our recommended route in Los Glaciares

    So… Our Recommendation

    In conclusion, we had a superb time enjoying the hiking in Los Glaciares – there are plenty of trails to fit a journey to your liking, and plenty of spots that are less crowded to explore. What we did absolutely not enjoy was the continuous stress. Will someone find us without a ticket? Are we allowed to camp here? Is someone going to fine us? Is any of it worth it? On this trip, we realized the extent to which we are not rulebreakers, and while we loved the walking we were able to do, we aren’t sure that we could stomach doing it again.

    So, a lesson for us and maybe some insight for anyone reading, always stay true to your values, because doing the opposite doesn’t feel good!

  • Essential Guide to Huemul Circuit in El Chalten- 4 day trek

    Essential Guide to Huemul Circuit in El Chalten- 4 day trek

    El Chalten and Parque Nacional Los Glaciares is one of the most popular parts of Patagonia, primarily due to Cerro Fitz Roy and the two neighboring peaks, which create a dramatic backdrop to stunning mountain lagoons. However, it’s not all that the park has to offer, and in our opinion, the centre of the park is Absolutely NOT the highlight. The Huemul Circuit is a 4 day, 65km loop that runs around the southern of Los Glaciares (but still starting from El Chalten, so not that south – it’s a big national park!). It’s technically a very normal hike, with two exceptions – two Tyrolean Traverses, which require you to hire a harness in El Chalten and carry it for the hike. The Tyroleans are so cool, and an awesome experience if you haven’t done it before (like us!). But the true highlight of this track is the Southern Ice Fields. If you’re lucky enough to complete this track with good weather, you’ll come across the first pass with an unbelievable view of the world’s second largest non-polar ice field. If the mouthy title doesn’t impress you, the views absolutely will!

    If you are only here for planning purposes and only want key info about the trek, then please CLICK HERE to take yourself to ‘Keep it Short and Sweet’

    Tell me everything:

    Hiring a Harness:

    A harness, safety rope, a steel carabiner and a aluminum carabiner are all musts. Optionally, you can hire a loop of retrieval rope. We didn’t know much about the traverses before we did them, so we hired this, but it’s absolutely not necessary if you’re completing this loop in the direction we describe. The only reason it can be helpful is if you have a big group and want to pull all the bags over at once (instead of each person clipping on their bag), or if you complete the track clockwise (and you’re in a multiple), because there is only one retrieval rope on the second Tyrolean, and it’s on the wrong bank.

    The cheapest place (Feb 2025) we found was Viento Oeste, at 8k ARS per day for the essentials, and 2k ARS per day for the retrieval rope. The other four shops in town were 10k per day. Viento Oeste was also the only shop that checked we could put the harness on correctly before hiring it out – which made us feel more comfortable!

    Starting Off:

    El Chalten is your start point. From the bus stop, head back south across the bridge to the visitor centre for the trailhead. At the centre, the staff can give you any up to date information on the track, and there’s a form to fill out with your intentions. I don’t think they check it, to be fair, so have your own safety system set up (as always!). 

    At this office, we were lucky enough to snap a photo of an old park map, which marks a number of tracks that new park maps don’t show. It was very helpful once we moved back into the main section of the park!

    More details on the above photo will follow in our Los Glaciores post.

    The track starts behind the office. This is one of the trailheads that was marked by a guardparque toll booth in 2025. Enter after 6pm as required. The track is marked well in places, and can be unclear in others. Make sure you have a GPS or offline maps. The campsites are all free, but there are also no facilities. Always be a good hiker and bury your shit well and away from water sources, and piss somewhere it will get washed away. Be aware there are lots of stinky spots!

    We’re describing the ‘normal’ way to do the track, anti-clockwise, though it is doable clockwise too, we can imagine the ascent up on the 2nd day (3rd in our blog) would be quite rough.

    Day 1: El Chalten to Laguna Toro; 16km; 4 hours

    Day 1 is fine, but our memories are limited as is not hellishly interesting compared to all the other days. We completed it quite late, as we arrived late in El Chalten, and were hustling down the track. The trail starts quite rocky and uphill, but eventually changes to a mix of boggy fields and drier forest. There is a lot of cattle on this section, weirdly enough, but also great views to the north of the iconic tip of Fitz Roy. Eventually, the track descends back down towards Río Túnel, and then alongside it for another hour or so until you reach the (very basic) campsite, sheltering In some trees. We actually started so late we didn’t make it to the campsite, just found a flat spot near the Río Túnel.

    Day 2: Laguna Toro to Paso del Viento Camp; 16km; 5 – 7 hours

    From the campsite, start weaving your way around the rocky formations on the true left of the river. The track can be a little unclear at times, so check for cairns, but you’ll know you’re in the right place in about 30 minutes, when you reach your first Tyrolean Traverse! This Tyrolean runs over a ravine that the water has carved – there isn’t an alternative crossing place. The traverse is short and a bit steep, so definitely keep your bag off your back, and clipped in by your feet. ALWAYS remember: steel-on-steel. Make sure your harness isnt twisted. Take your time! Safety is more important than someone else’s impatience. There are plenty of videos out there, either keep one downloaded or screen-record if this is your first time to make sure you’re comfortable with the process.

    Awal did the traverse with his backpack on his back and he would not recommend this! Your back pulls you down and you cannot stay upright as you’re attempting to pull yourself uphill. DONT MAKE THE SAME MISTAKE I DID! Take your backpack off and clip it too the steel carabiner aswell.

    We were lucky to reach this Tyrolean first, so we could get comfortable with the gear and set up. As we said, it’s short but quite steep, so it can be a bit rough on the forearms. The dismount is also a bit hectic, because the rock face is fairly steep, so again take your time here! 

    Once over the ravine, and the adrenaline rush wears off, continue along the true right of the river along the rocks. This wends around a bit until you come to your next challenge – walking on or next to a glacier!

    It’s important to be careful here, as the moraines are unstable and the glacier, well, is icy. We found there was a well travelled path on the moraine, that wasn’t too slippery, so we followed that along the edge of the glacier, and just jumped on for a walk on it at the end. Poles definitely help with the slipperiness. There were lots of crevasses on the glacier that we could see, even right next to the moraine, so we kept off it until right at the end.

    Once youve had your fun on the ice, the track begins to ascend steeply, providing awesome views of the glacier below. Continue climbing for views over the glacier, which is broken up into two pieces now (or maybe it splits into two? Either way, it looks amazing!). The climb continues for an hour or so until you come to the top of the saddle.

    Now, if you’re lucky with the weather, this is the real extraordinary part, with the Southern Ice Field opening up below you. The views descending the pass into the valley below are the best you’ll get – we advise stopping and taking your fill of the view here and now.

    When we completed the O Trek, one of the rangers told us that as we ascended the John Gardener pass, if we were lucky we’d be able to see up the glacier to the Southern Ice Fields – and we were not lucky, so seeing it this time was so spectacular. 

    The main campsite descends to the left of the pass, and is only another hour’s walk. It sits next to a little lagoon and at this one, there is a tiny little campers’ shelter – which smelled like piss. There are several camping boundaries set up with rocks, and there’s not a lot of privacy. Being people who don’t love that vibe, we managed to find a little flat spot up in the rocks above the campsite (beyond the ‘toilet’ section – watch your step).

    Before that though – if you have terrific weather and time to spare, we recommend heading down to the right and camping at Laguna Ferrari for an extra night, which is a brilliant blue and is close to a series of moraines that overlook the ice sheet and give brilliant views. Obviously, being close to so much ice means it is quite cold, so wrap up tight overnight! It’s only an hour between the two campsites.

    Day 3: Paso Del Viento Camp to Bahia de los Tempanos; 14km; 5-7 hours

    As above, this was our day 4, but we’ll keep the numbers as is. The day starts with some easy, flat walking parallel to the ice sheet, between rocky moraines and stream ridden grassy fields. Eventually, the trail starts turning to the east, and you’ll start catching views of the Glaciar Viedma, which splits off the ice sheet. There’s a particularly nice view, and a good spot to take a break, just before the track begins to narrow and follow a sheer wall on the left, and a solid drop on the right. This is also where, for us, the famous Patagonian winds began to really pick up. The ascent up the pass is very steep, but not too technically difficult, and we did it with the wind blowing into our backs, making us trip up into the hill, but there were times where standing was nigh impossible!

    There’s a slight reprieve of a bowl at the top of this section, though the real ‘peak’ of the pass is up to the left a bit further. We took a right turn here before checking the GPS, and had to backtrack (big regrets in the wind). The track descends through scrubby legua forest – we assume the roots keep erosion to a minimum, but they make for some leg raises as you’re walking! The real rough bit comes on a very steep, eroded section a little way down. There are some ropes to help (it’s basically on sand covered rocks, but at about 45° – hell), but we both spent most of it sliding down and not really walking. The descent overall is quite long, so take care on your knees.

    Eventually the track flattens out though. Take care, as you’re again in a section with lots of cattle, and misleading tracks. The campsite is only about 30 minutes walking more, where the final stretch descends to Bahía Tempanos of Lago Viedma, sheltered by the trees. There a lotsssss of rats at this campsite, so keep your food triple bagged and out of your tent. We think there’s an alternative campsite another 30-60 minutes along the trail, but we didn’t check it out. The beach is rocky and slippery, and with the wind can be quite rough, so take care if you swim (but it’s so worth it).

    Day 4: Bahia de los Tempanos to El Chalten; 16km; 5-7 hours

    As mentioned, take care with the cattle trails compared to the track. GPS can be helpful in this section to keep you confident. Also note that when we completed this section, we had to do a small stream crossing about an hour in. It’s a couple of hours trekking through grassy countryside until you reach the second Tyrolean. 

    As mentioned, this Tyrolean only has one retrieval rope, but you should be on the correct side. Just make sure you don’t forget anything on the pulley (or let go of the pulley too early… maybe before you’ve attached your harness for your trekking partner… just a thought). This one is also quite long! So be prepared for a workout, and possibly wear gloves to help with the rope chafing.

    From here, it’s pretty flat walking out of the park. If youre lucky, or organised, you can plan a ride to picn you up another 30 minutes along the track. If youre not so organised, or cant afford the taxi, its another hour and a bit to the road, which at this point, is really just a slog. But you’ll get there eventually, joining up to the road, and a beer and a bed.

    Keep it Short and Sweet

    Track Type: Circuit

    Distance: 65km

    Elevation: 2500 meters gained

    Days: 4

    Park Entry Cost: 45k ARS (the guards leave after 6pm)

    Camping Cost: Free. No facilities at campsites.

    GPS needed in sections, in general the track is easy to find.

    Cattle tracks can be misleading. 

    The cheapest place to hire a harness is from Viento Oeste, at 8k ARS per day for the essentials, and 2k ARS per day for the retrieval rope.

    Day 1: El Chalten to Laguna Toro; 16km; 4 hours

    Cruisy day

    Day 2: Laguna Toro to Paso del Viento Camp; 16km; 5 – 7 hours

    First tyrolean traverse, glacier walking

    Day 3: Paso Del Viento Camp to Bahia de los Tempanos; 14km; 5-7 hours

    Walk up a pass with a sketchy downhill

    Day 4: Bahia de los Tempanos to El Chalten; 16km; 5-7 hours

    Bit of a slog and final Tyrolean traverse

  • Exploring The End of the World: Puerto Williams & Ushuaia

    Exploring The End of the World: Puerto Williams & Ushuaia

    Keep it Short and Sweet

    Puerto Williams:

    • Awesome 5 day trek- De Dientes De Navarino; to be some of the most southern people in the world
    • Chill and relax, very cosy and comfortable vibe

    Ushuaia:

    • The boat fromj Puerto Williams to Ushuaia costs $160USD per person. Pay at the only tour agency in Puerto Williams (Turismo Shila) in Chilean Pesos so you aren’t disadvangted by the Argentinean Peso exchange rate!
    • Day hike to Laguna Esmeralda and if your up for it, continuing further to Glacier Albino del Ojos
    • If you got the $$$ bills, take a tour to Antartica. If the tour leaves tomorrow, make sure you bargain because you can get a massive discount (We heard from other travelers who were offered $5000USD compared to the usual $10,000 USD)
    • Take a boat tour to see penguins.
    • High end cafes and shopping
    • Pretty expensive overall

    Tell me Everything

    Puerto Williams

    Reaching the end of the world – except Antarctica – is a pretty exciting feeling. We flew from Punta Natales to Puerto Williams, officially the southernmost city in the world. Hilarious fact: this is a reasonably new title, as Chile only recently changed their municipal definitions to include the tiny population of 2000 to be defined as a city. Puerto Williams pushes boundaries in that sense and no other. It is a quiet, sleepy coastal town, boasting a single tourism agency. It’s vibe is “end of the world”, but in the sense that it’s the end and nobody goes there. It is honestly,  completely lovely. Not that there is anything to do; our opinion is probably skewed by our choice of accomodation – a cottage that we found on Airbnb, tucked into the forest, away from the township with chooks, a garden and a wood-burning stove. We picked it because it was only 5 minutes away from the the start of the Dientes de Navarino, the southernmost hike in the world & the reason we visited Puerto Williams. However, it turned out to be the best choice, and the peaceful setting gave us the utmost sensation of being at the end of the world.

    This is our recommendation for Puerto Williams, if you aren’t (or can’t be arsed) hiking. Enjoy the peace. Unless you’re made of money and can head to Antarctica, this is the time to appreciate the fact that you’re one of the southernmost people in the world!

    Ushuaia

    Now, while Puerto Williams gives you the sensations of isolation and tranquility at the end of the world, you will find neither at the original Fin Del Mundo. Ushuaia feels like a city, and has the price tag to match. Picture this: two silly kiwis enter Argentina at its most isolated town, at the country’s most expensive point in history. That makes two hungry, hungry kiwis. To be fair, the “ferry” crossing from Chile to Argentina costing 160USD ea should have given it away. “Ferry” = 60 mins of driving along the coast of the Chilean side to reach the narrowest point of the Beagle Channel, then 30 mins on a speedboat to reach Argentina. 

    There are many more activities in Ushuaia, but all of them have a hefty price tag. 

    Channel cruises to see seals, penguins, and a few random attractions (lighthouse, anyone?) can be taken on big catamarans, or you can take a smaller boat for a higher price. We opted for the latter, and got to see some penguins up pretty close, but we would say it wasn’t worth it for the cost. There are better, cheaper places to see penguins, and the breeds aren’t endemic to the Beagle Channel. The channel itself has some interesting history – we enjoyed some explanations of the local indigenous population and

    As with all the national parks in Argentina, Tierra Del Fuego is now a pay-to-enter model. There’s a single shuttle group which has a monopoly of price, so you’ll be paying around 50k ARS to enter the park. There are options for camping, with a multi day circuit available. For reference – kiwis should be thinking “west coast”, aussies should be thinking “tassie”. It rains a lot in this region, so be prepared for some very boggy group and knee high mud patches. With a big price tag and tough conditions, we avoided!

    There are a few other day hiking options around Ushuaia which are not national parks. Absolutely our favourite was Laguna Esmeralda and Glaciar Albino del Ojos. This was also a shuttle ride away, so they took a fair bit of money off us for a very short ride – but we spent the whole day out, enjoying the track. This is an out and back – Laguna Esmeralda is an easy walk, well graded and well marked. It’s worth it and gorgeous. However, if you’ve got a good pair of boots and are feeling strong and fresh, we highly recommend continuing onto the glacier. The track is not well graded, it’s big rocks and some scree, which eventually turns into some rock climbing. It’s technically a little challenging and so – to us – super fun! As long as you have good weather, good boots and experience using them, there is no need for a guide. The glacier at the top has receded a fair bit but is still very cool to look at, and a great reward. We saw some people hanging our right under its shadow (but always take care doing this – glaciers can calve at any time!). We spent so long enjoying the views and chatting that we had to run back to our shuttle – worth it, though. 

    Glacier Albino del Ojos

    There are also some options for short hikes closer to Ushuaia. We climbed around the old ski lift, which is near the entrance to the Martial Glaciar track, for some great views and generally nice walking. We think we read you can get to the Martial Glacier yourself, although there are lots of (expensive) tours if you want to do it guided. Wandering around the wetlands and along the promenade is also pleasant, although the wind can really chill you, and watch out for the seagulls! They’re super aggressive. 

    Other than that – being a city, Ushuaia has plenty of cafes, restaurants and cute nooks that you can sit and have a bevvy and a treat. It’s also got at least three supermarkets (Emma’s dream), which gives you plenty of options to cook at home if you’re on a budget like us. It’s definitely a different “end of the world” vibe – think ‘Fin del Mundo’ plastered on shopfronts, the world’s southernmost mall, European and American outdoor brands in stores, flash coffee places. It’s a place made for money, especially with the Argentinian currency as it is, but there is still a place for a backpacker if you’re willing to skimp a little!

  • Patagonia Travel Costs and Itinerary: What You Need to Know

    Patagonia Travel Costs and Itinerary: What You Need to Know

    Logistically, this part of our journey was not well planned. As Worldwide Walkies, you can guess why we were in Chile in the first place – for Patagonia, and its wealth of trekking destinations. We wanted to do the whole honky – south as south goes, the big treks with big names, and anything we could fit in between. We knew it would be expensive – but just how expensive? We didn’t get to that level of detail, and we ended up with a number of shocks to our system (and the budget spreadsheet)!

    You can definitely complete Patagonia on the cheap, don’t get us wrong. There are always options to cook in your hostel, to avoid the expensive tours, or to walk everywhere you conceivably can. However, there are three things which really contribute to a full ‘Patagonia Tour’ being very expensive, despite being in countries which are traditionally considered cheap.

    Distances, Weather and Isolation

    The Patagonia region is nearly 2 million km^2 of the world’s southernmost countries. Most of the places that offer the best hiking (and therefore receive all the tourism) are along the spine of the Andes, which are a substantial roadblock in any easy travel. The western side is peppered with fjords and mountains that are beautiful but basically uninhabitable. Most of the civilisation on the Chilean side lies along a single, dead-end road which traverses 1240km of Chilean Patagonia from Puerto Montt to Villa O’Higgins. This is the Carretera Austral. There are a few crossover points from the Carretera Austral into Argentina, but it is an extremely isolated route – and half of it isn’t even paved!

    The eastern side of the Andes slowly flattens out into an arid plain that alpine grass and nothing else grows on. Roads (and ferries) do connect the southernmost point of Argentinian Patagonia to the northernmost, but the next consideration is the weather. Ruta 40 runs adjacent to the Andes and connects up the popular tourist towns of El Calafate and Bariloche, but the road is not passable in the winter, and can be questionable in the shoulder seasons. For the perspective of our kiwi readers: Stewart Island ends at about halfway down the Carretera Austral, and it’s another 900km South to Puerto Williams. That’s pretty far south.

    So we have – towns that are connected by one road; roads that close in the wintertime; sub-Antarctic weather patterns all year around – which all in all, smells like true isolation. That’s part of the beauty of Patagonia – a real sense of being far, far away from anything else. Sure, there is still normal infrastructure in the towns, but just out of them, you can get a sense for how wild the countryside really is. That beauty just comes at a cost – and the costs are your groceries, which can be up to double the price that you’ll find in the northern regions of both Chile & Argentina.

    National Park and Camping Fees

    In Aotearoa, you pay for huts and the occasional campsite – and nothing else. Paying to enter a national park is a concept that was entirely foreign to us, although we have since heard it is common in many parts of the world. It seems like every National Park across Chile & Argentina have fees to enter, ranging from 10USD to 50USD – and it varies to pay by entry, and to pay by day. What really caught us out is that the fees in Argentina were introduced at the start of the 2024-2025 summer season and without warning – so just before we started travelling, but well after we’d done all of our research. For this very reason, we did not visit Tierra del Fuego National Park in Ushuaia.

    Camping in Patagonia is also not always cheap. We paid, at maximum, 40USD per night per person in the O-Circuit in Chile – sure, this was in a campground with running water and hot showers, which was a pleasant surprise, but still a hell of a price to sleep in your own tent! In Los Glaciares in Argentina, campgrounds wanted to charge 15USD per night plus $45USD per day to enter, with the absolute bare minimum of facilities (long drop & no campers shelter). It seems crazy to us that we could be so self-sufficient and still be charged so much money!

    The Cheap Countries are No Longer Cheap

    Chile’s economy has been stable and strong for some time, so prices steadily increase over time as tourism and infrastructure develop. To be honest, the work of CONAF in a place like Torres del Paine felt genuine and really positive; despite the heinous amounts of tourists, we thought that the rangers were honest hard-workers who care about the diversity and conservation efforts in the park.

    The major spanner in the works is Argentina. In 2022, people were travelling to Argentina and living like Kings and Queens. Argentina was renowned for its “Blue Dollar Rate” – an unofficial exchange rate (although, sanctioned by Western Union) of USD into ARG which could (at one point) double your pretty money. In 2024, inflation was 200% – the stability of the dollar compared to the chaos of the peso drove the blue dollar rate. However, the more recent political party has stabilised the inflating economy, which has resulted in the Blue Dollar Rate closing into the official rate – using Western Union still gives a better rate than the official, but only by about 10%. It also means that the cost of goods has increased dramatically, all over Argentina but felt even more strongly in Patagonia, where as above, distance and isolation further drives up the costs of goods. Talking to Argentinians living in Patagonia was rough – the wages of the local people haven’t increased with the record inflation, so the cost of living for the locals is sky-high.

    Tell me everything:

    What we did:

    As per our previous blog posts, before descending into Patagonia we thought we would take a break and enjoy the north of Chile. This meant we’d been through Santiago de Chile, Pucon, Valdivia, visited Chiloe before flying out of Puerto Montt. If we hadn’t had the O-Circuit booked in our third week of travel, or maybe if we’d just thought a little harder, we would’ve decided to do a more efficient South > North route (or vice versa). 

    Our route, briefly, was as so – including the key trekking points:

    Puerto Montt > Puerto Natales (plane) – Torres del Paine NP & the O-Circuit

    Puerto Natales > Punta Arenas (bus)

    Punta Arenas > Puerto Williams (plane) – the Dientes de Navarino

    Puerto Williams > Ushuaia (ferry) – Tierra del Fuego NP & other hiking in the surrounds

    Ushuaia > El Calafate (plane) – Perito Moreno Glacier in theory, but it was too expensive for us

    El Calafate > El Chalten (bus, return) – Los Glaciares NP

    El Chalten > Bariloche (plane) – Nahuel Huapei NP & other hiking in surrounds

    Bariloche > Puerto Varas (bus) – to collect our gear!

    That’s four flights, and a whole lot of doubling back and forth on ourselves. Looking at how to travel through Patagonia is confusing – there are buses, but some aren’t direct, or your sequence of stops is important to ensure you can bus from place to place. To top that off, some of the buses (looking @ El Calafate > Bariloche) can be far more expensive than flying – we booked our plane ticket 4 weeks in advance and saved around 100USD (with checked baggage!).

    One thing that we do regret is flying from Punta Arenas to Puerto Williams. Apparently, the ferry is beautiful – 30 hours on a boat, but you’ll sail through the fjords of Patagonia, seeing wildlife and glaciers for the whole time. Apparently it is also very common to get all the seasons in one day 🙂 So if you’re travelling and you’ve got the time, we would definitely advise the ferry over the plane. For us, the decision was made because flight was slightly cheaper, but we definitely think that the ferry sounded worth it.

    In hindsight, we have two routes we’d advise depending on whether you start in Argentina or Chile, minimising your time on the bus or the need to catch so many flights!

    From Argentina:

    Buenos Aires > Ushuaia (plane)

    Ushuaia > Puerto Williams (ferry)

    Puerto Williams > Punta Arenas (ferry)

    Punta Arenas > Puerto Natales (bus) 

    Puerto Natales > El Calafate (bus)

    El Calafate > El Chalten (bus, return)

    El Calafate > Bariloche (bus)

    From Chile:

    Santiago > Punta Arenas (plane)

    Punta Arenas > Puerto Williams (ferry)

    Puerto Williams > Ushuaia (ferry)

    Ushuaia > Punta Arenas (bus, which will get on a ferry!)

    Punta Arenas > Puerto Natales (bus) 

    Puerto Natales > El Calafate (bus)

    El Calafate > El Chalten (bus, return)

    El Calafate > Bariloche (bus)

    ArgentinaChile
    Buenos Aires > Ushuaia (plane)Santiago > Punta Arenas (plane)
    Ushuaia > Puerto Williams (ferry)Punta Arenas > Puerto Williams (ferry)
    Puerto Williams > Punta Arenas (ferry)Puerto Williams > Ushuaia (ferry)
    Punta Arenas > Puerto Natales (bus)Ushuaia > Punta Arenas (bus, which will get on a ferry!)
    Puerto Natales > El Calafate (bus)Punta Arenas > Puerto Natales (bus)
    El Calafate > El Chalten (bus, return)Puerto Natales > El Calafate (bus)
    El Calafate > Bariloche (bus)El Calafate > El Chalten (bus, return)
    El Calafate > Bariloche (bus)

    And if you want to do everything at once – instead of returning to El Calafate and continuing onto Bariloche, you can cross back into Chile from El Calafate and hitch-hike or bus up the Carretera Austral! Buses are available in some sections, but we’ve heard that in particular the southern section is very quiet, so you’ll need to be happy to chill out and spend some time waiting for a mate:

    El Chalten > Villa O’Higgins (bus, ferry, hike/bike – this crossing sounds awesome, albeit a little complex. There are pletny of blogs out there with detailed descriptions, and we met lots of people who did it, it sounds amazing!)

    Villa O’Higgins > Puerto Montt (hitch, bus)

    Puerto Montt > Puerto Varas (bus)

    We believe that both Puerto Varas and Bariloche are worthwhile destinations, of the lake districts of Chile and Argentina. There’s a lot to do in the Lakes Districts of both countries – we’ll cover the details (and the details of each of the different locations) in different posts!

    Also just a random aside – the Andes are renowned for being high altitude – the highest capital, the highest lake, etc. However, the Andes in Patagonia are not high altitude. The maximum point above sea level would only be around 2000m. That doesn’t mean you don’t do lots of elevation when you’re hiking – just that your starting elevation won’t be adding in an extra factor of difficulty!